Electronics Lab Bench Setup Guide
I have set up an electronics lab bench for all my hobby and product development projects. In this article, I will dive deep into every part of the setup and guide you through the structure, organization, tools and parts. The idea is that with this guide, my bench can be replicated with the same functionality in minimal time.
Note that my bench is mixture of hobby grade and profession grade tools. I have made judicious choices based on my requirements, usage and the type of projects I am working on. These choices have evolved and refined over time as I have gained experience, financial stability and moved up to more complex projects. This guide is a snapshot in time of what my bench currently looks like and it will surely continue to evolve. Your needs and preferences might differ and you should do your research to make the best decision for your our setup.
With that out of the way, lets get into it. Feel free to look through the contents and navigate to sections you are interested in.
Note: I earn a small commission on Amazon purchases made through this post. But rest assured, my recommendations are not influenced by that at all. Any revenue will most likely go straight back into buying some more tools or supplies.
Background
Since a very young age, I have been curious about how things work. Thanks to my dad, my curiosity was satiated with an ample supply of tools and knowledge. In 6th grade, I got my first experience with a soldering iron and it all took off from there. Very quickly, I set up a work bench to do my projects on. Over the years, the working setup improved, moved and evolved.
The electronics lab bench has been optimized over the years and redesigned to fit in a smaller space. Its very functional, customized and economical. I use high quality tools but only where it makes sense. Most of the products I use, I have used for a while and have tested other cheaper alternatives, only to land on the current one. Some, I am still figuring out the best version of.

Contents
- Bench Setup
- Organization
- Test Equipment
- Prototyping Supplies
- Soldering Tools
- Hand Tools
- Consumables
- Parts
- Computer Workstation
- 3D Printer
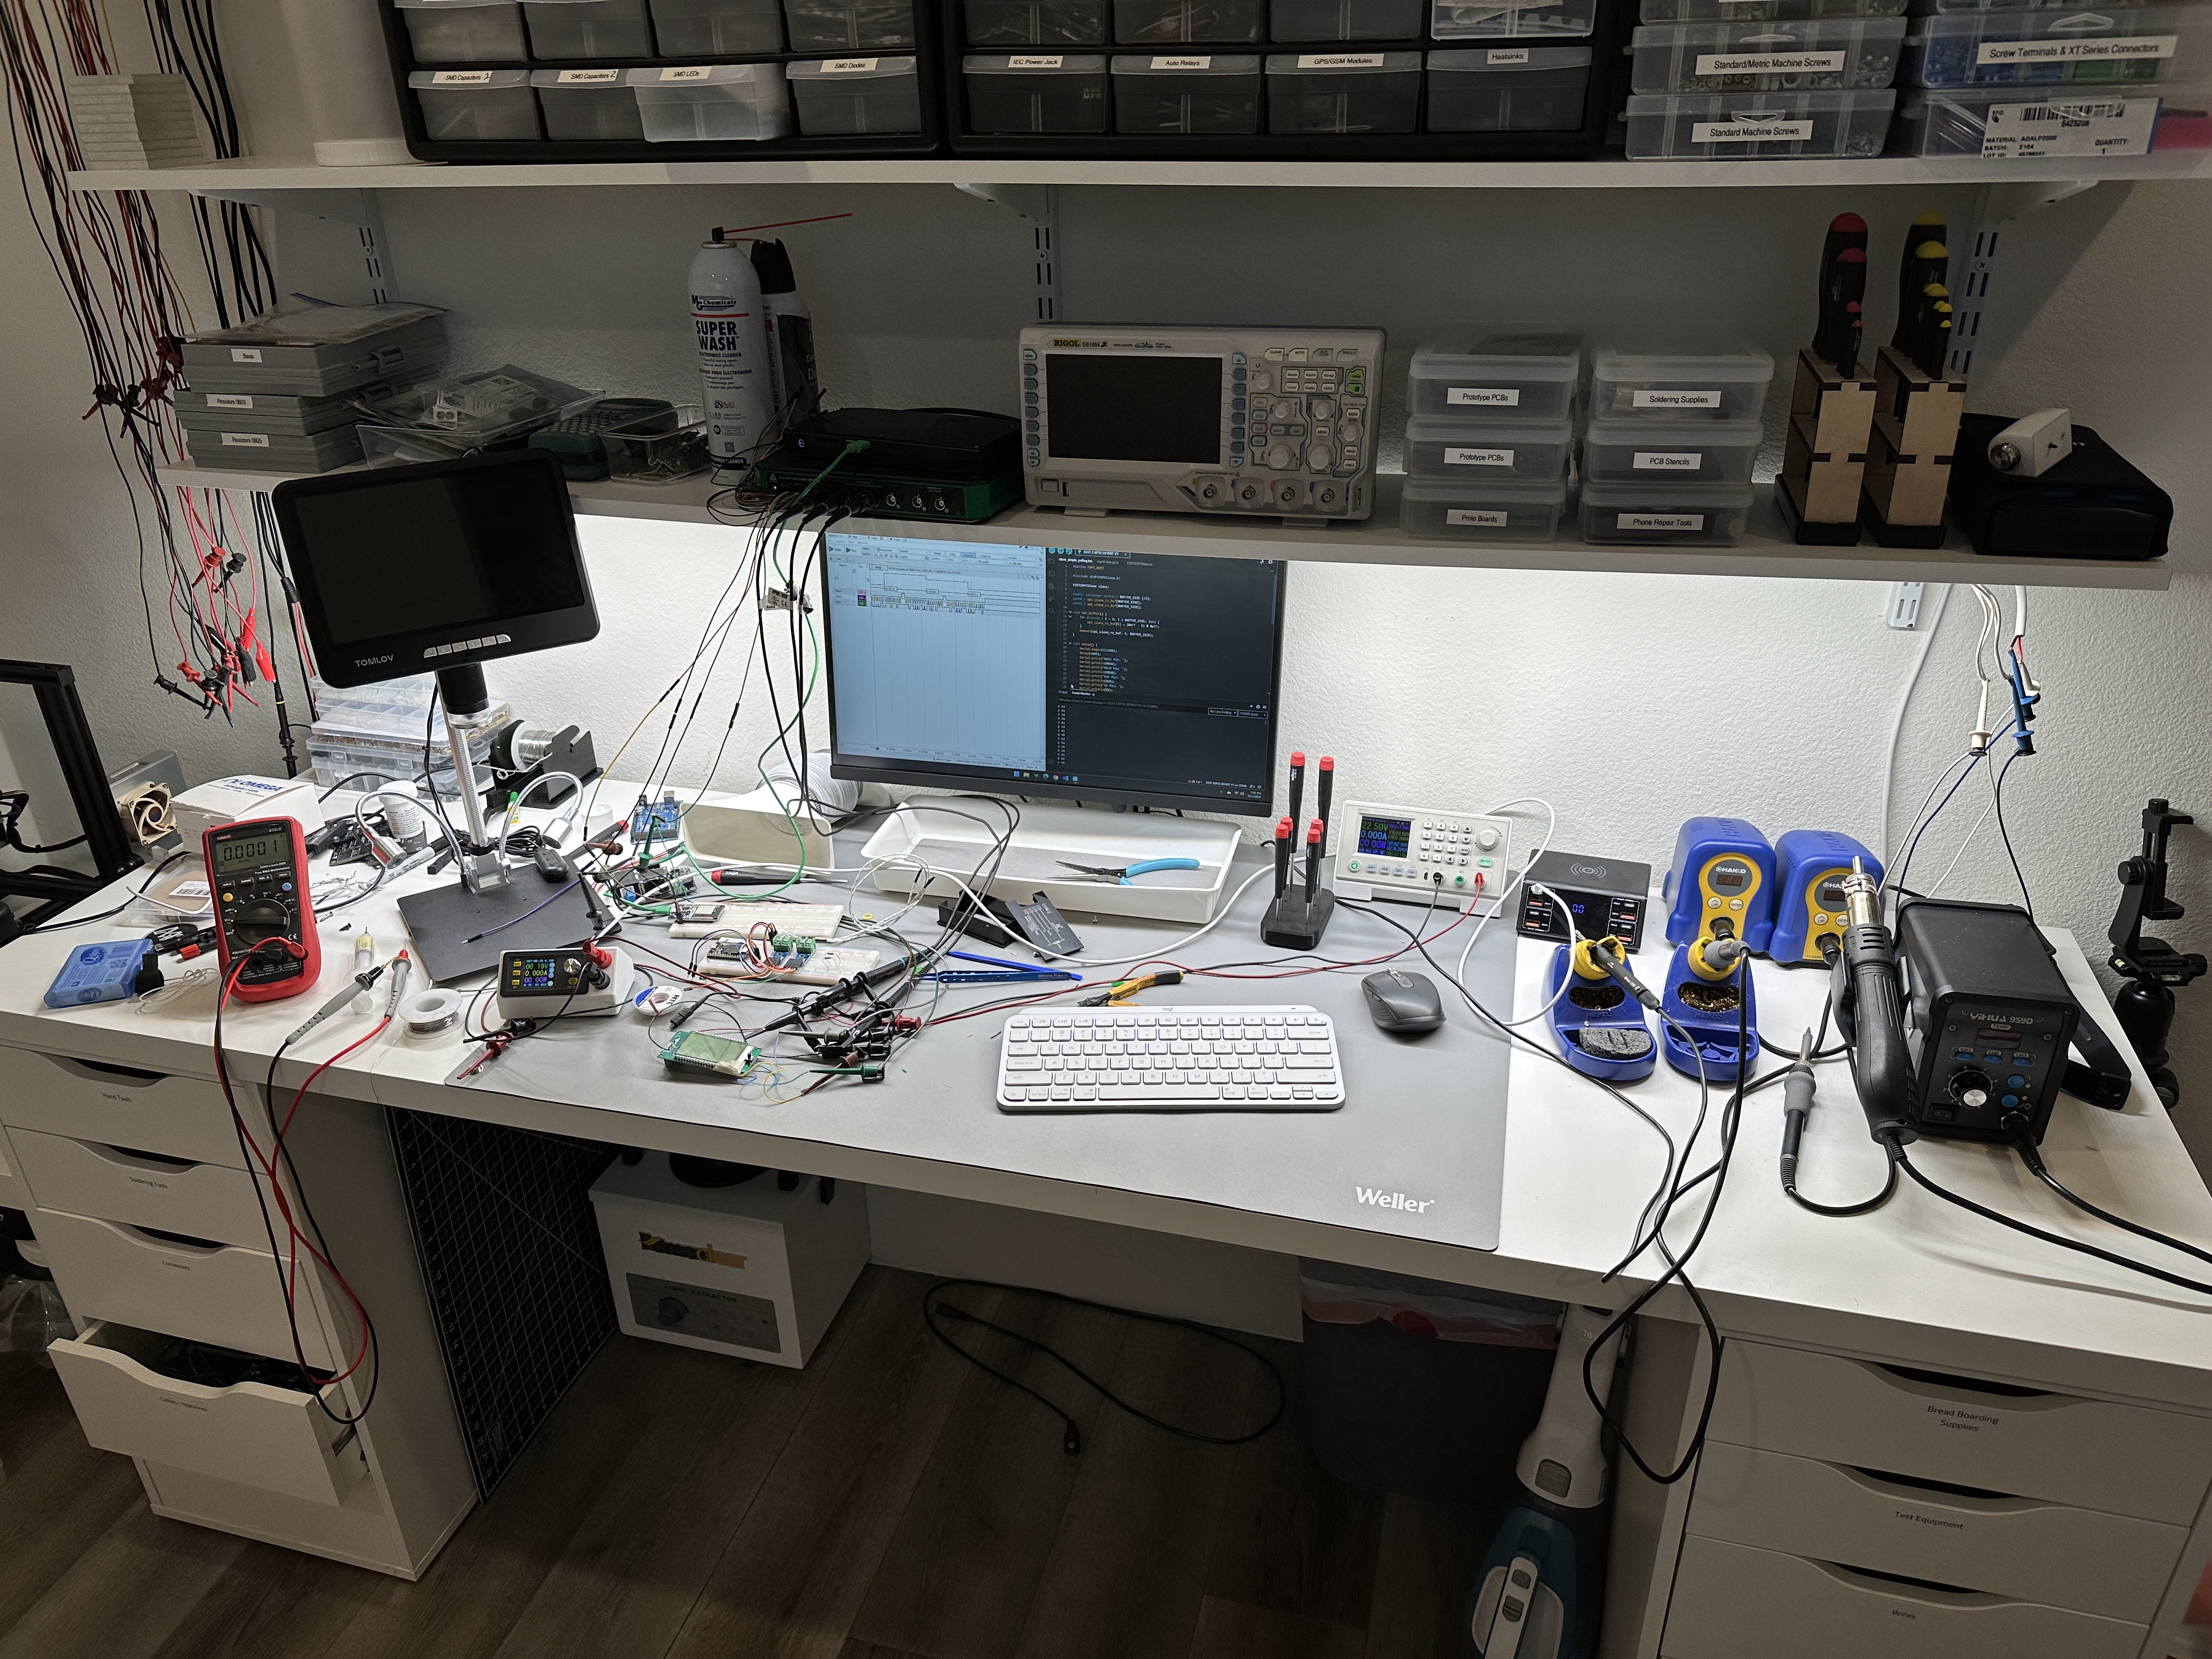
Bench Setup
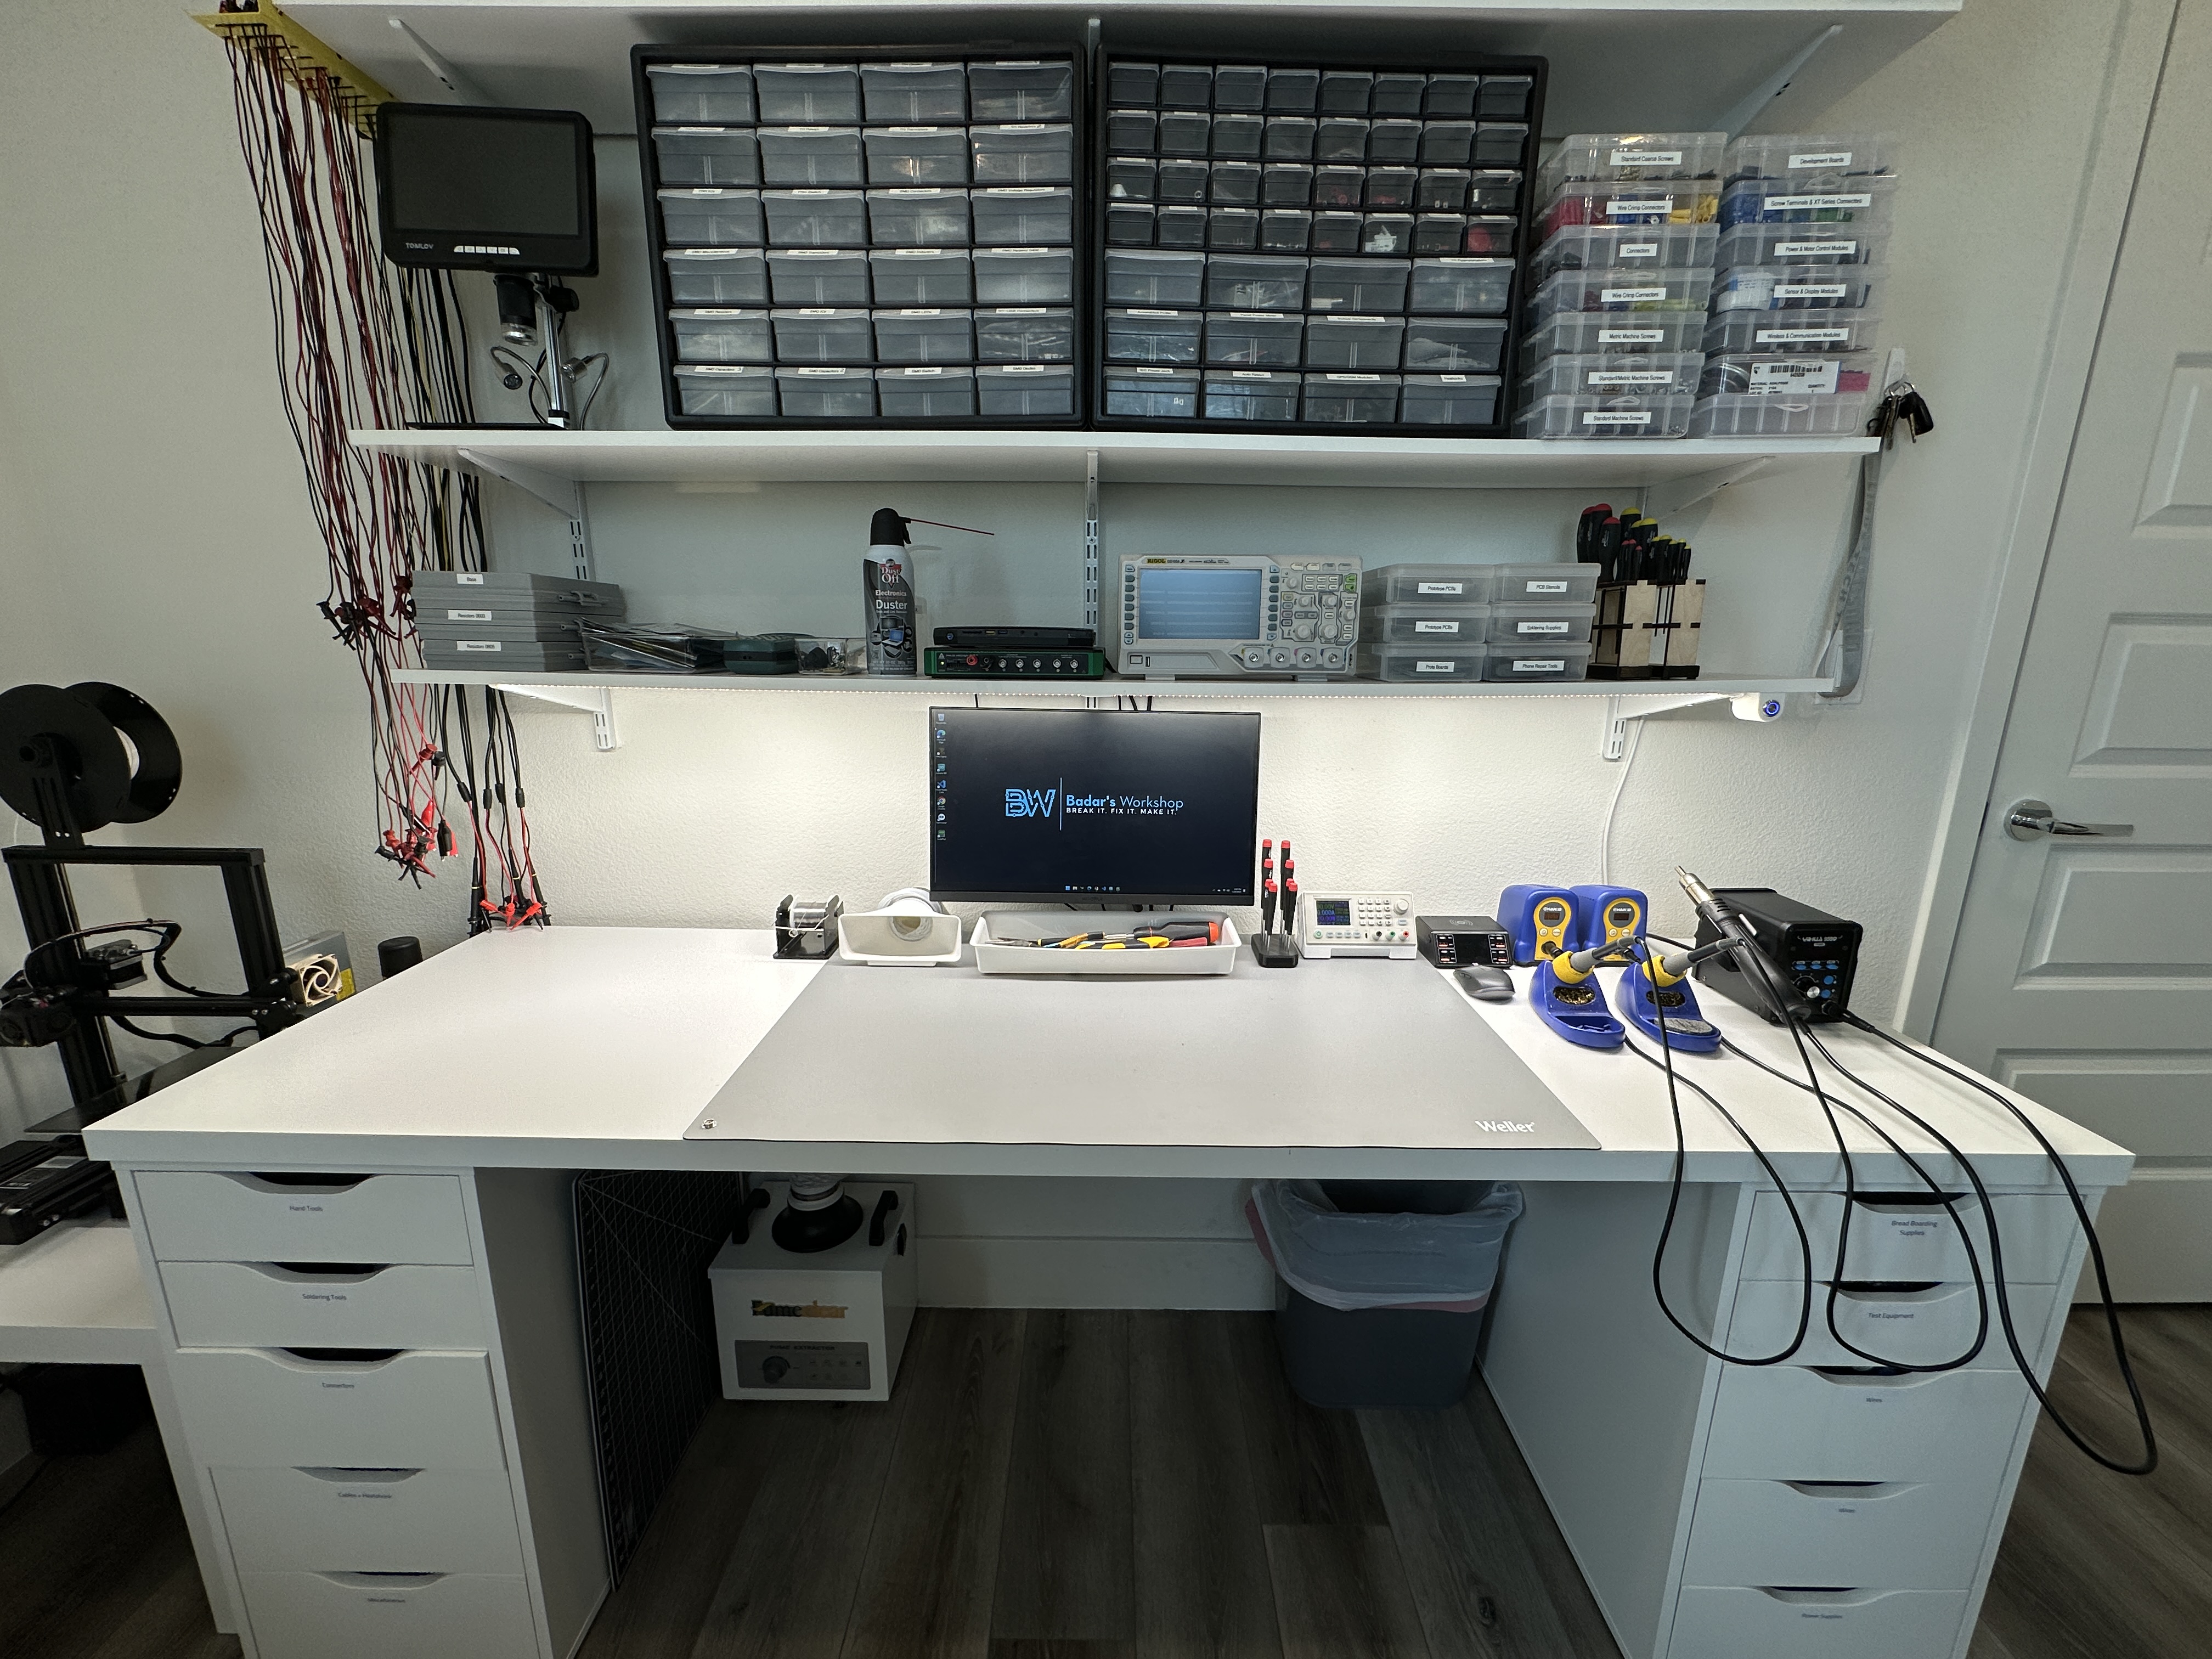
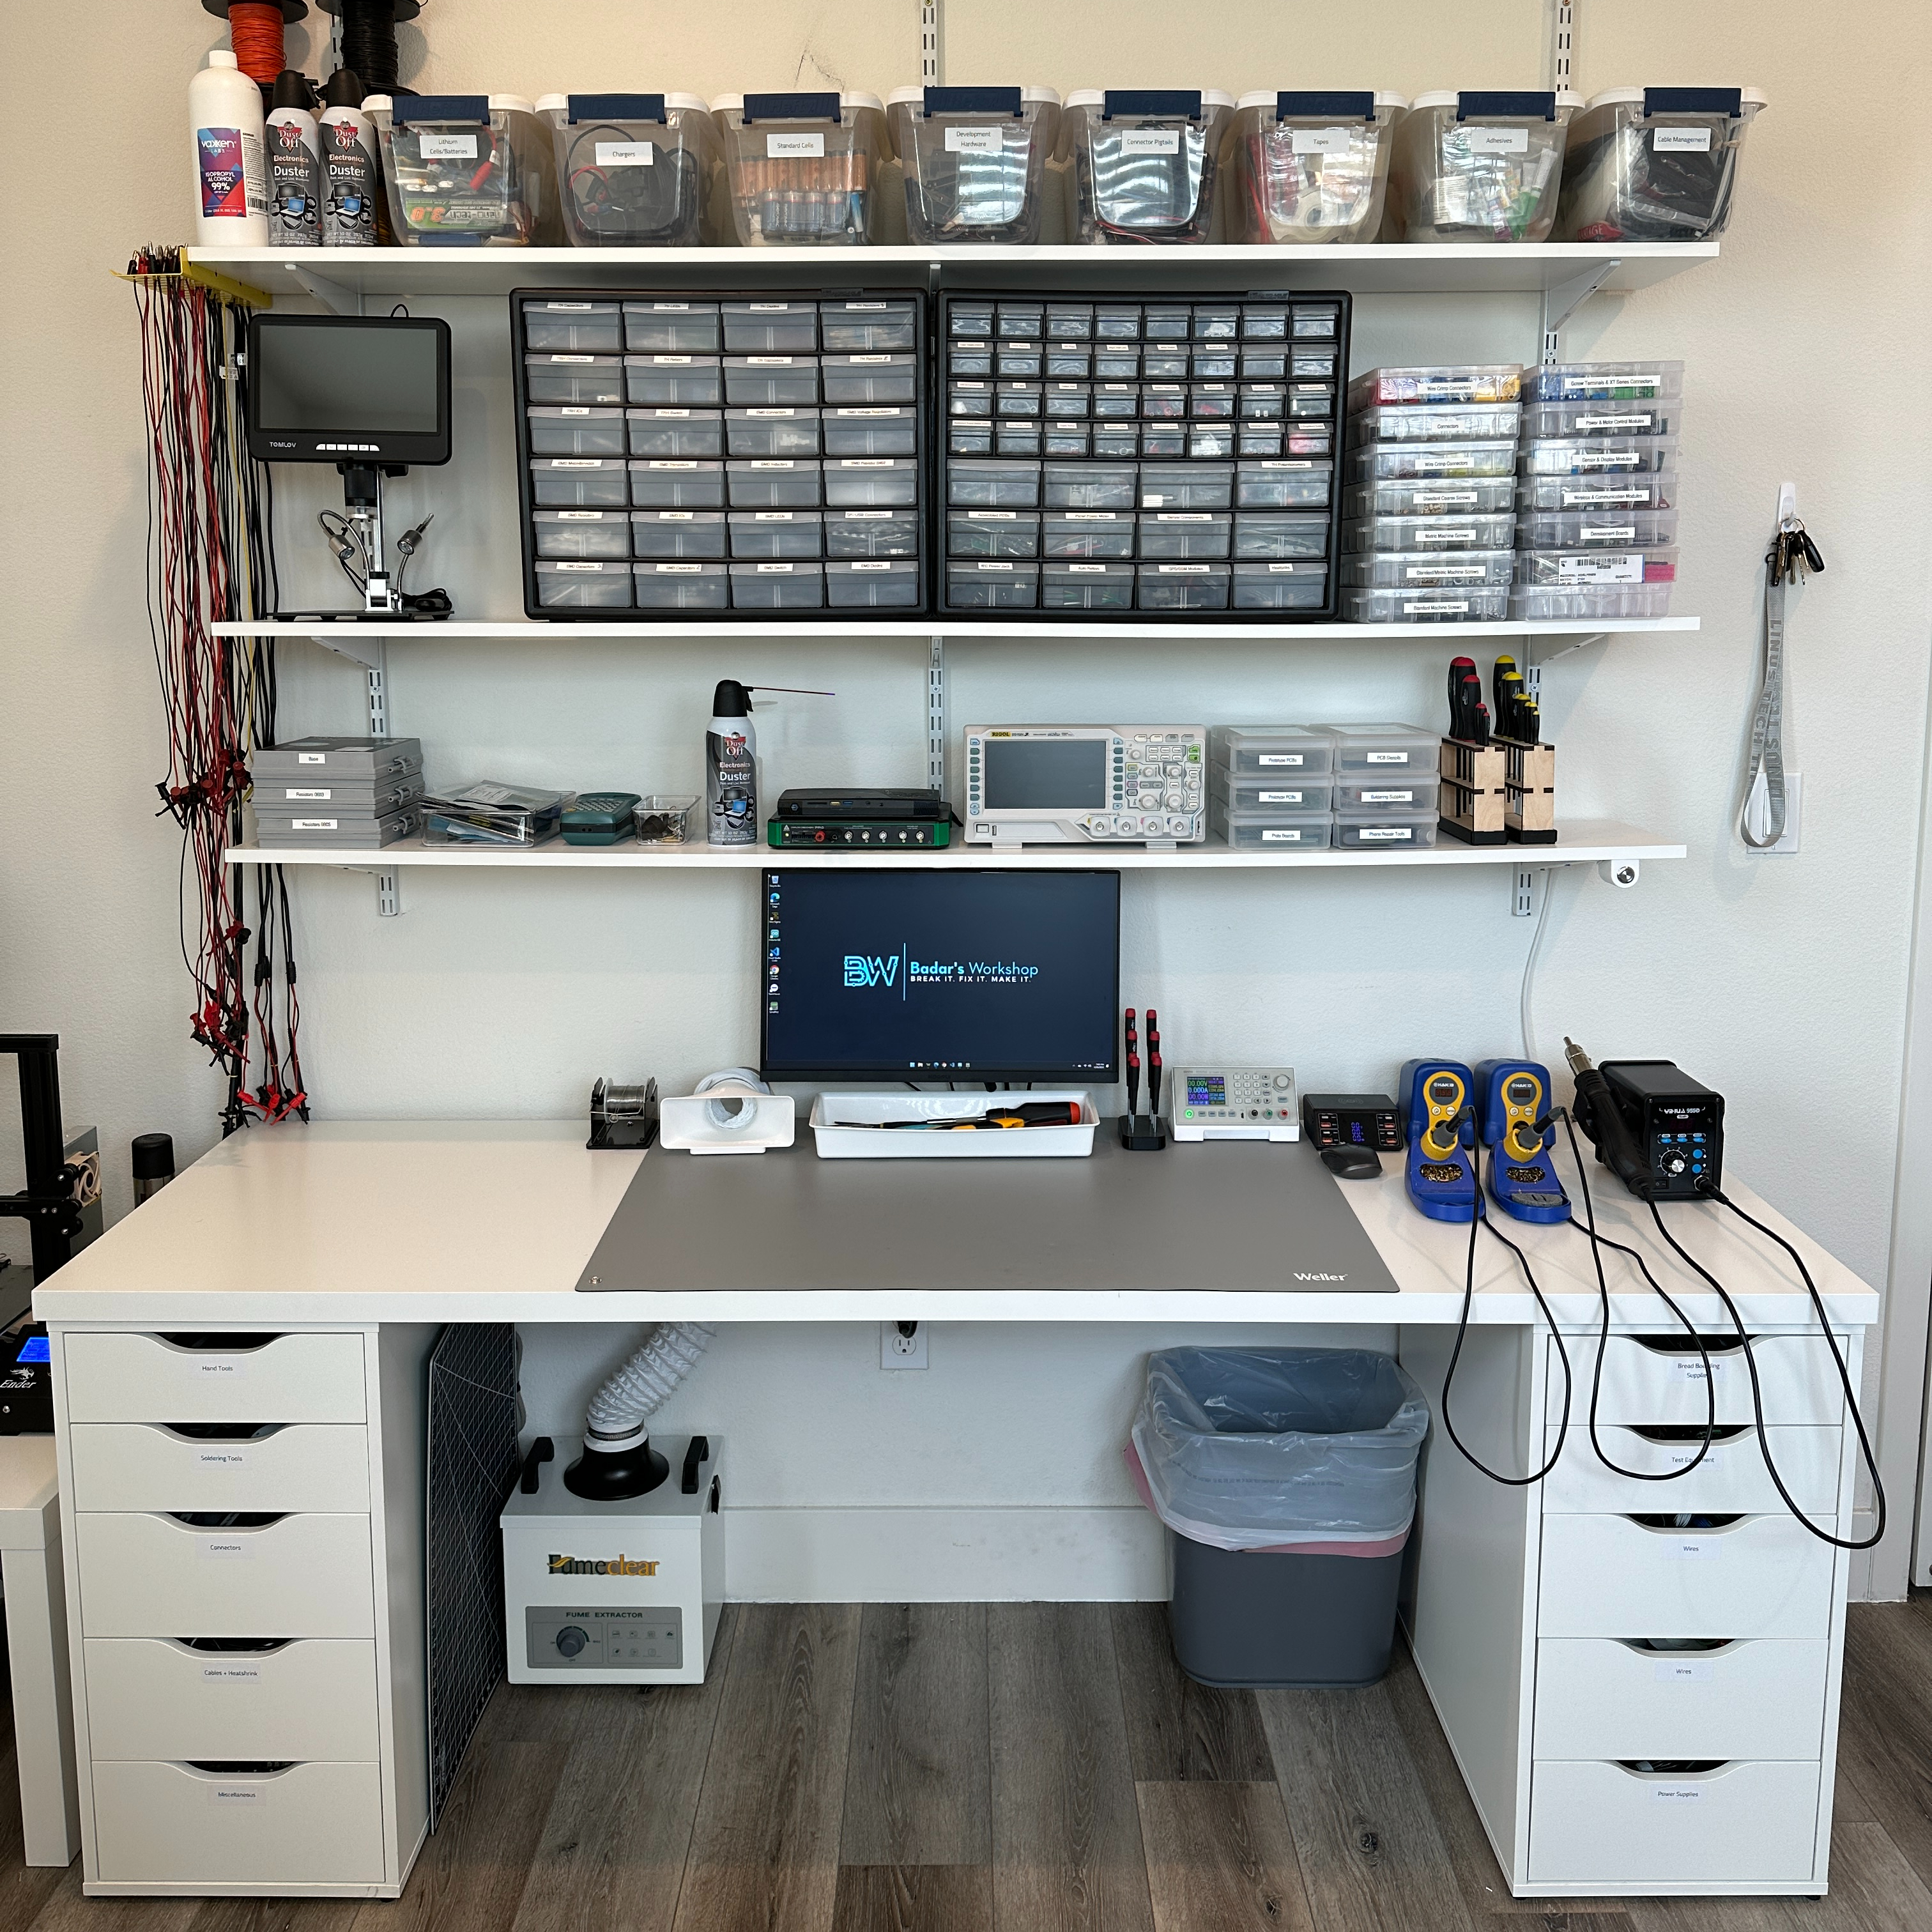
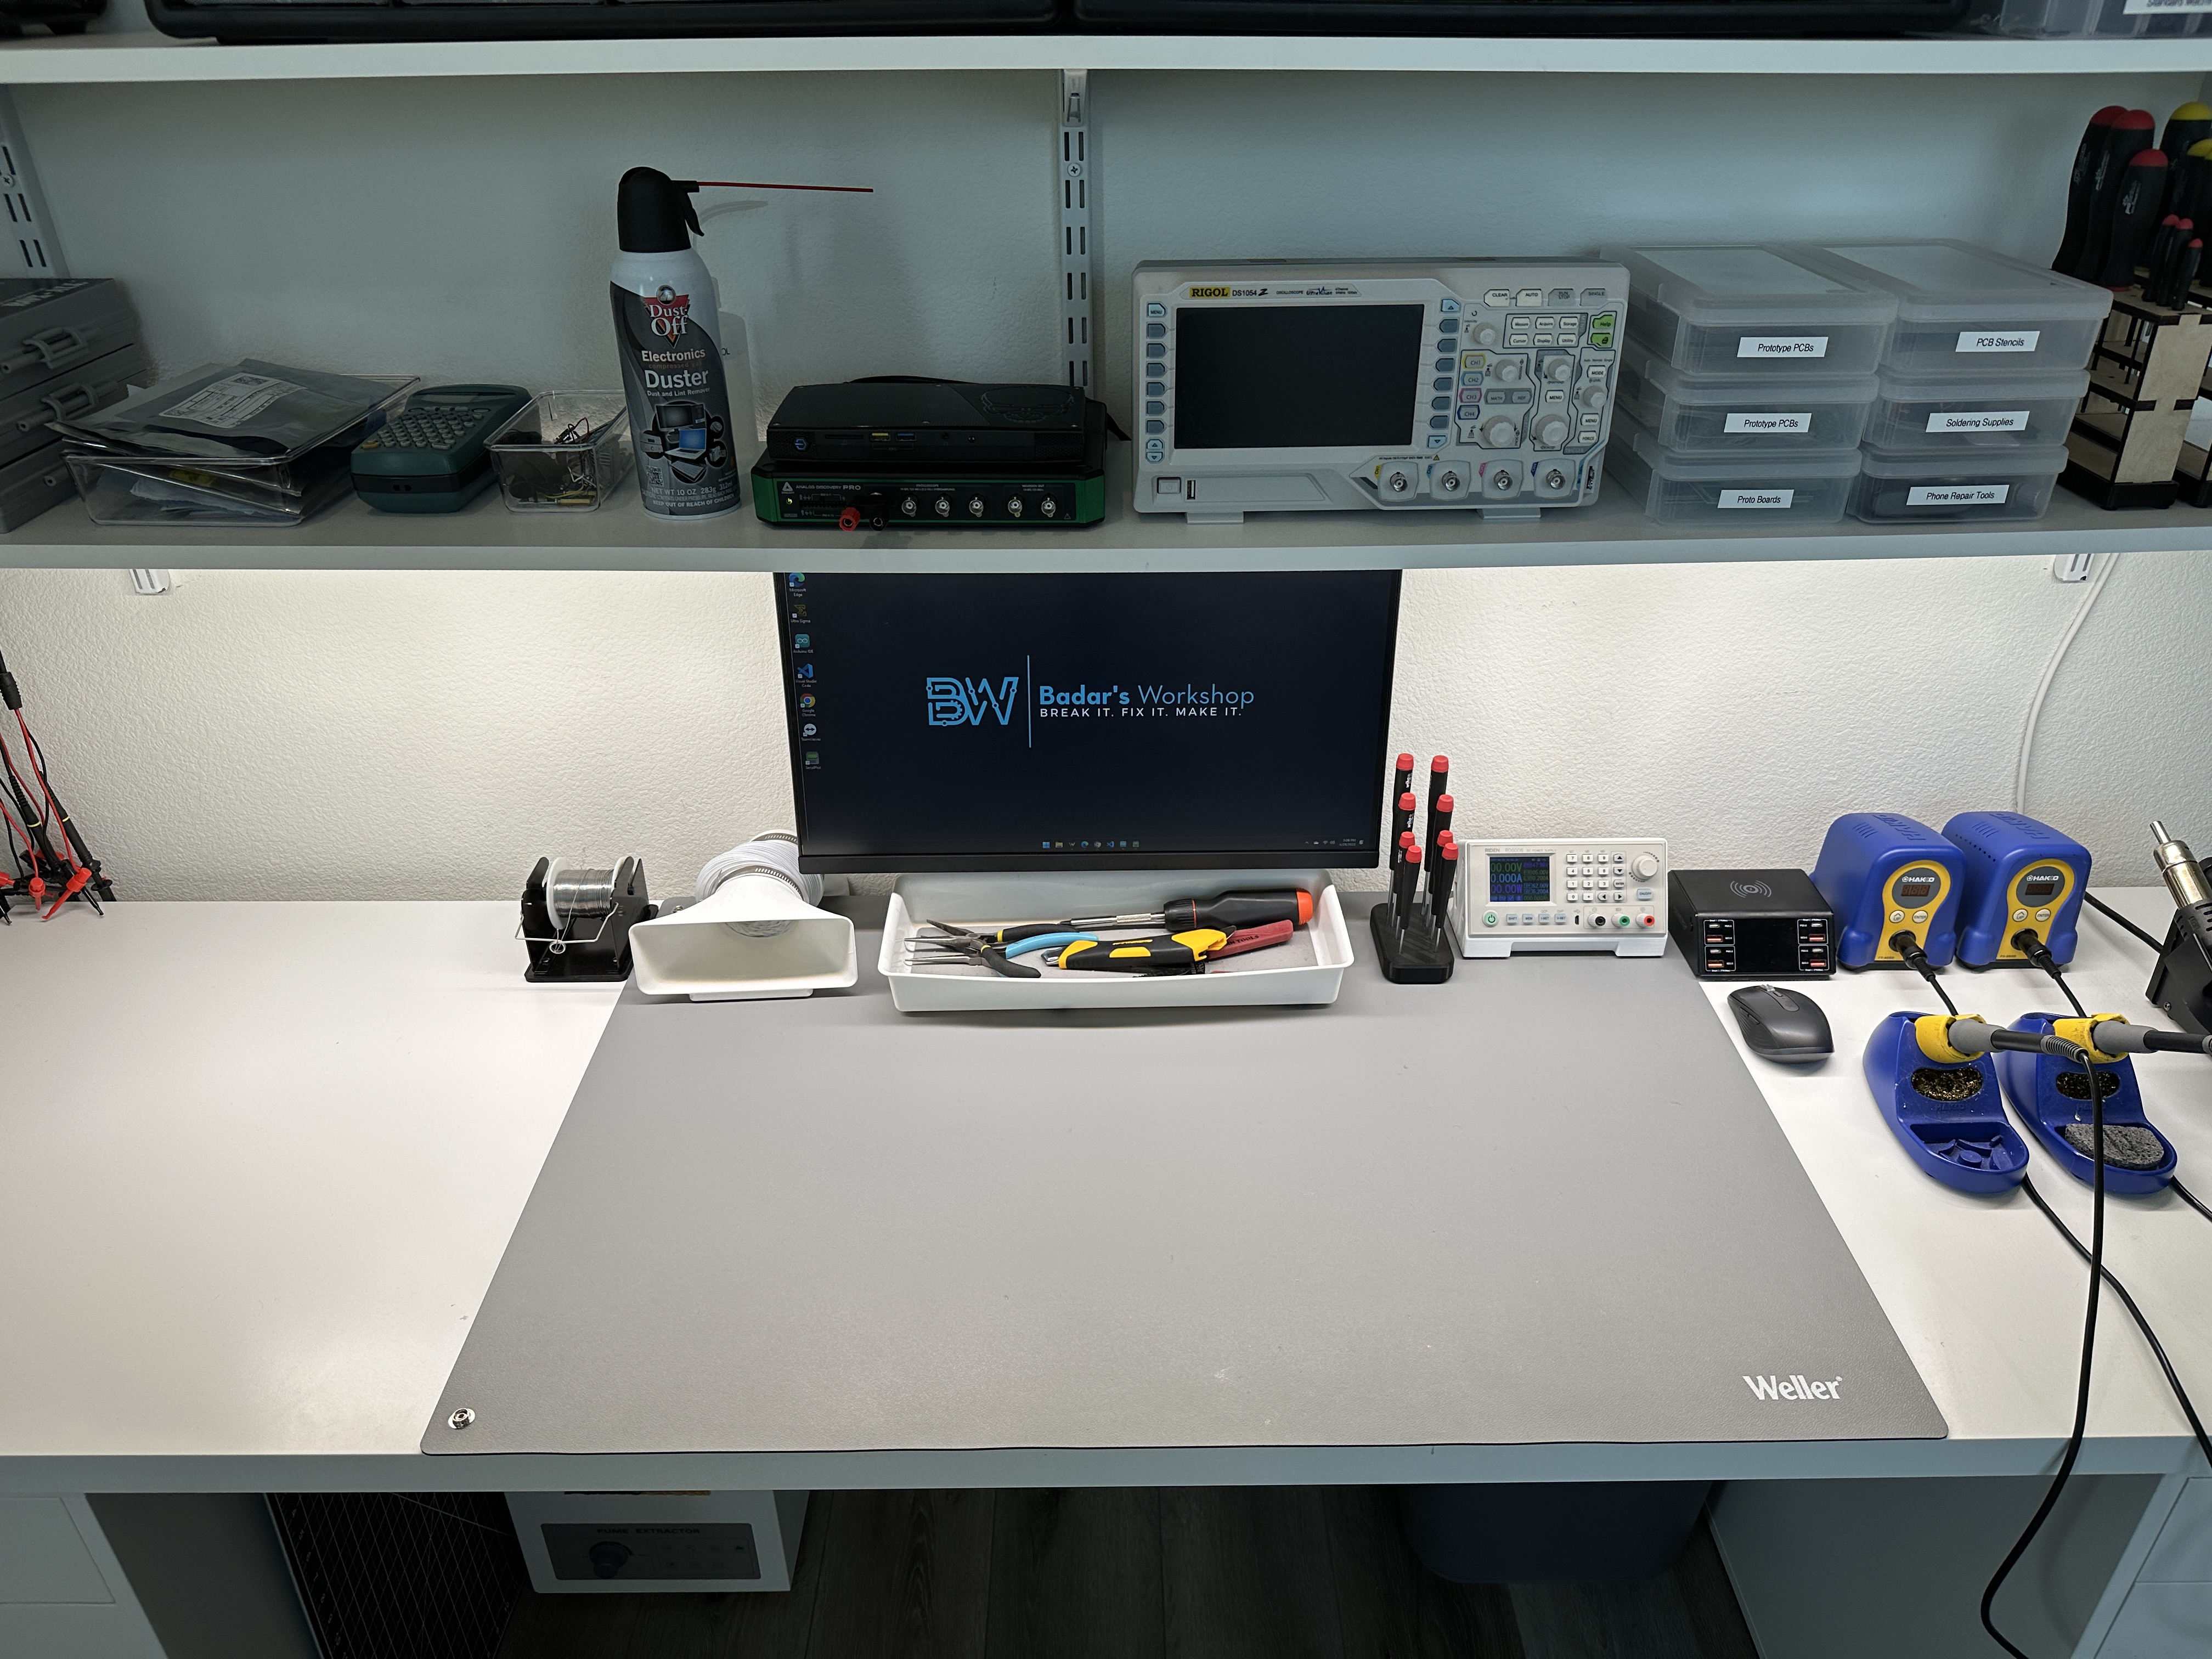
The bench is built using a 78″x24″ table top from Ikea and two Alex drawers to support it. The grey matt on the bench is a Weller ESD mat with high temperature resistance. I also have a cutting mat stowed underneath the bench for any cutting needs I may have.
Above the bench are 10″ deep wall mounted shelving. I opted for wall mounted since it is the most compact solution. The shelves are from home depot and I am using the Rubbermaid rail mounting system.
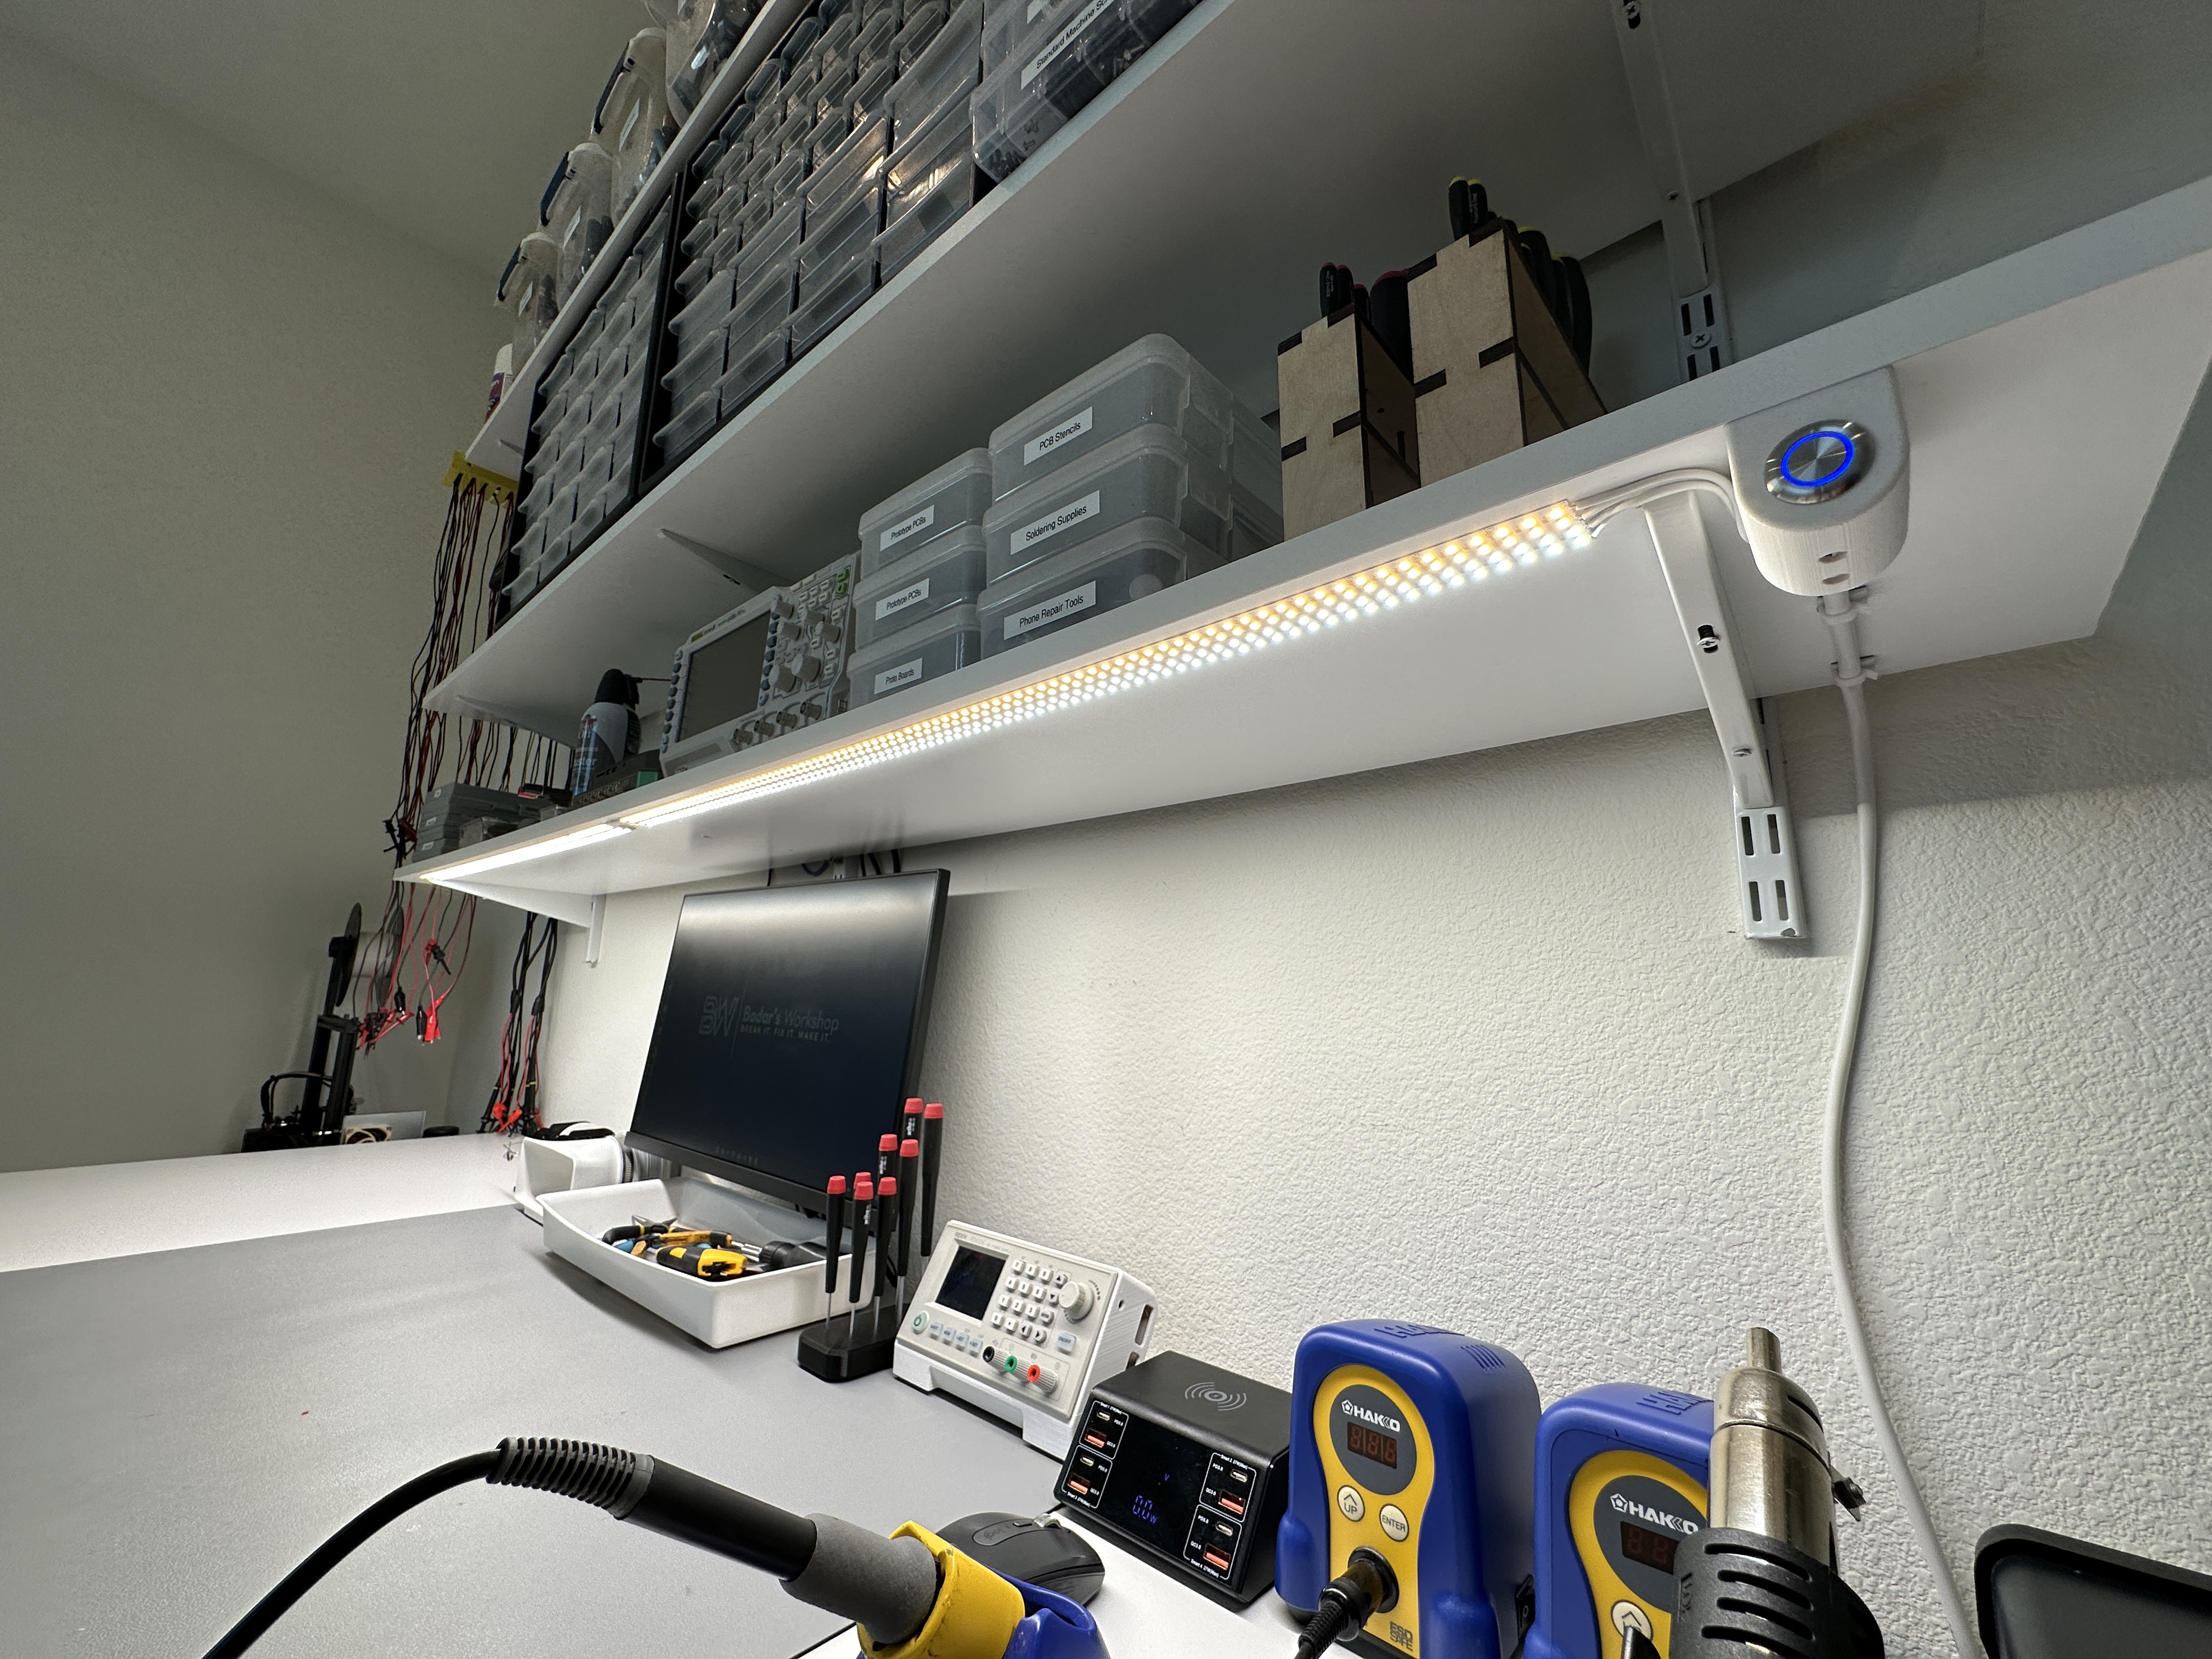
The lighting is done using two 90+ CRI LED strips mounted underneath the lowest shelf, each with a different color temperature. They are controlled using a touch switch and powered from a 24V PSU. The light can be too bright at times so I am planning to add PWM control in the future to modify brightness and net color temperature as well. It also doesn’t spread too evenly so I am looking into a diffuser as well.
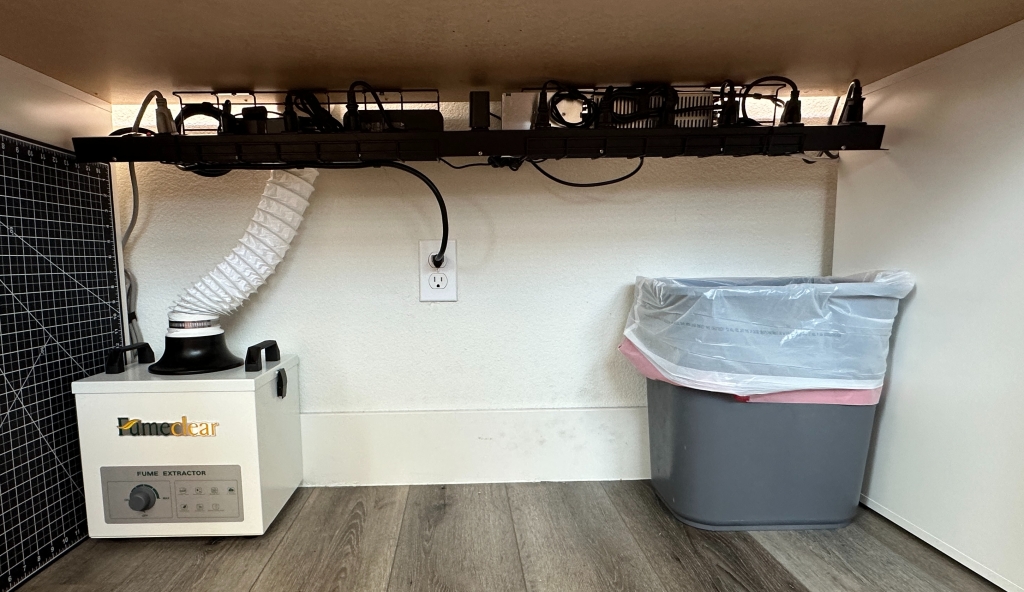
All the power distribution is done using a long 12 port power strip that is mounted on a wire management tray. All the PSU’s and power wiring is managed on the tray to avoid a dangly mess underneath the desk.
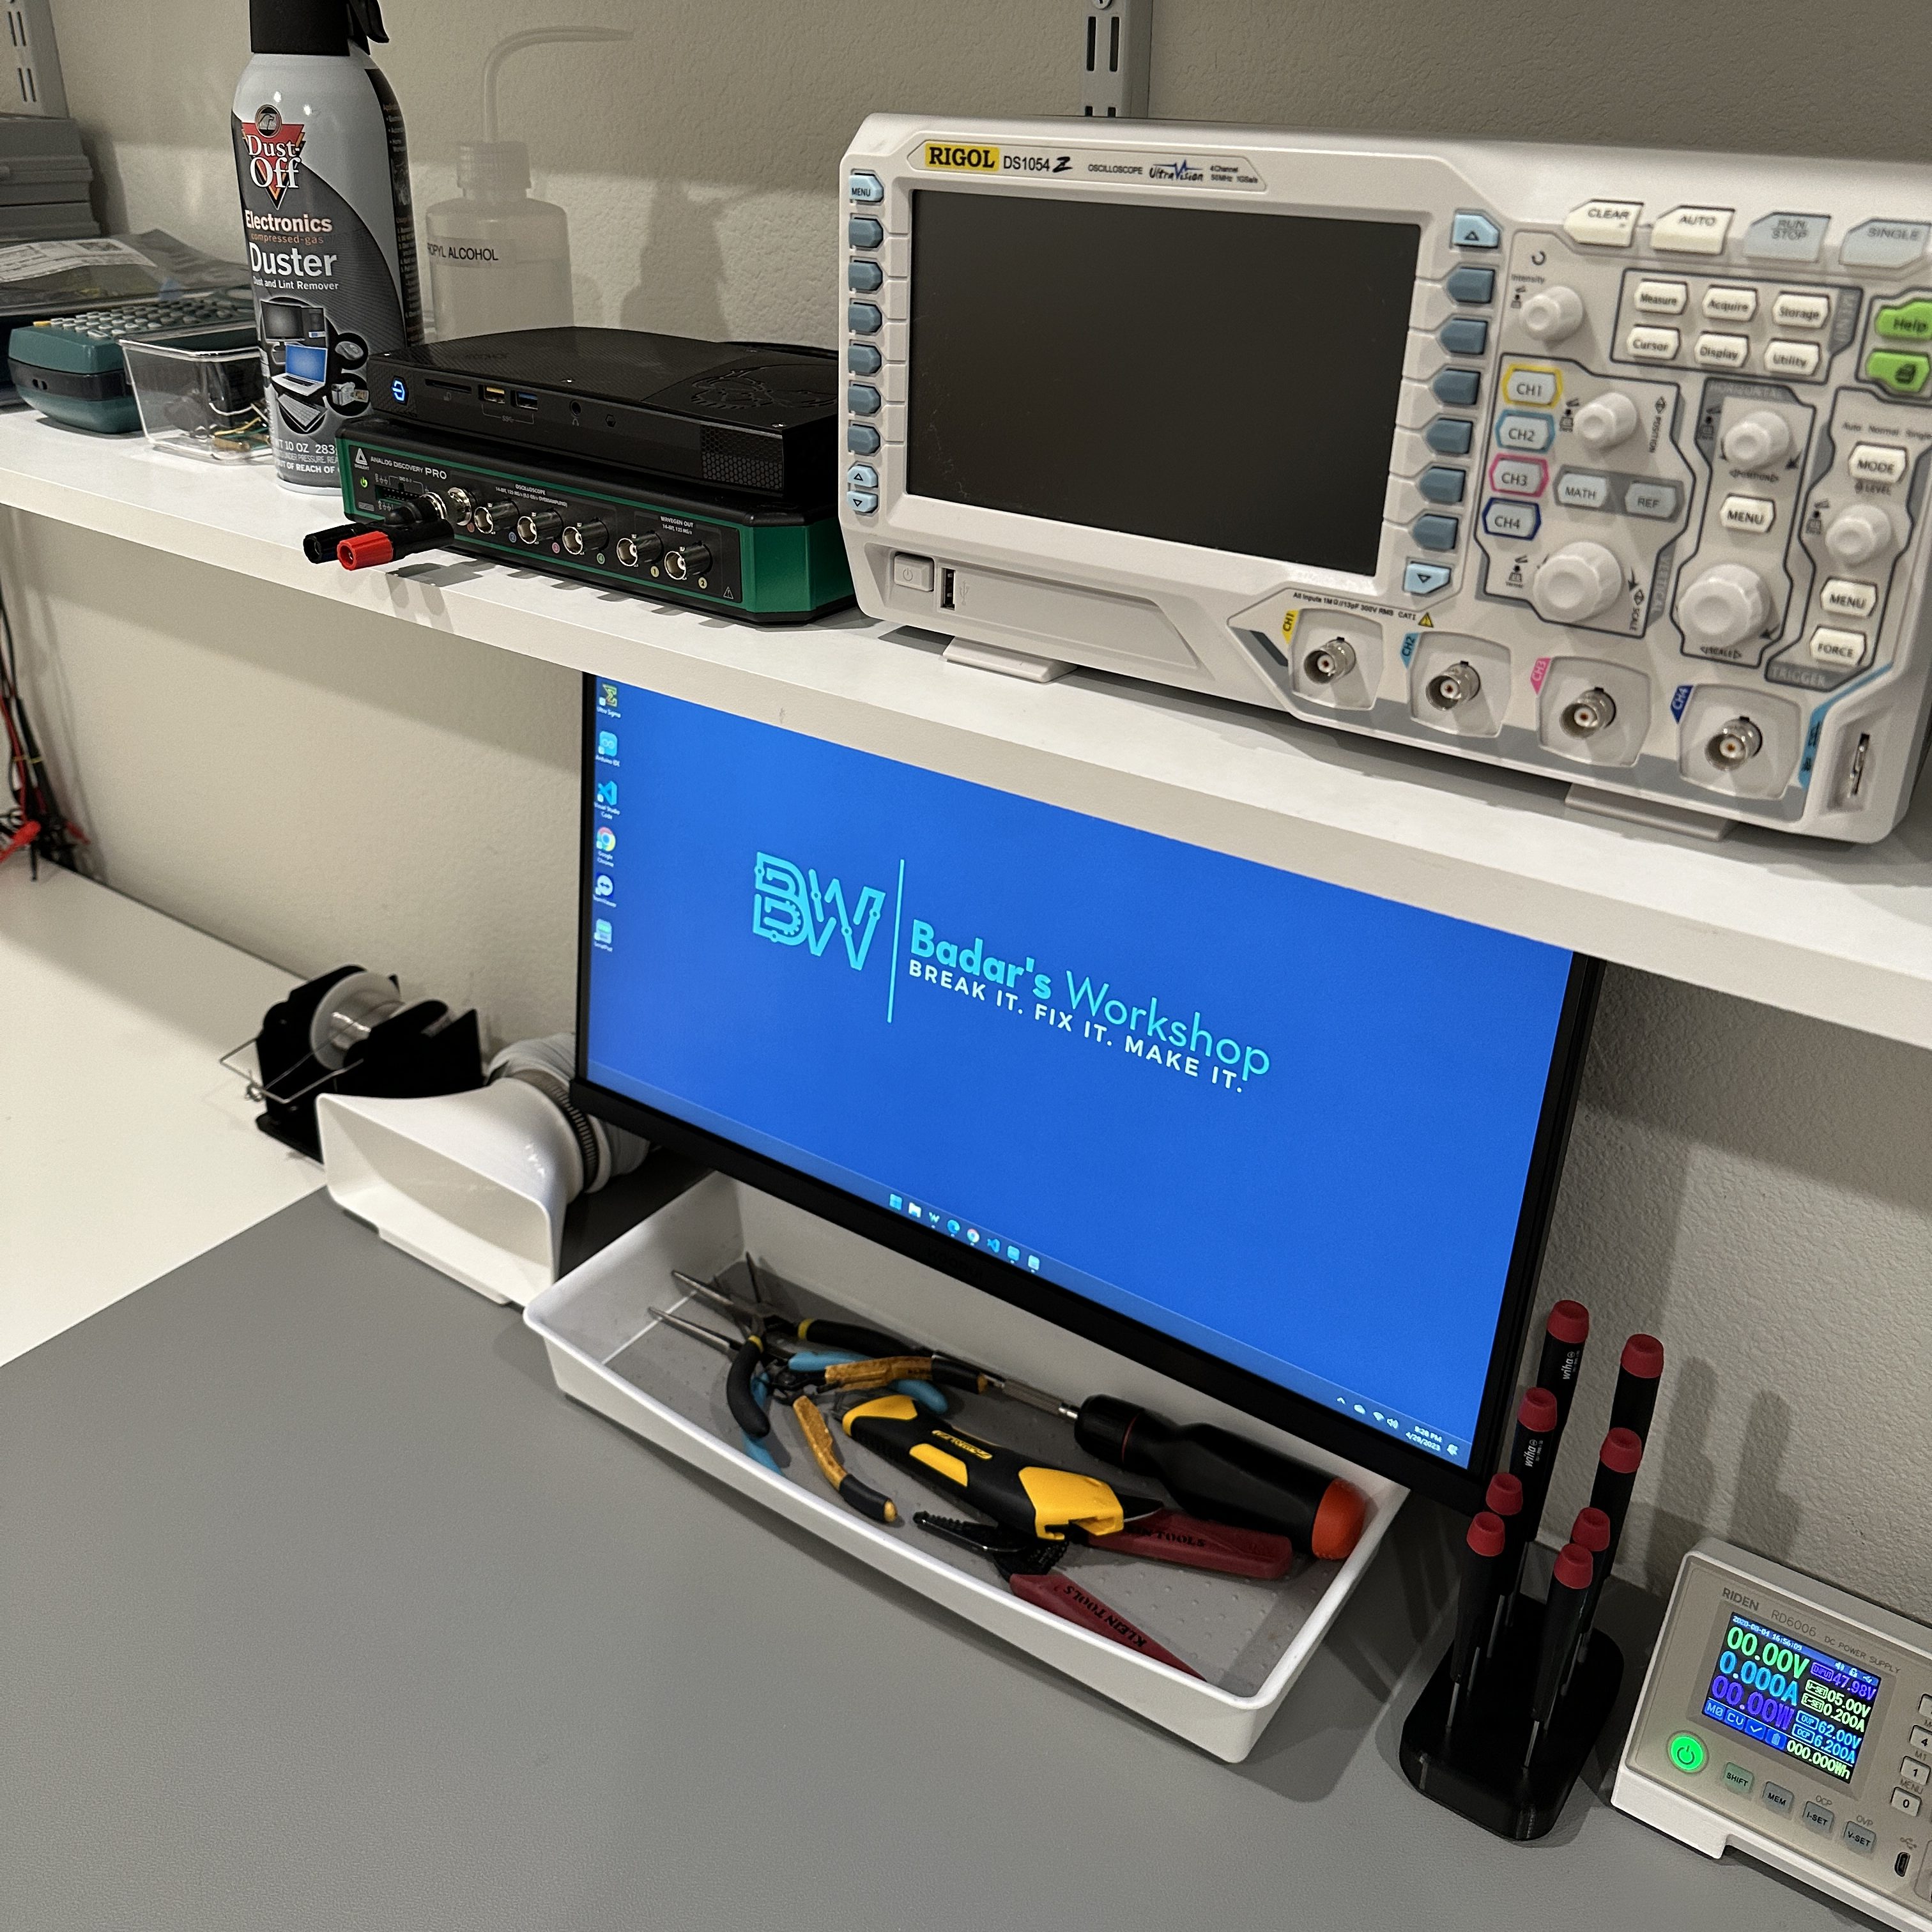
I also have a bench PC that is extremely useful to collect data, interact with the oscilloscope and view schematics, datasheets etc. The display for the bench is mounted on the wall with a swivel arm.
Organization
The main appeal of my bench is the organization. I obsess over the little details and have spent a lot of time to organize every part of the bench. Organization is an ever going process though so it will never be done, it will just keep getting better.
Overview
Lets look at the organizational structure I have implemented. Everything is placed in a way that the most used things are the easiest to get to. Most frequent tools, instruments and components are out in the open. Less frequently used stuff is stored in drawers, bins and compartment boxes. I like to keep things consistent as much as possible since it makes storing them easier.
At this point, I would like to point out that you need a way to label things. Masking tape and a sharpie work great but you can get fancy with a label maker or label printer. I use them all based on what I am labelling and how permanent/important I expect it to be.
Bench Top
Lets start with the bench top. I have a main bin of tools that always holds a certain set of tools and based on what I am working on, will store additional tools as well. It serves as a quick way to stow away tools when not needed and easily retrieve them when needed.
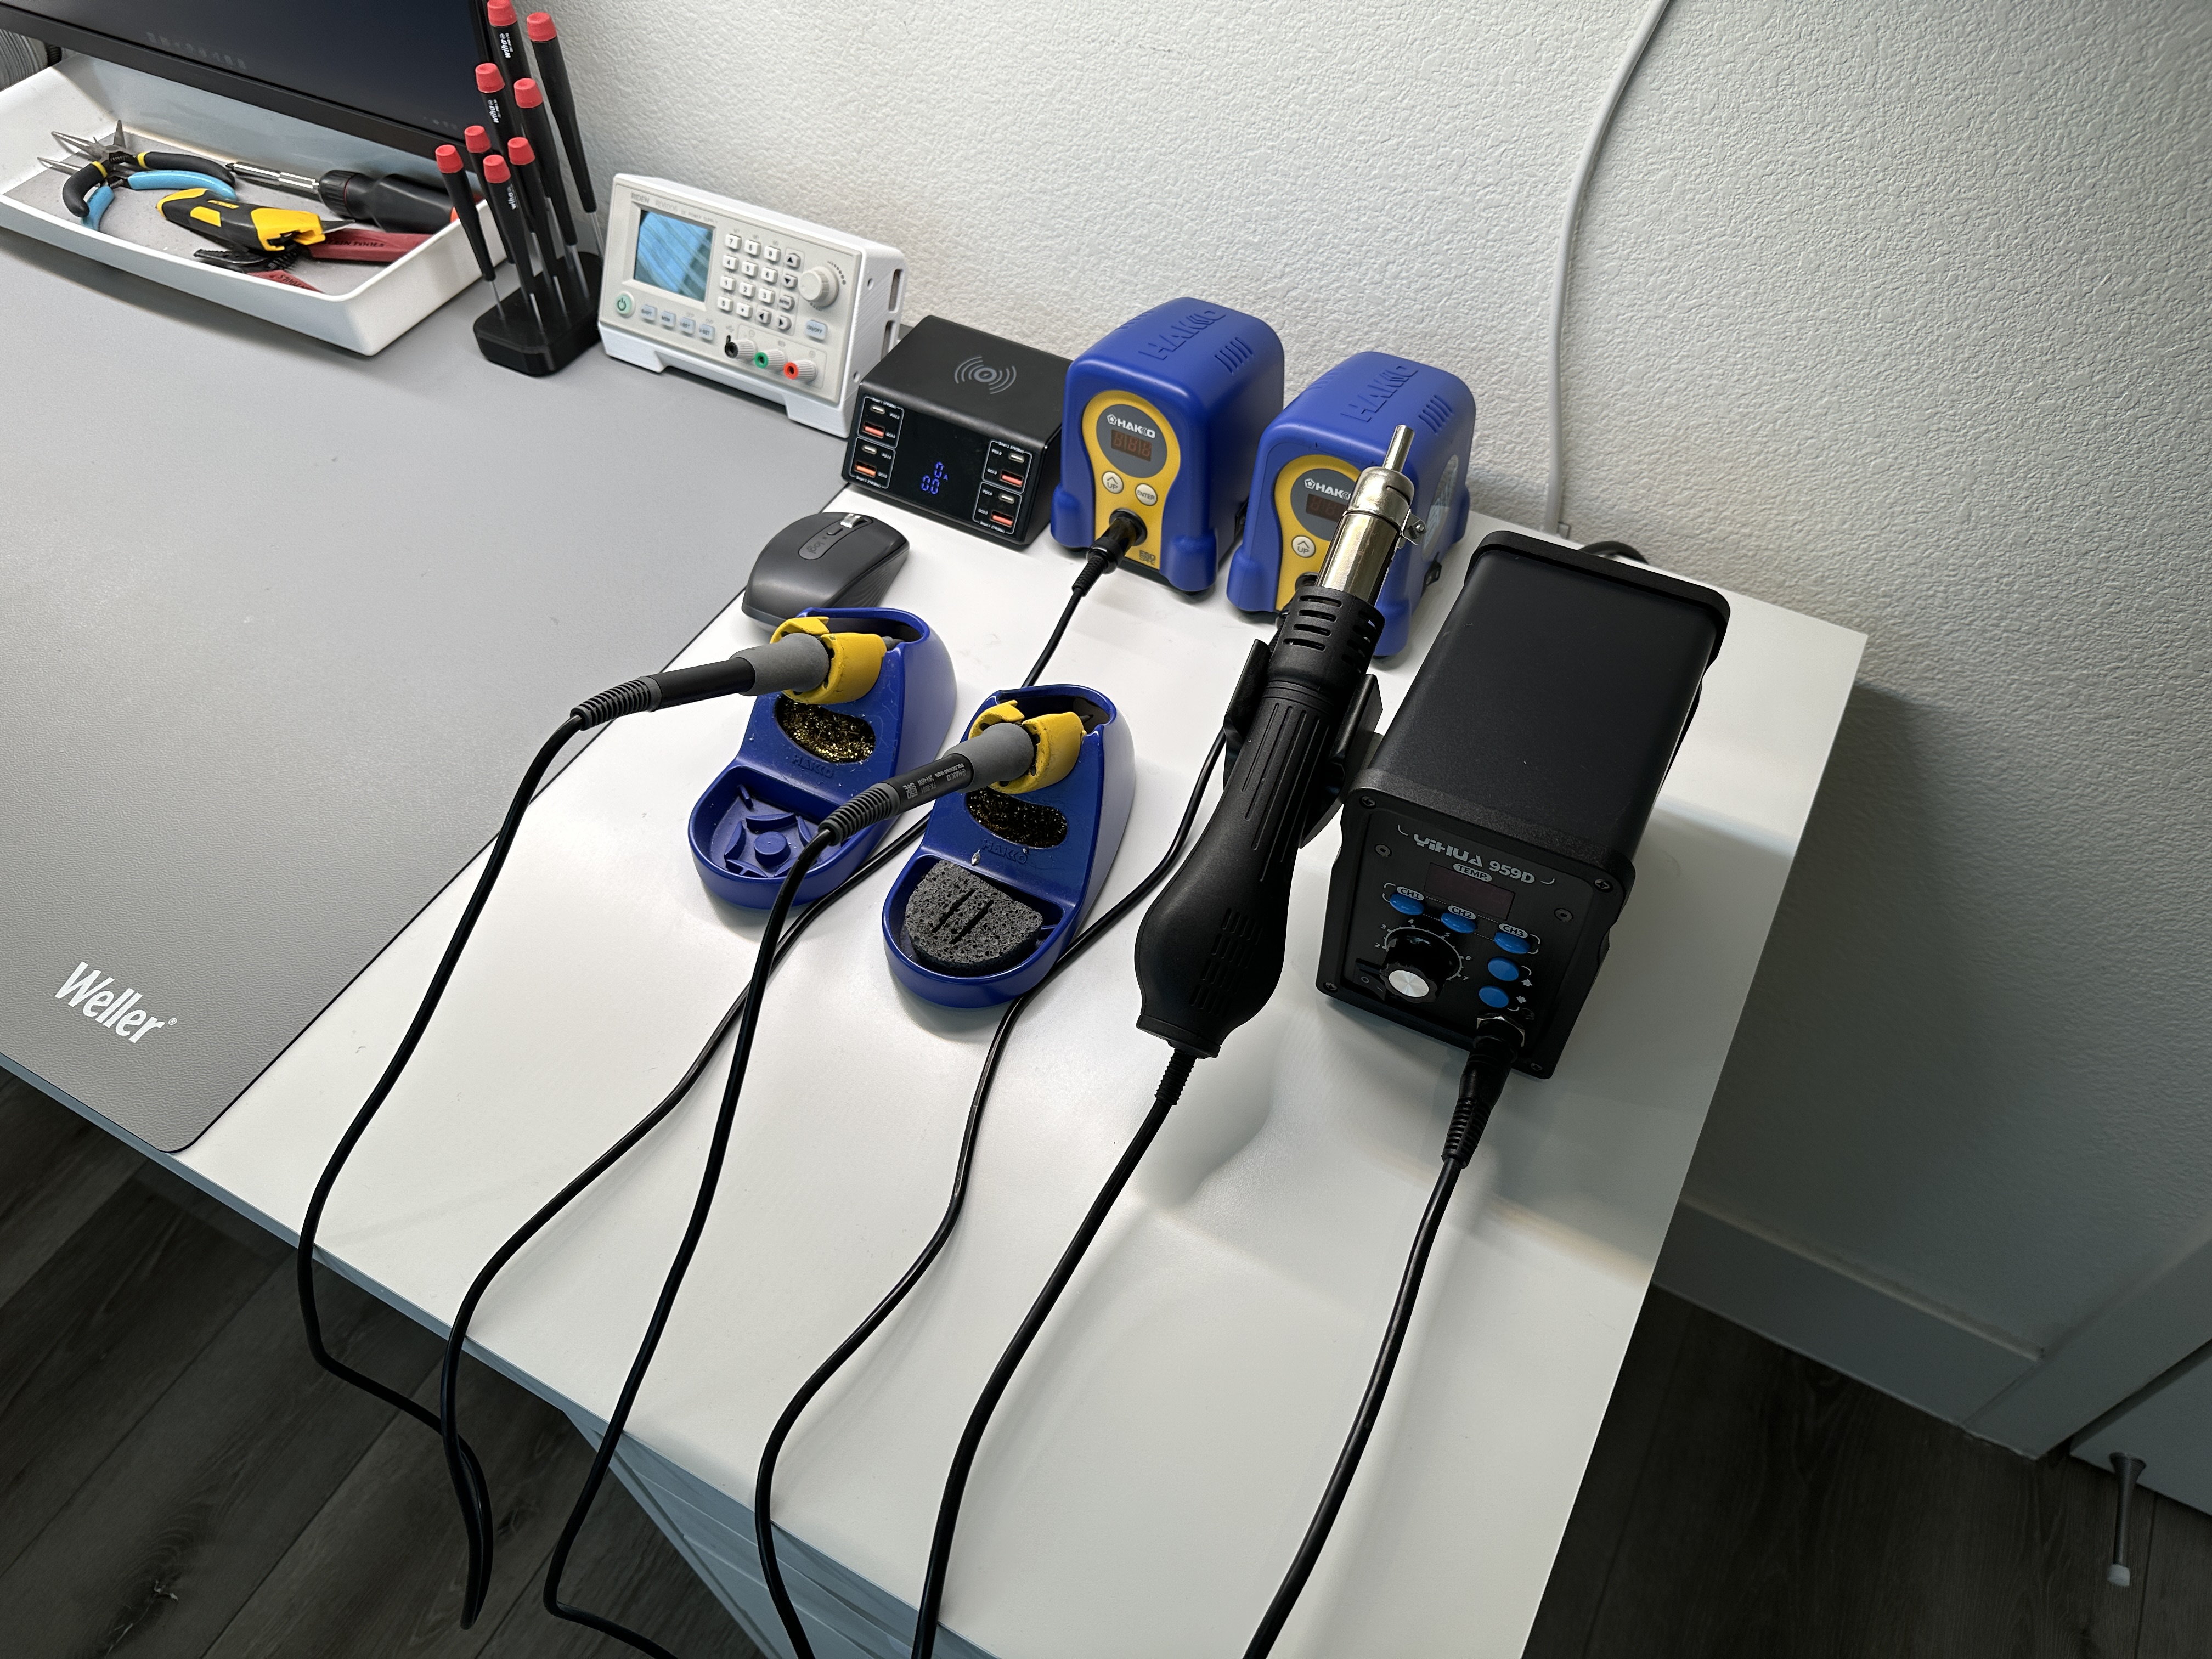
The soldering iron and hot air rework station are to the right since I am right handed. They are quick to reach but also not in the way. Other things are lined up where they fit like the power supply, solder wire, USB charging station etc. I keep the left area clear so I can spread out my project further. I also usually keep a smaller bin to hold components I am actively using on the left.
Parts/Consumables Storage
There are 3 primary types of containers I use to store all my stuff:
- Small Drawers
- Compartment Boxes
- Bins
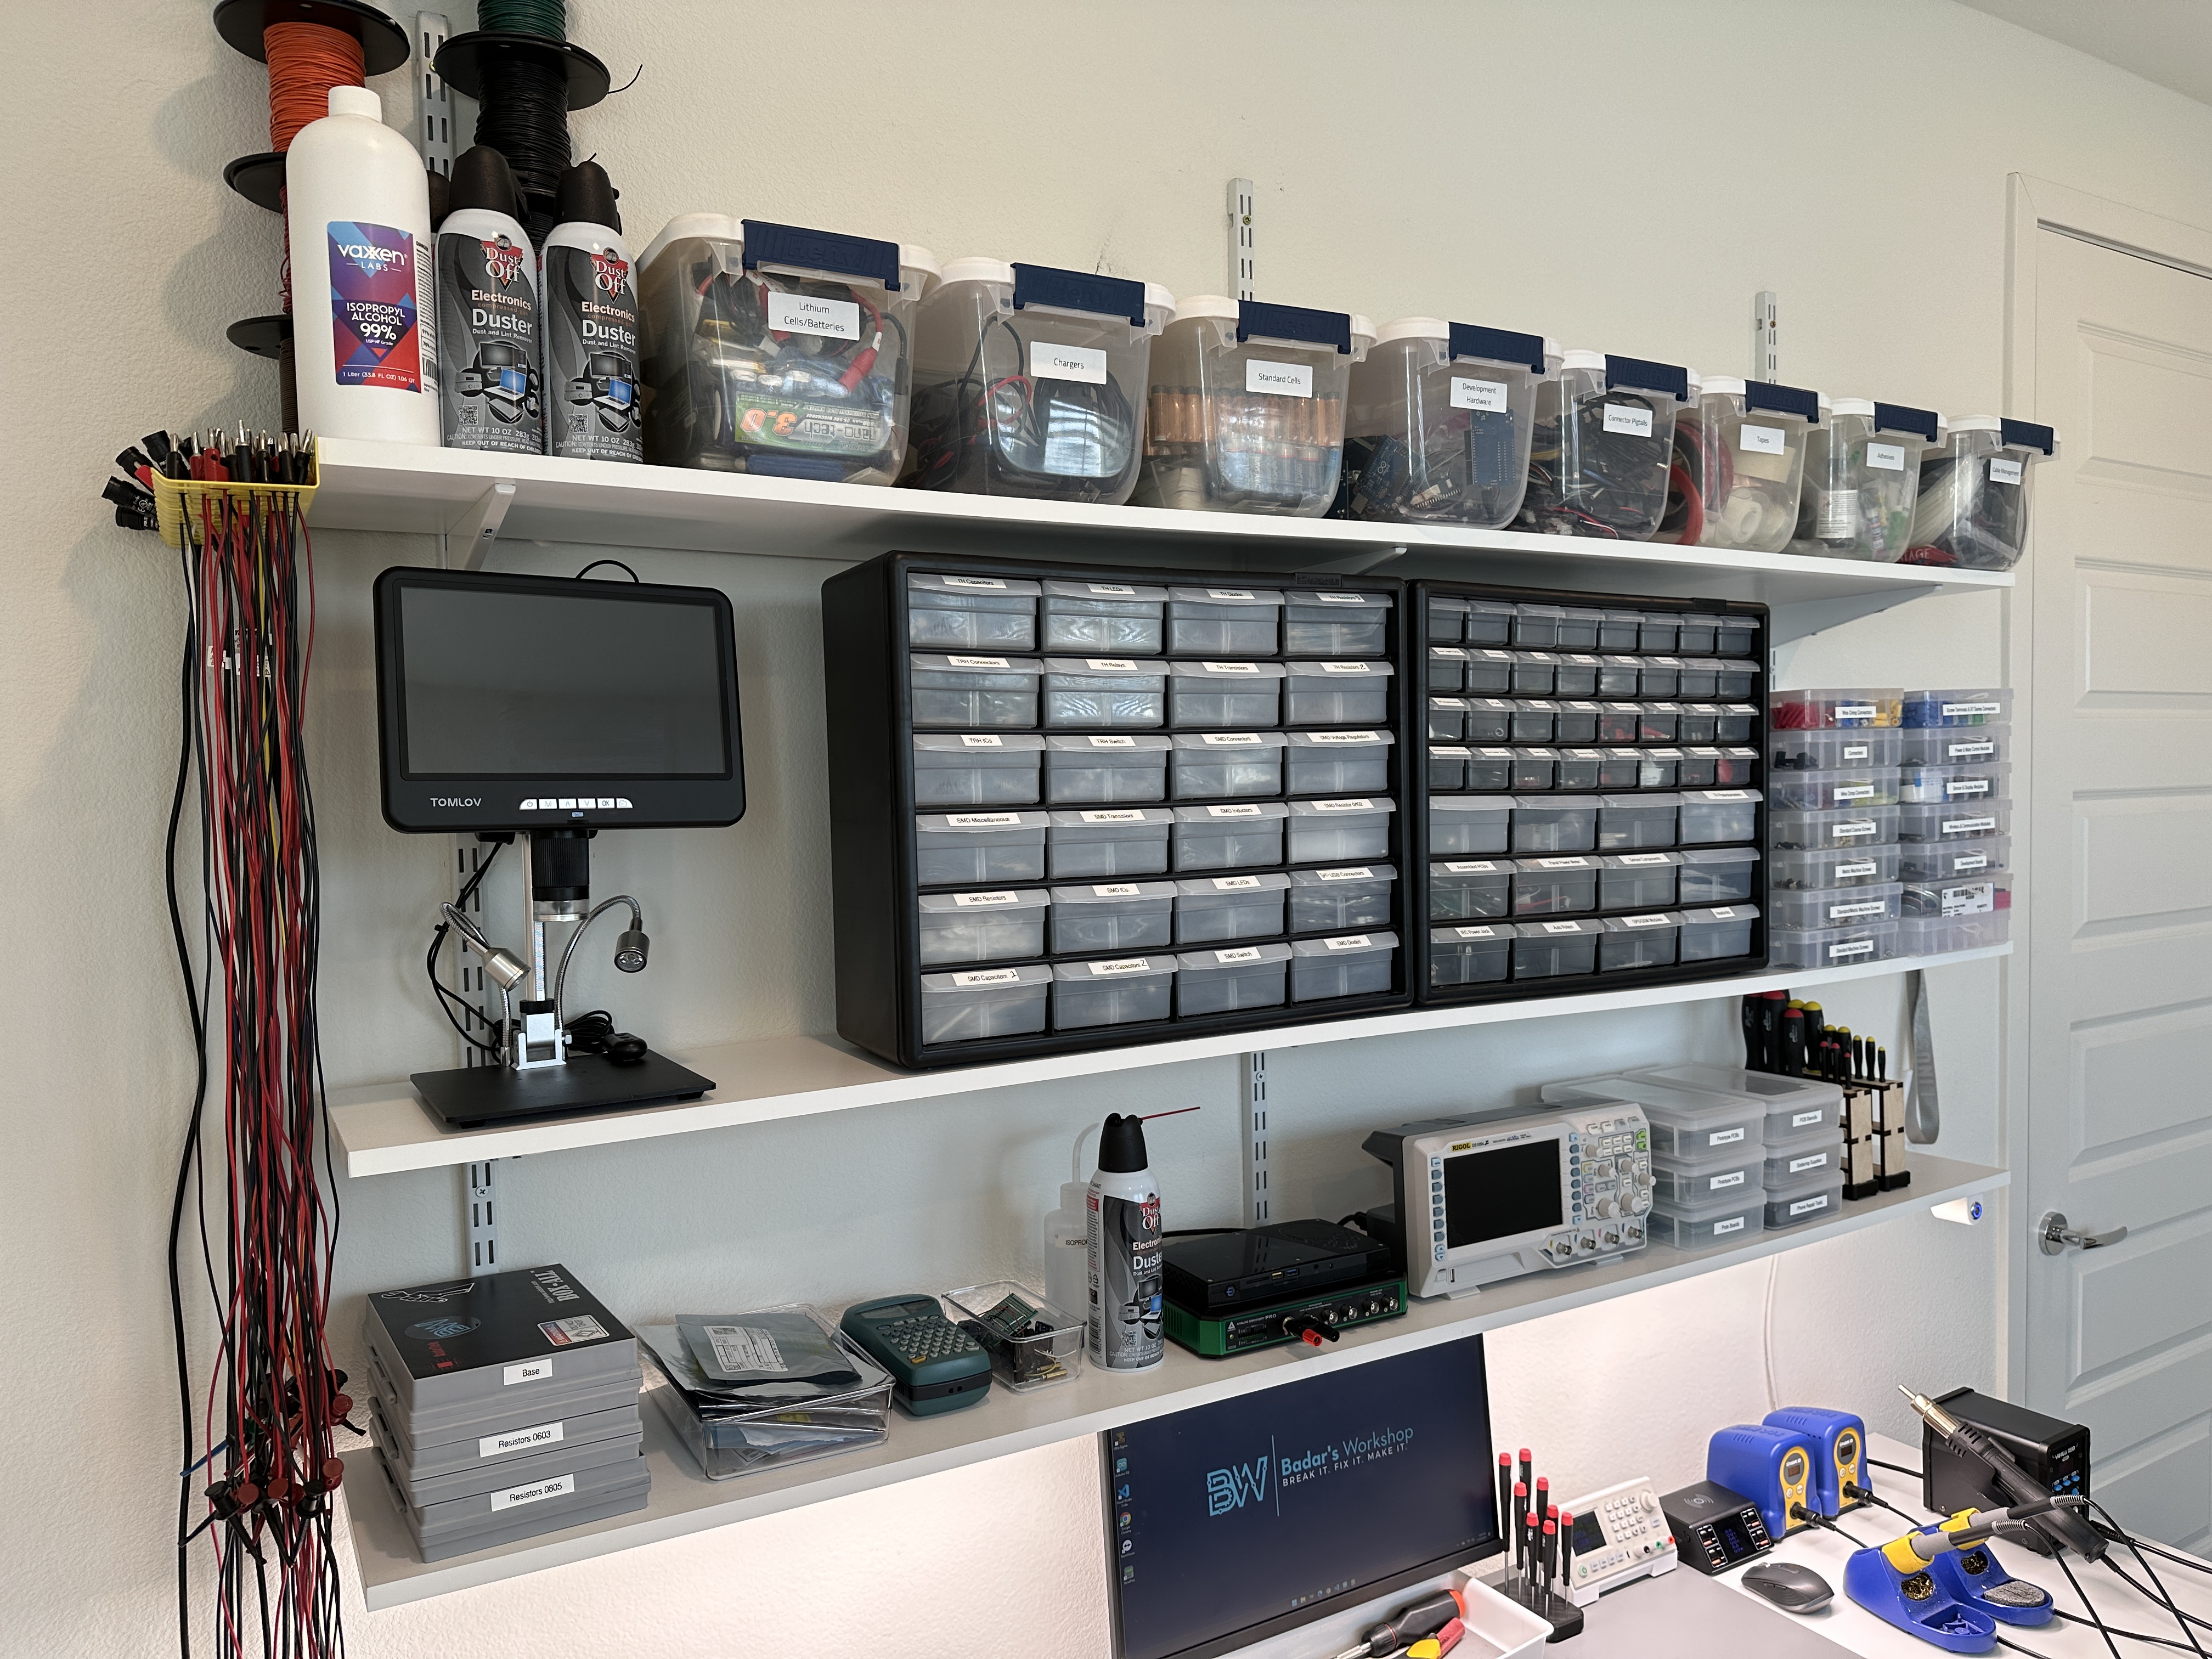
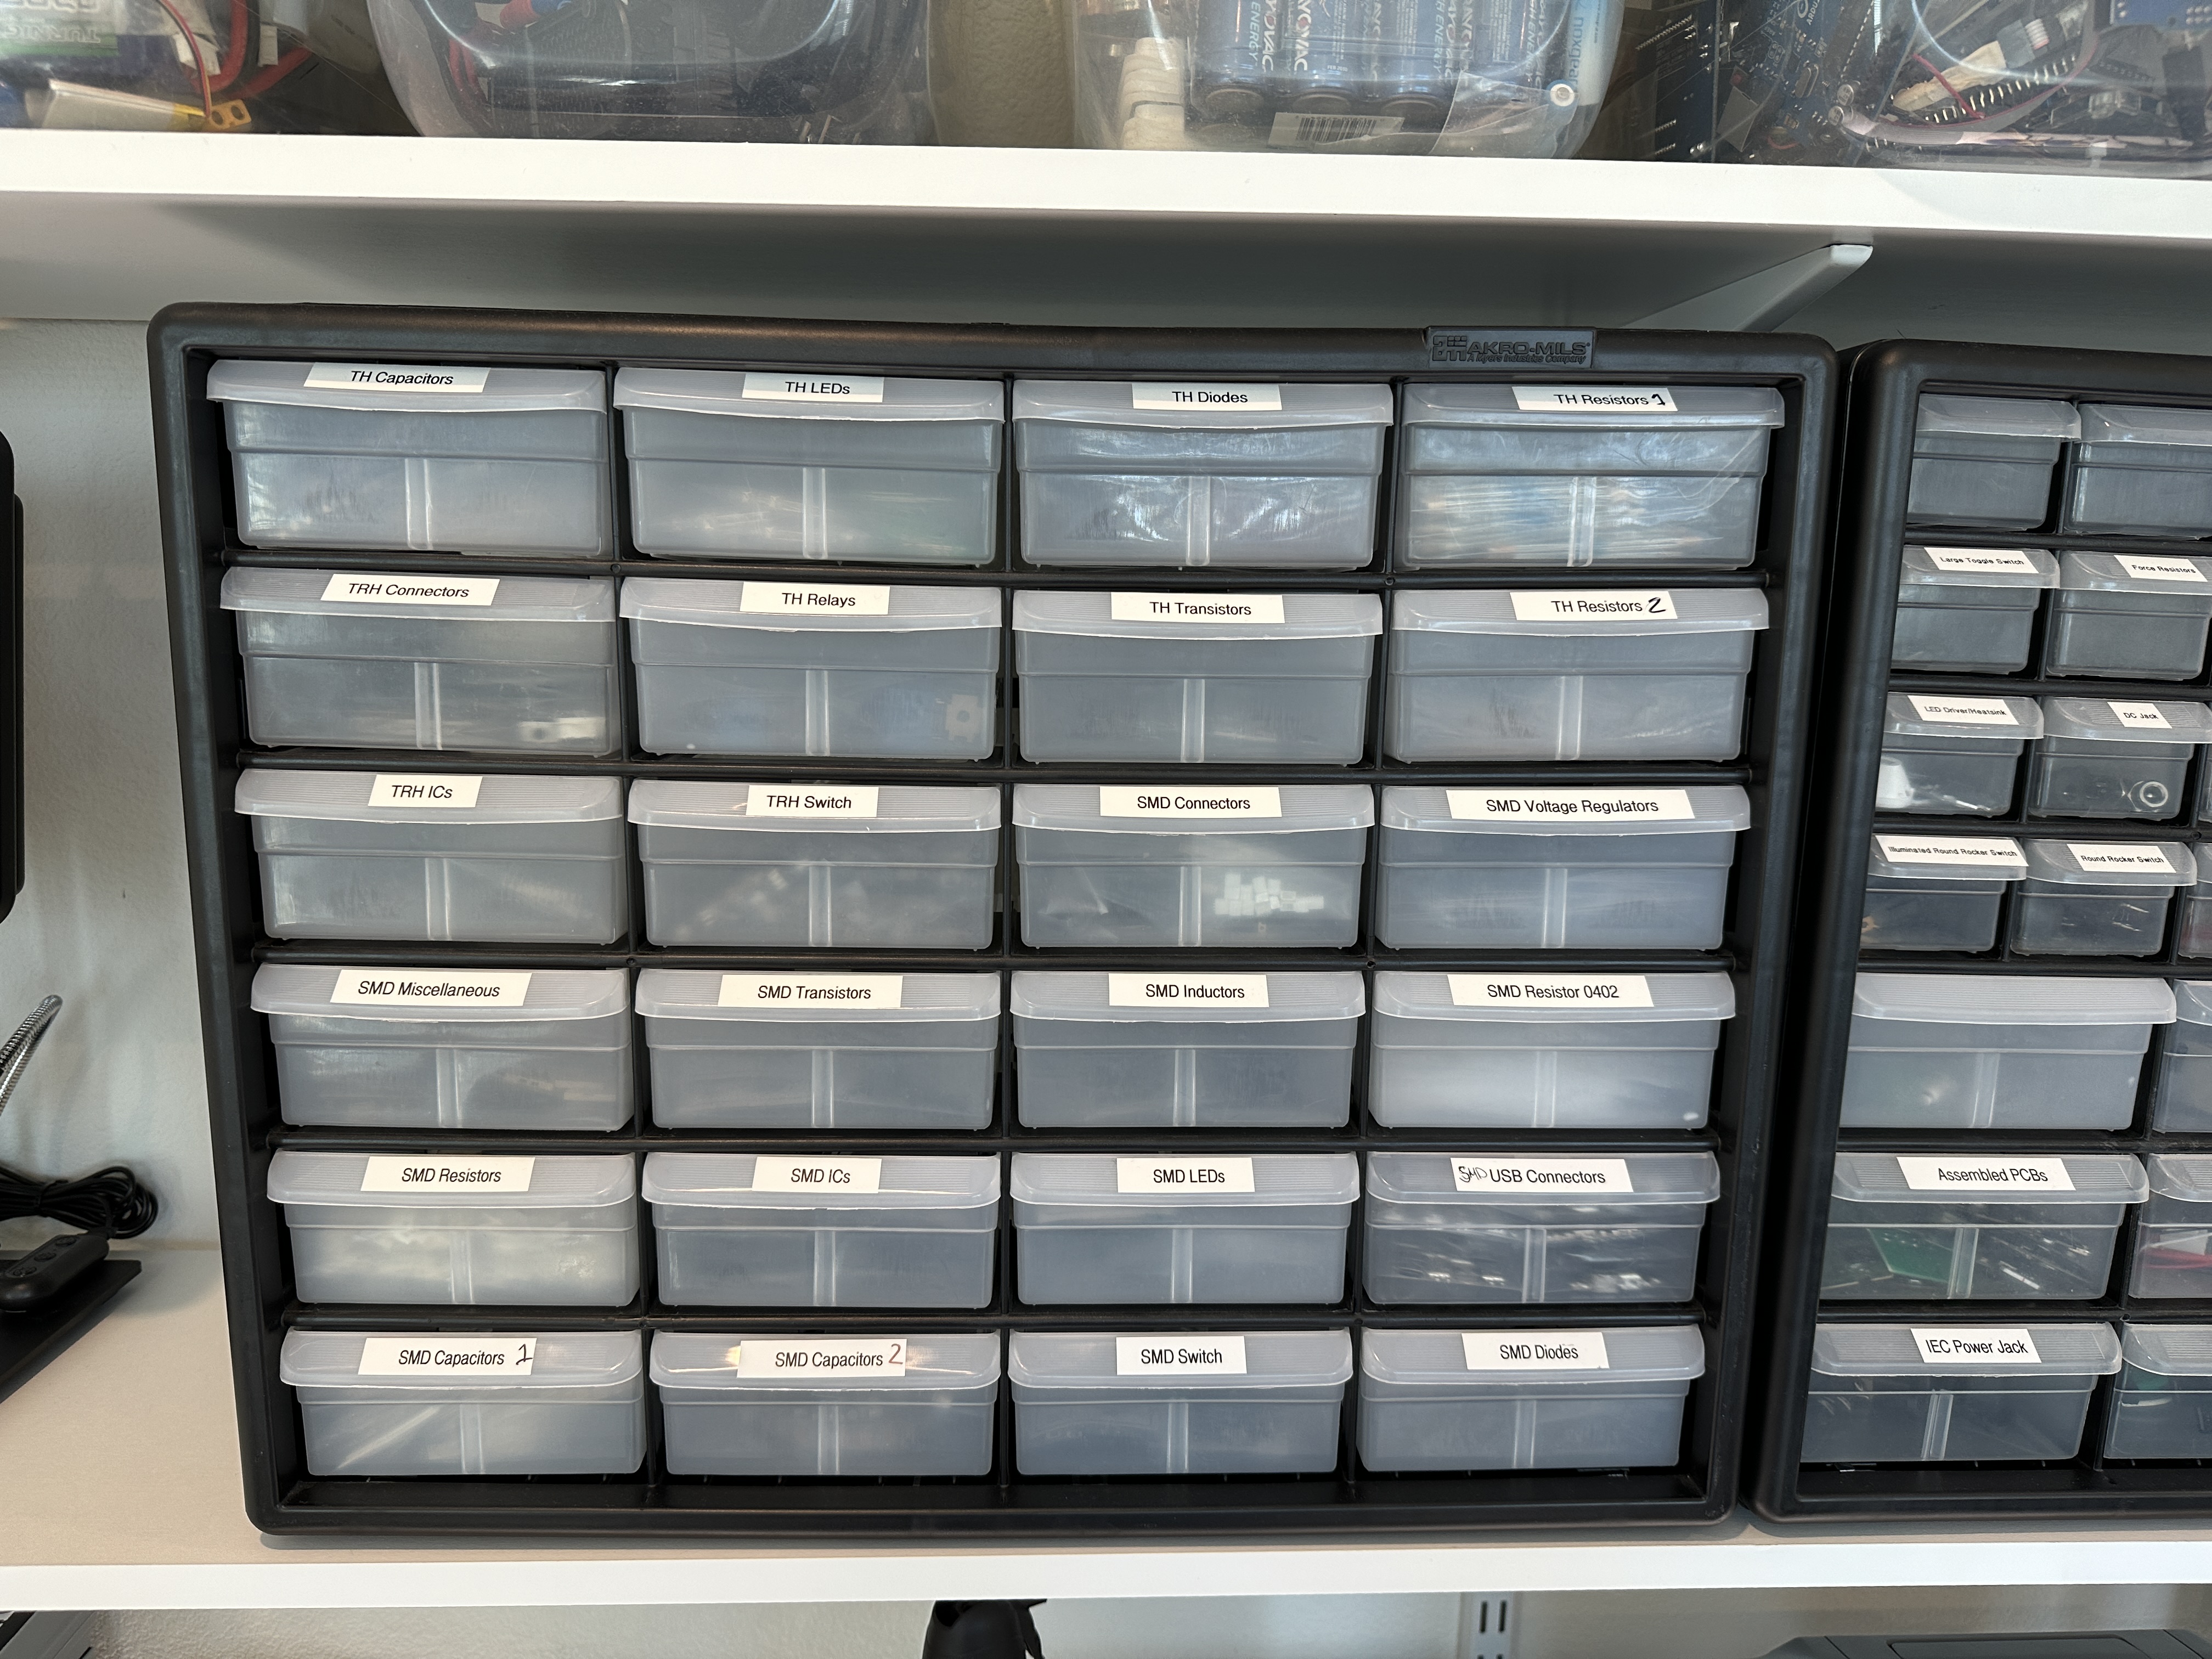
For the drawers, I use Akro-Mills drawers as they are decent quality and come in a variety of configurations. I use these to store electronic components. Most of the drawer space is taken by my tracked inventory of components for PCB designs. I also have other electronic components like relays, panel mount switches, magnets etc. in the drawers. They are all labelled and organized in a logical way so that similar stuff is together. For example all SMD components are grouped together.
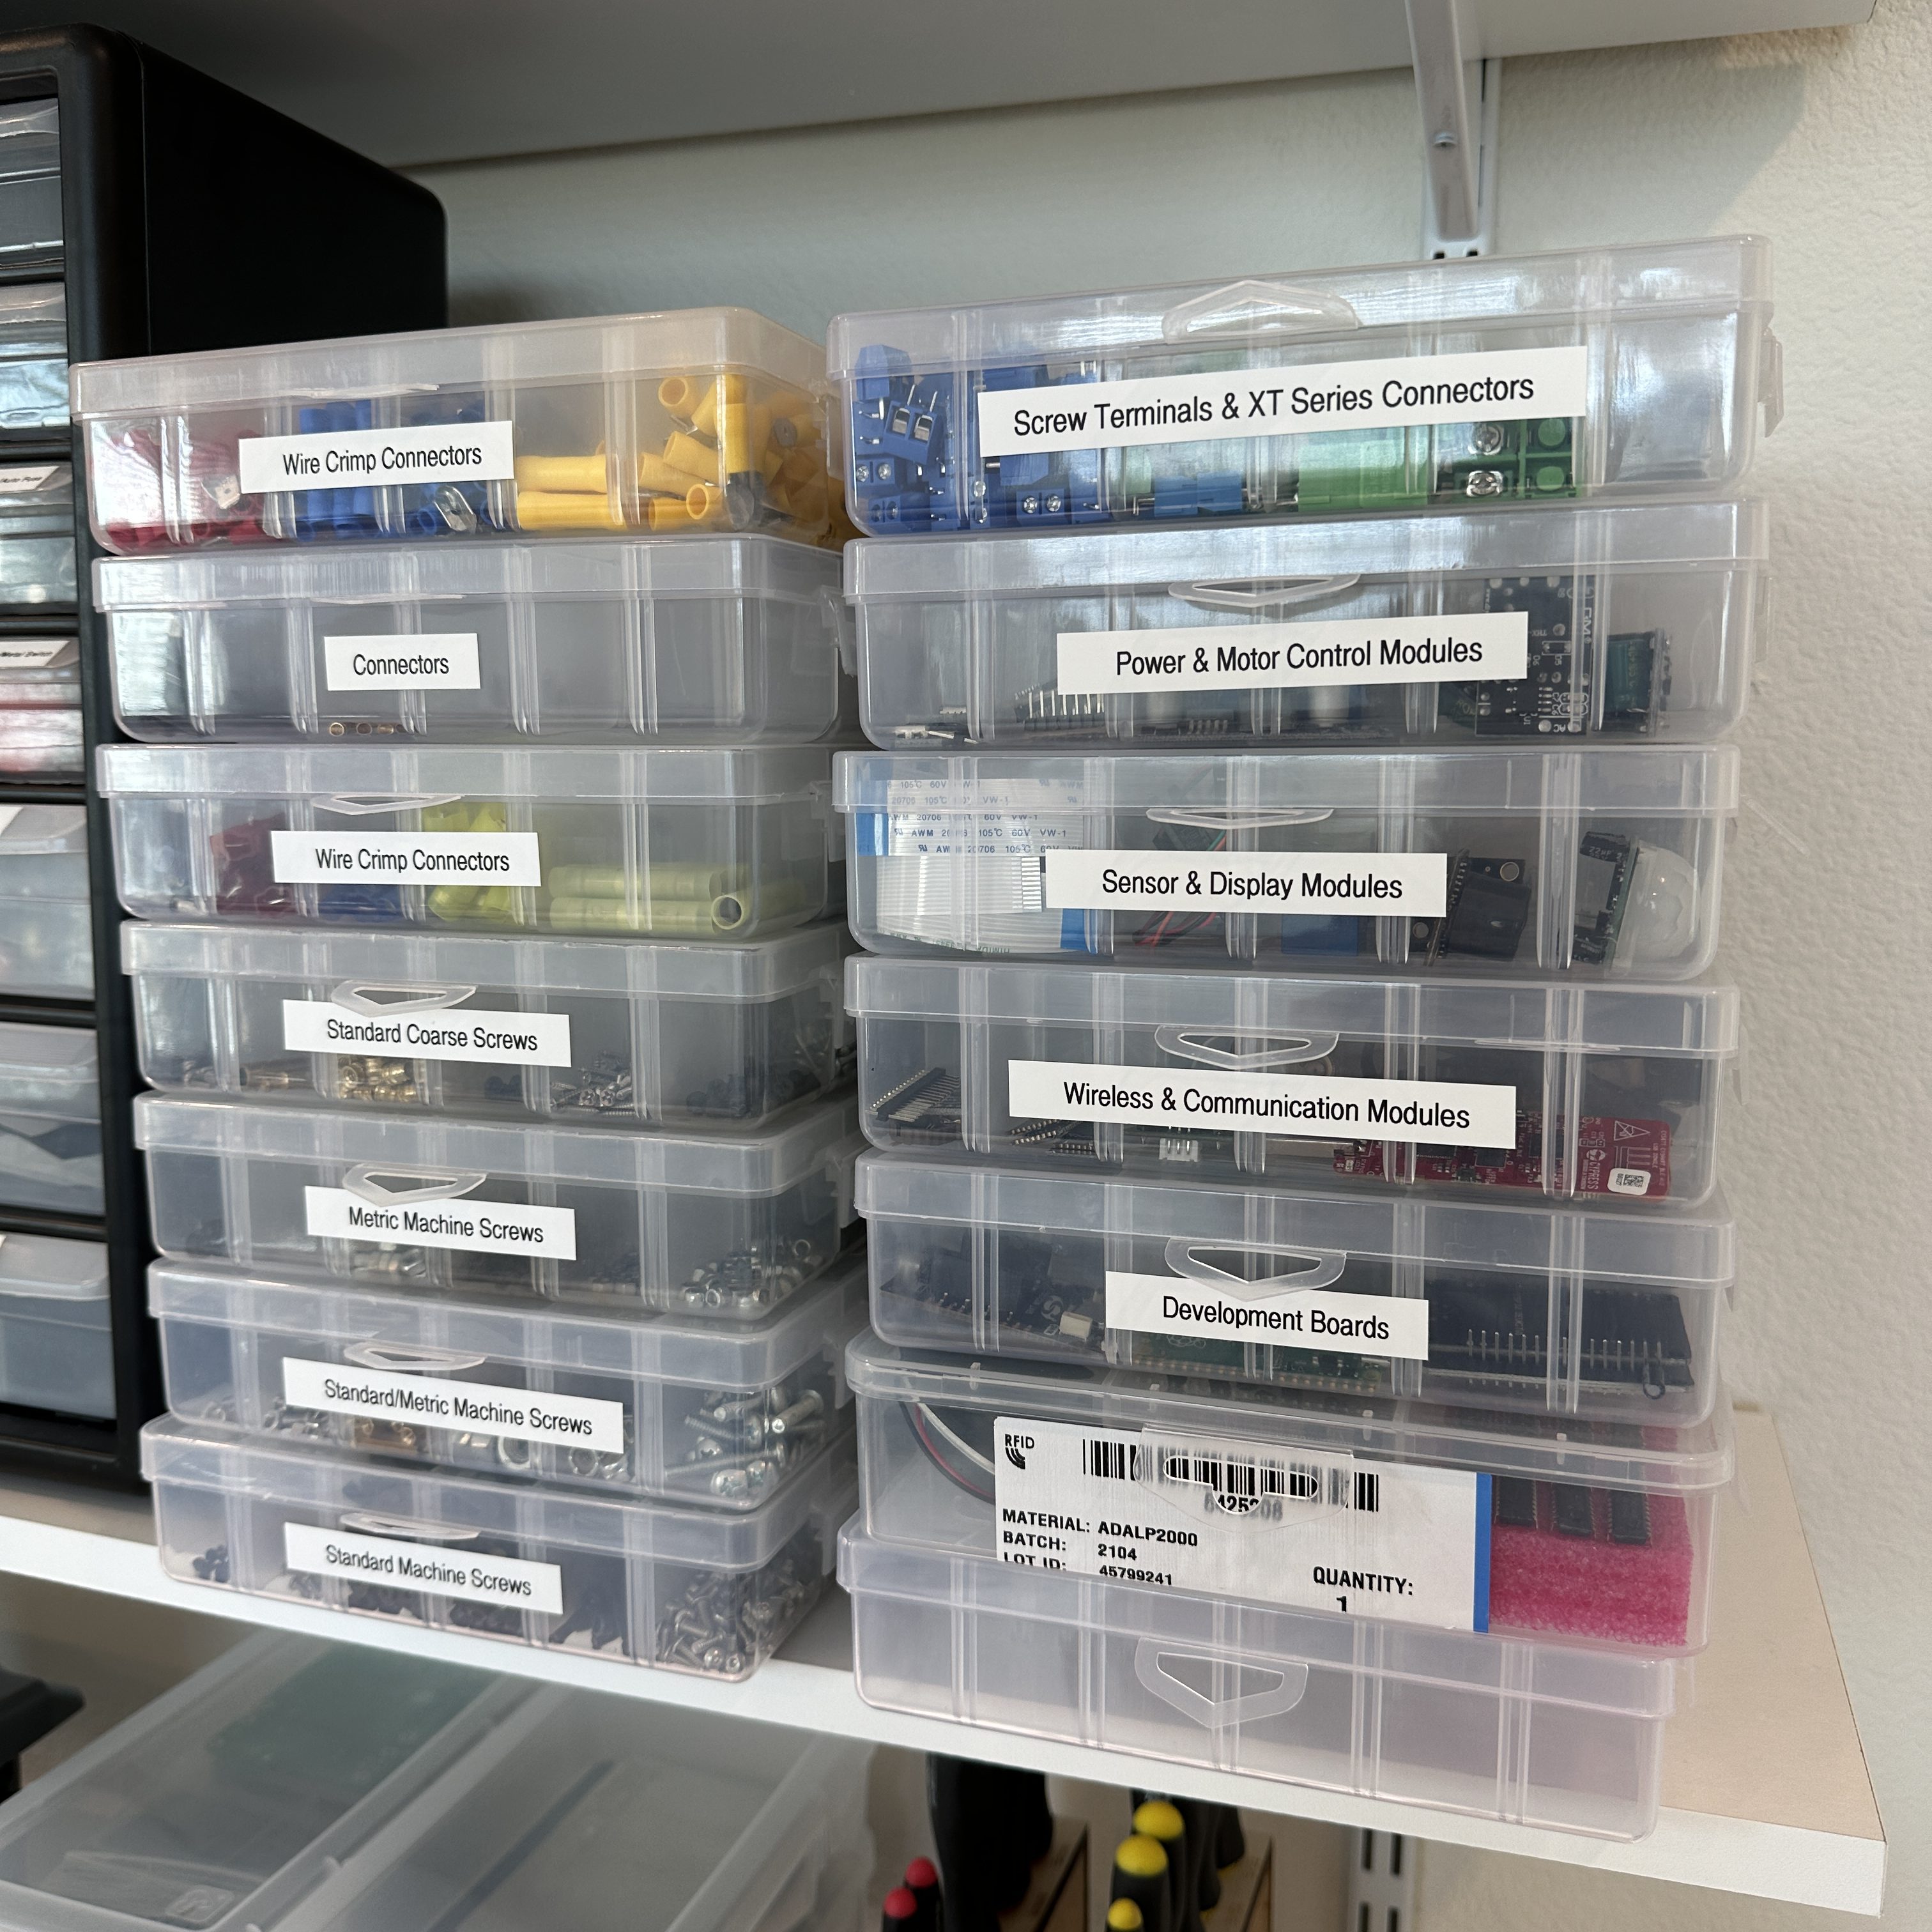
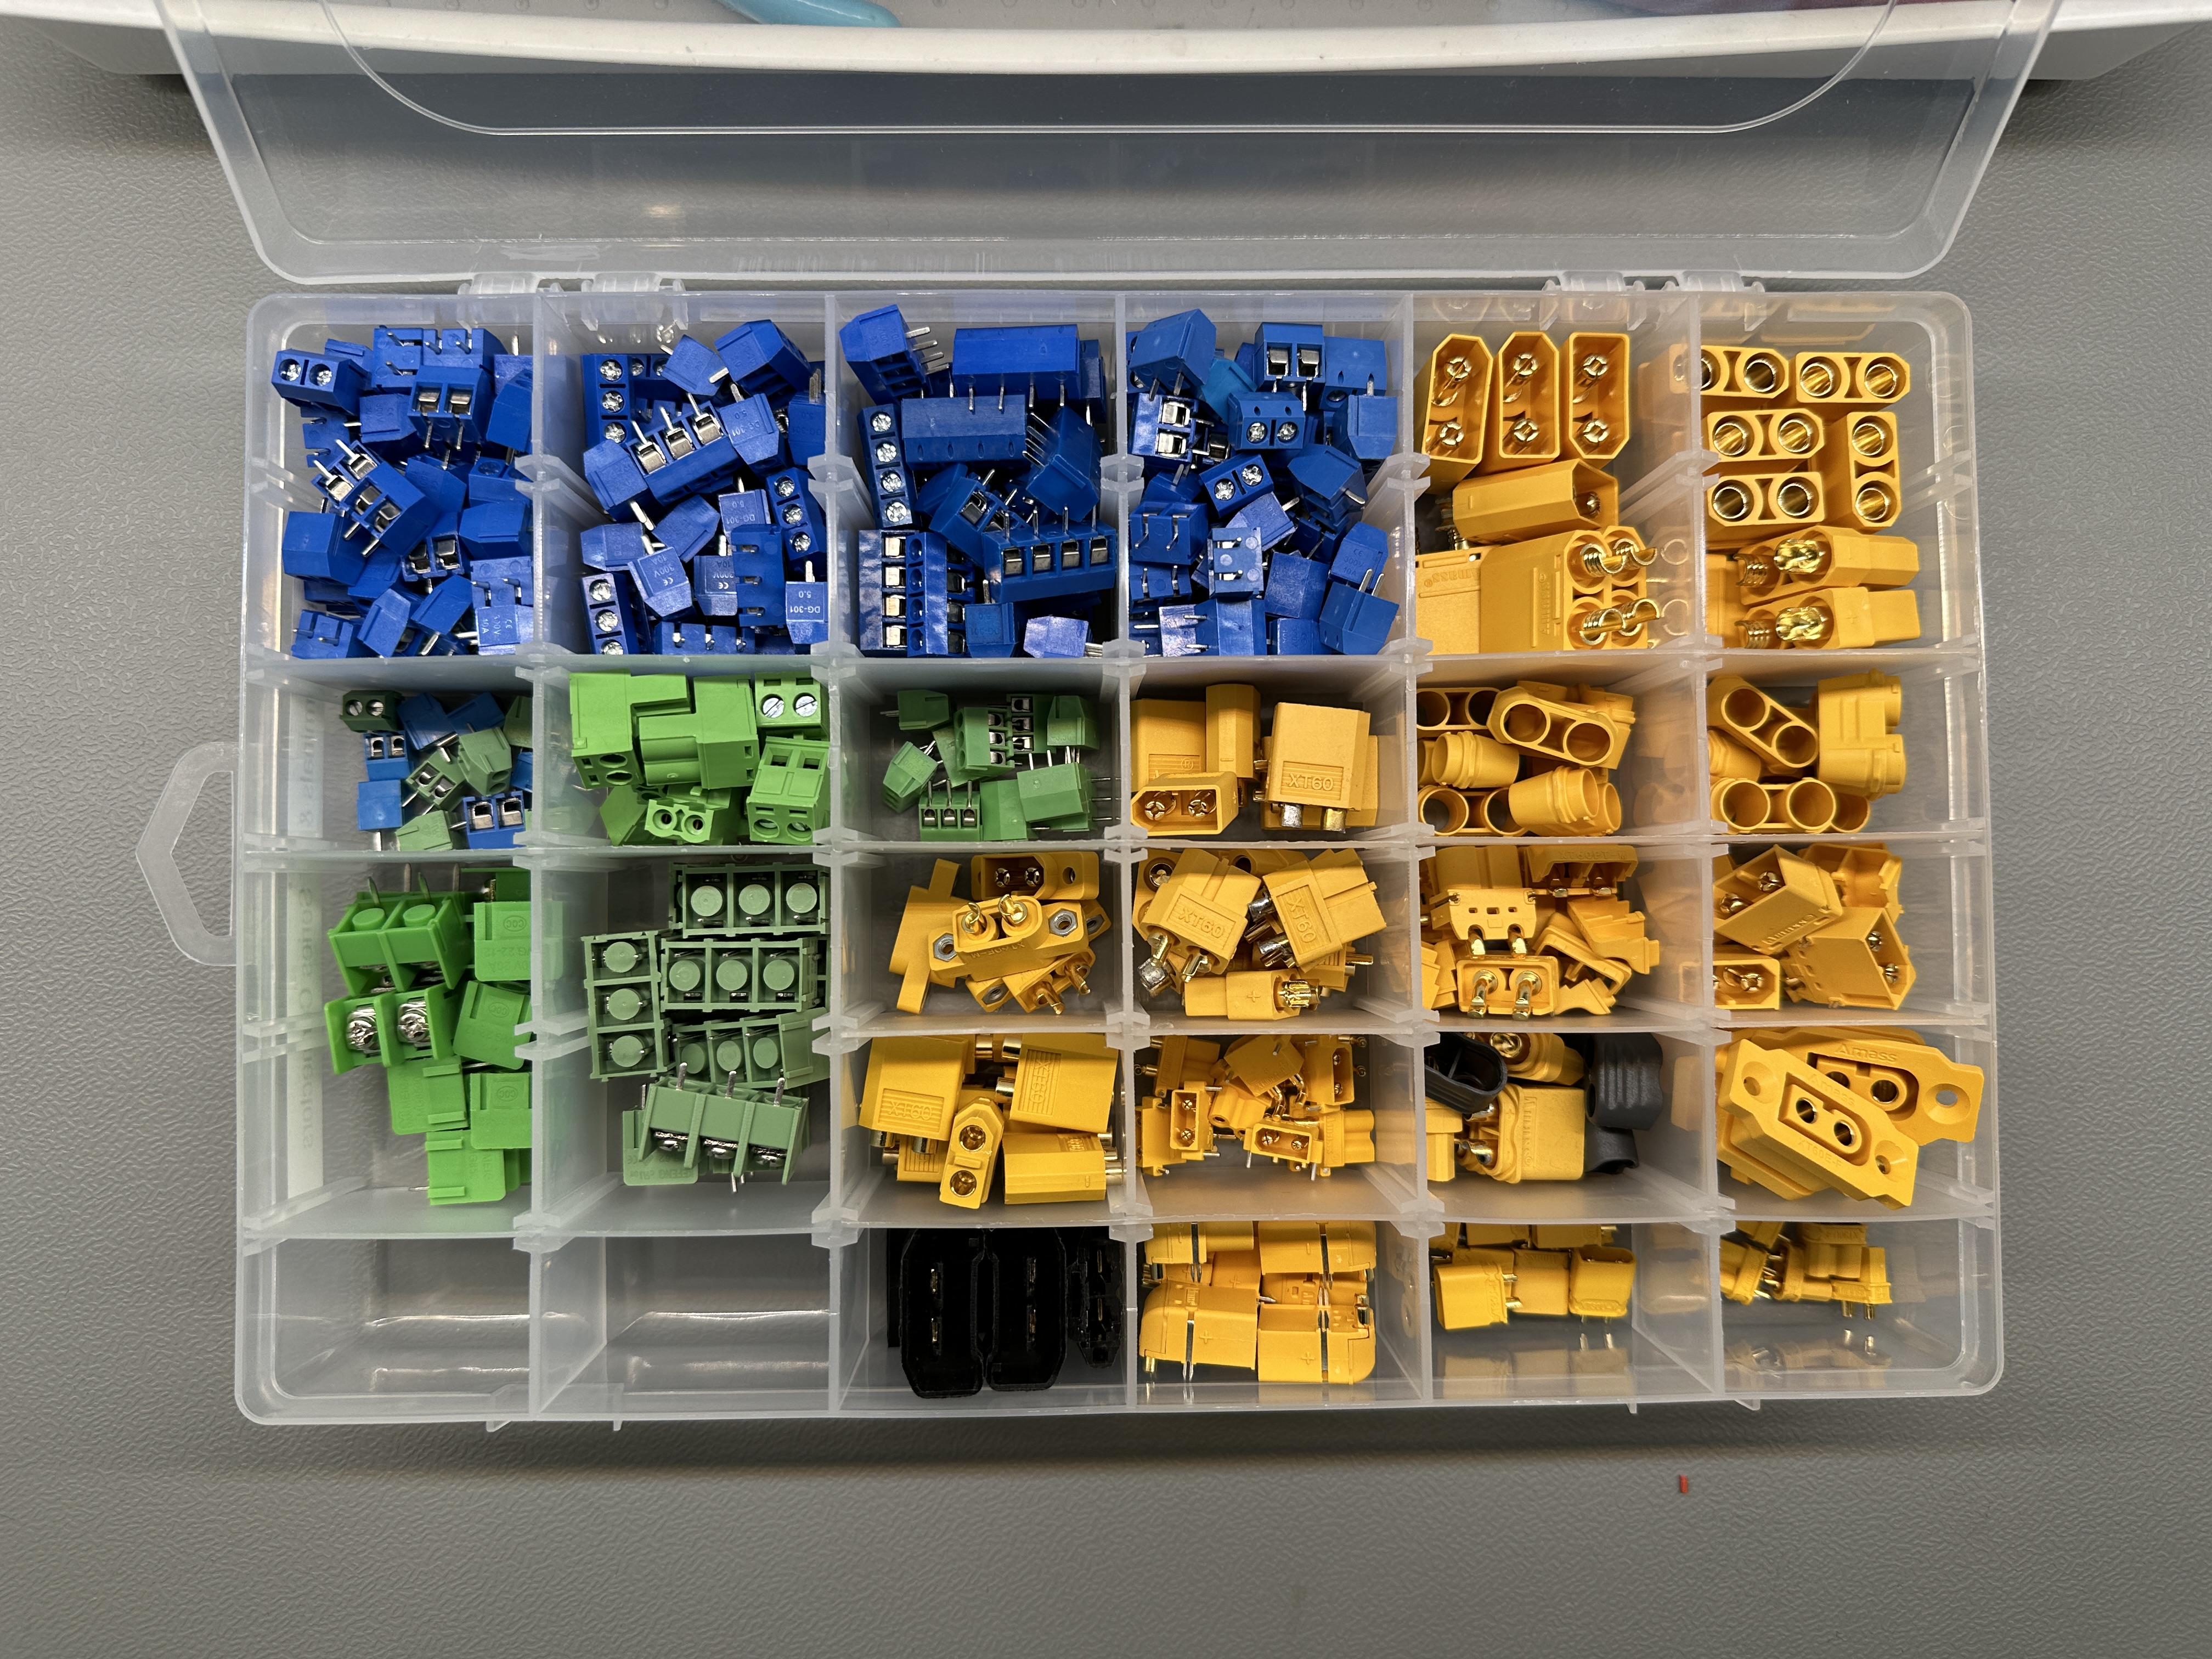
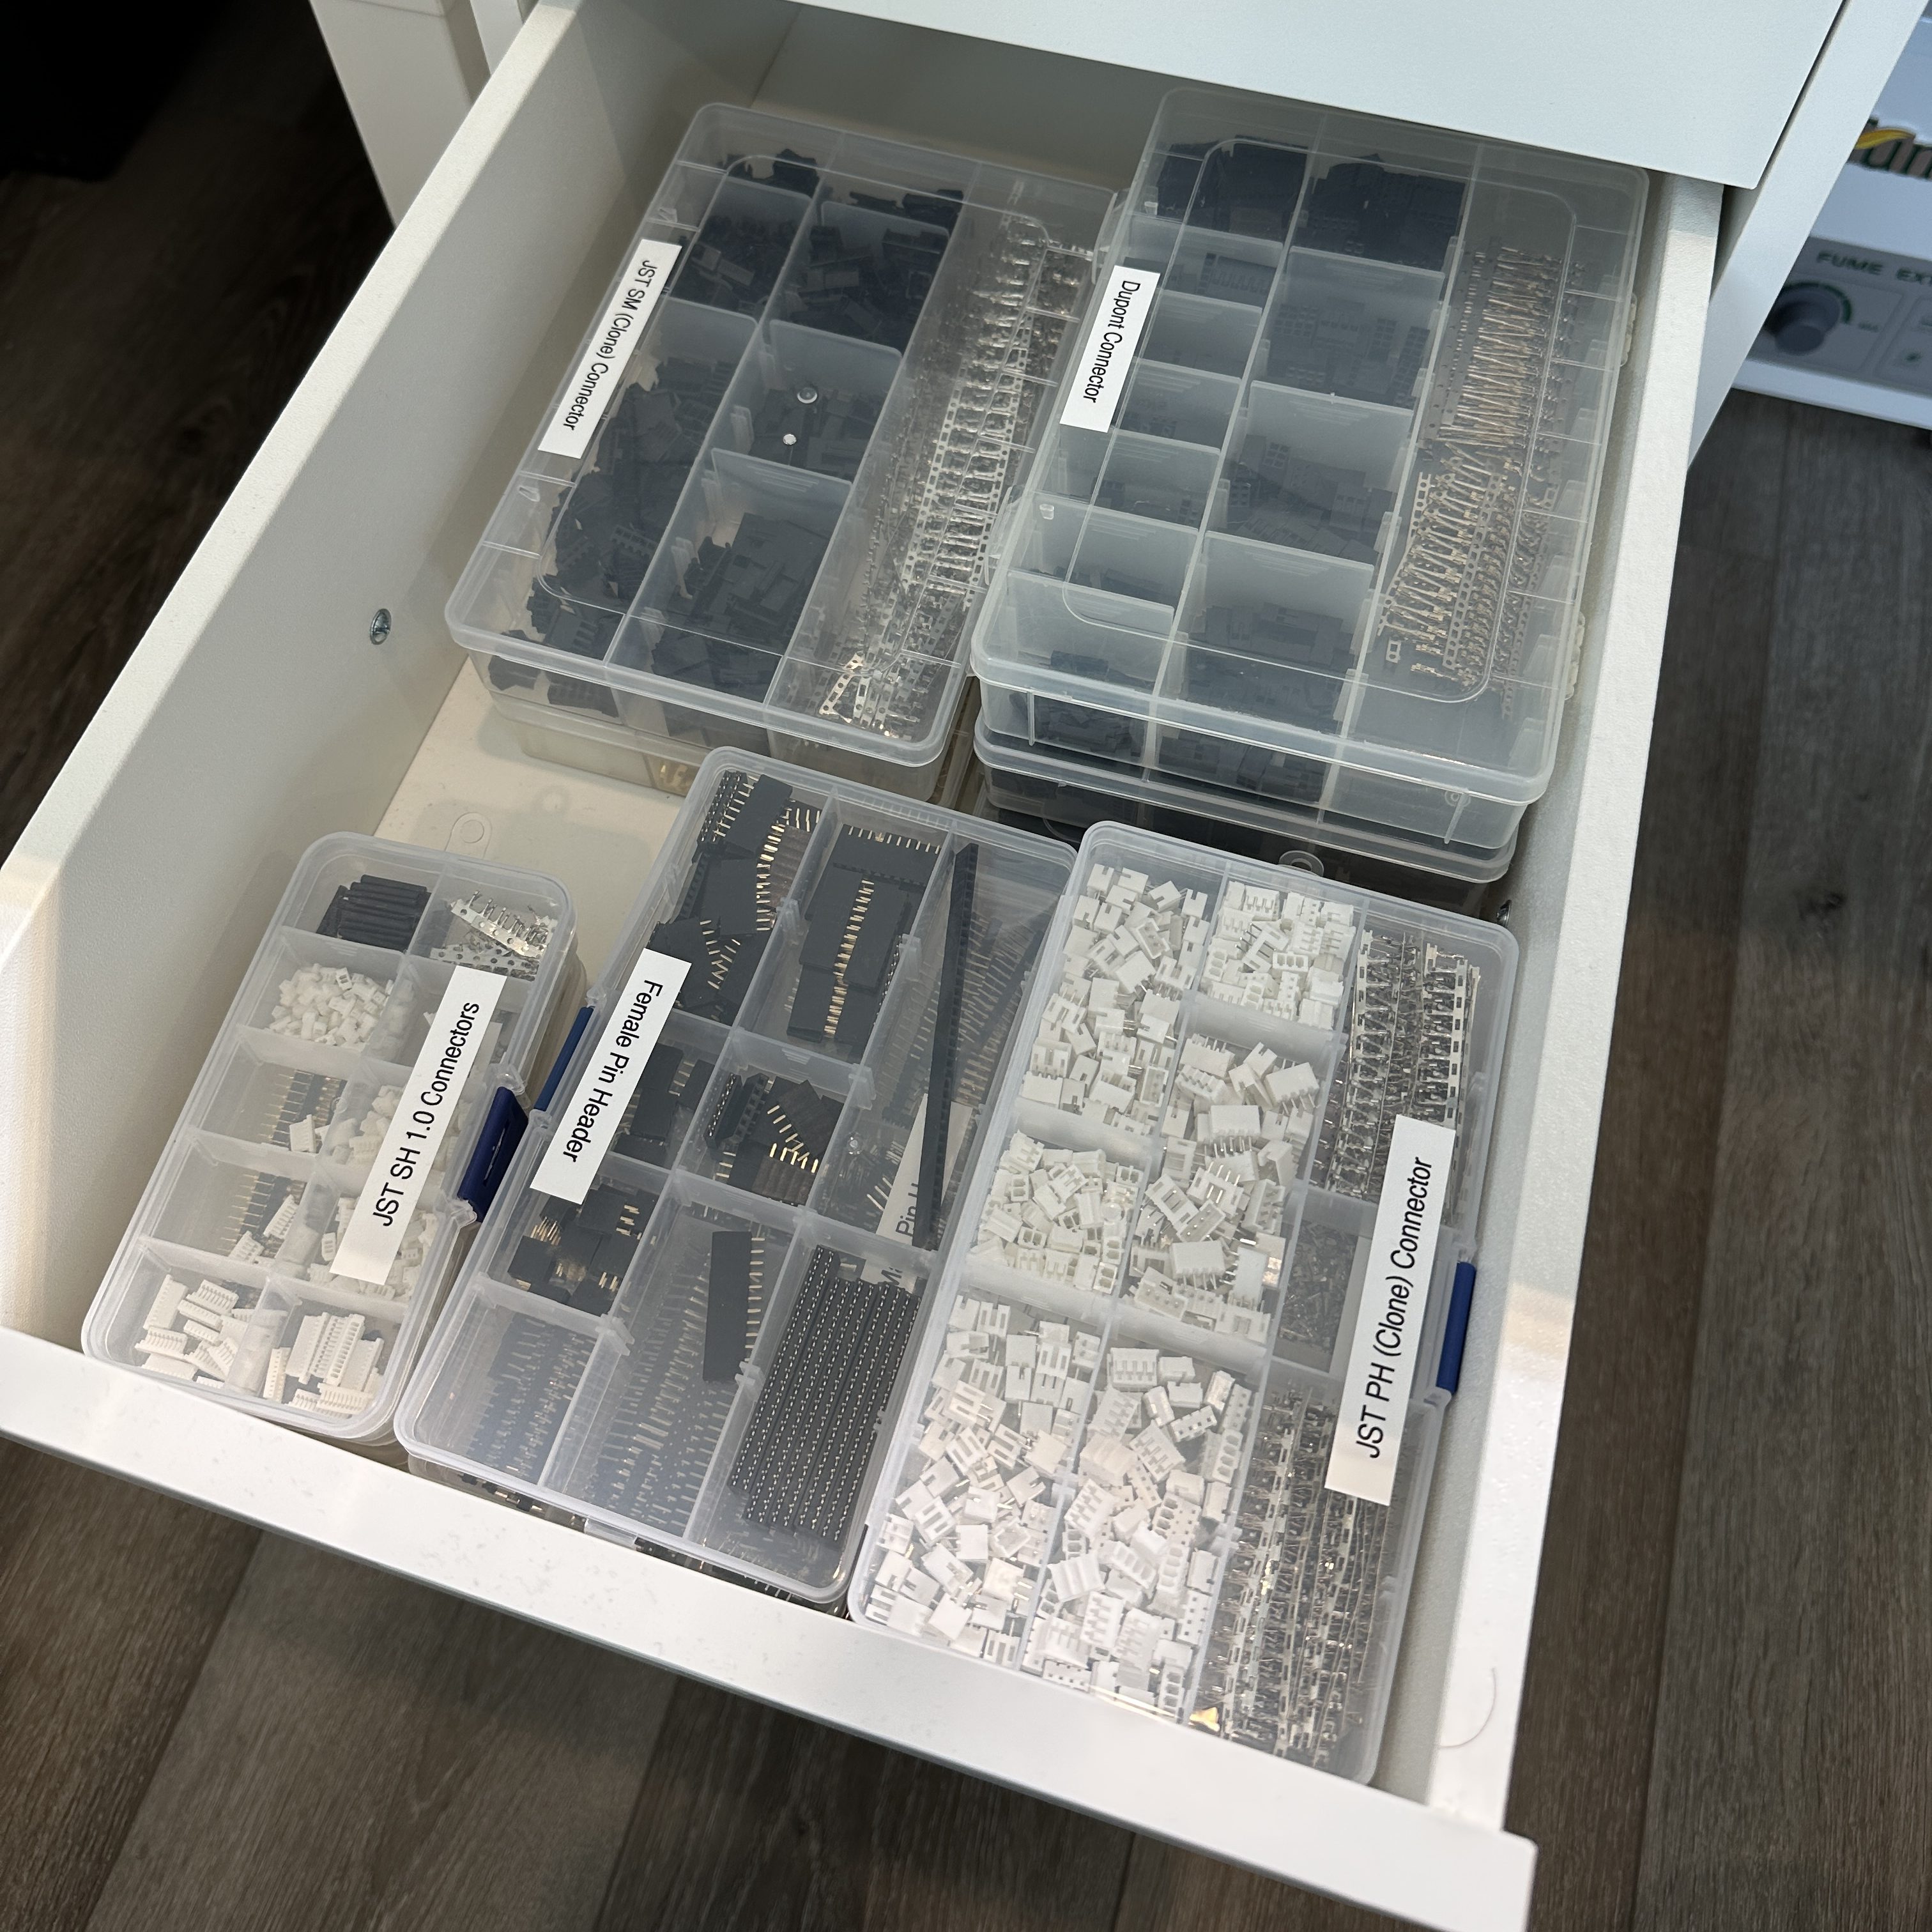
I mainly use 2 types of compartment boxes. One is the clear 10.8x7x1.8″ box that is cheap and good for a variety of parts due to its modular compartments. I store connectors, hardware, modules and dev boards in these boxes. I usually buy kits of thing from Amazon and each comes in its own unique box so I have found it better to shift the parts to these standard boxes. They are much easier to store and navigate when you are looking for something. These are stacked on the second shelf. I also do have smaller compartment boxes for some of the smaller connectors. For example all JST SH connectors go in a small box. But I have tried to have a few different sizes and stick to those instead of having each connector be its own type of box. Initially, that can work but as you add more types of parts, it gets annoying. The smaller boxes are stored in the main drawers. There are some things like connectors which come in so many shapes, sizes and use cases that I find it best to store them appropriately in different containers and different locations. My more frequently used connectors are in the drawer next to me but the less frequent ones are in the larger compartment boxes.
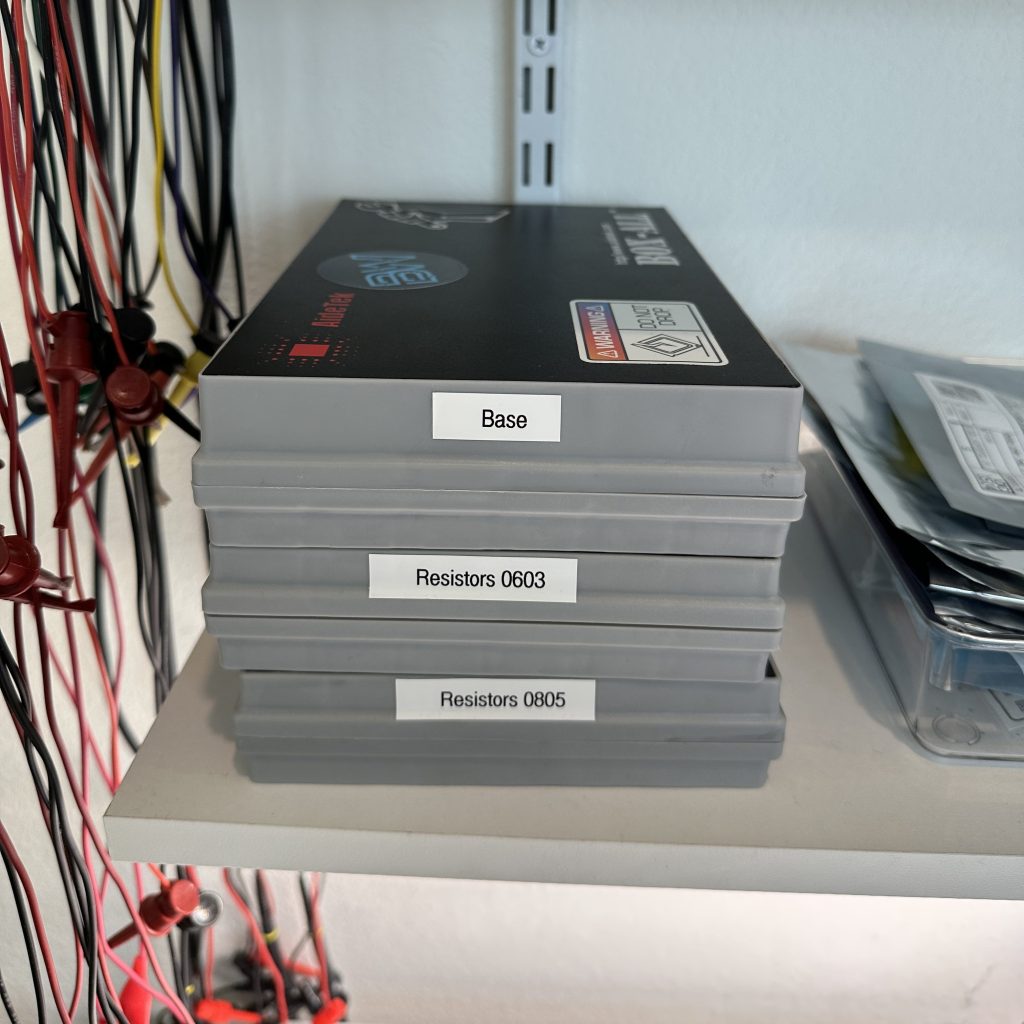
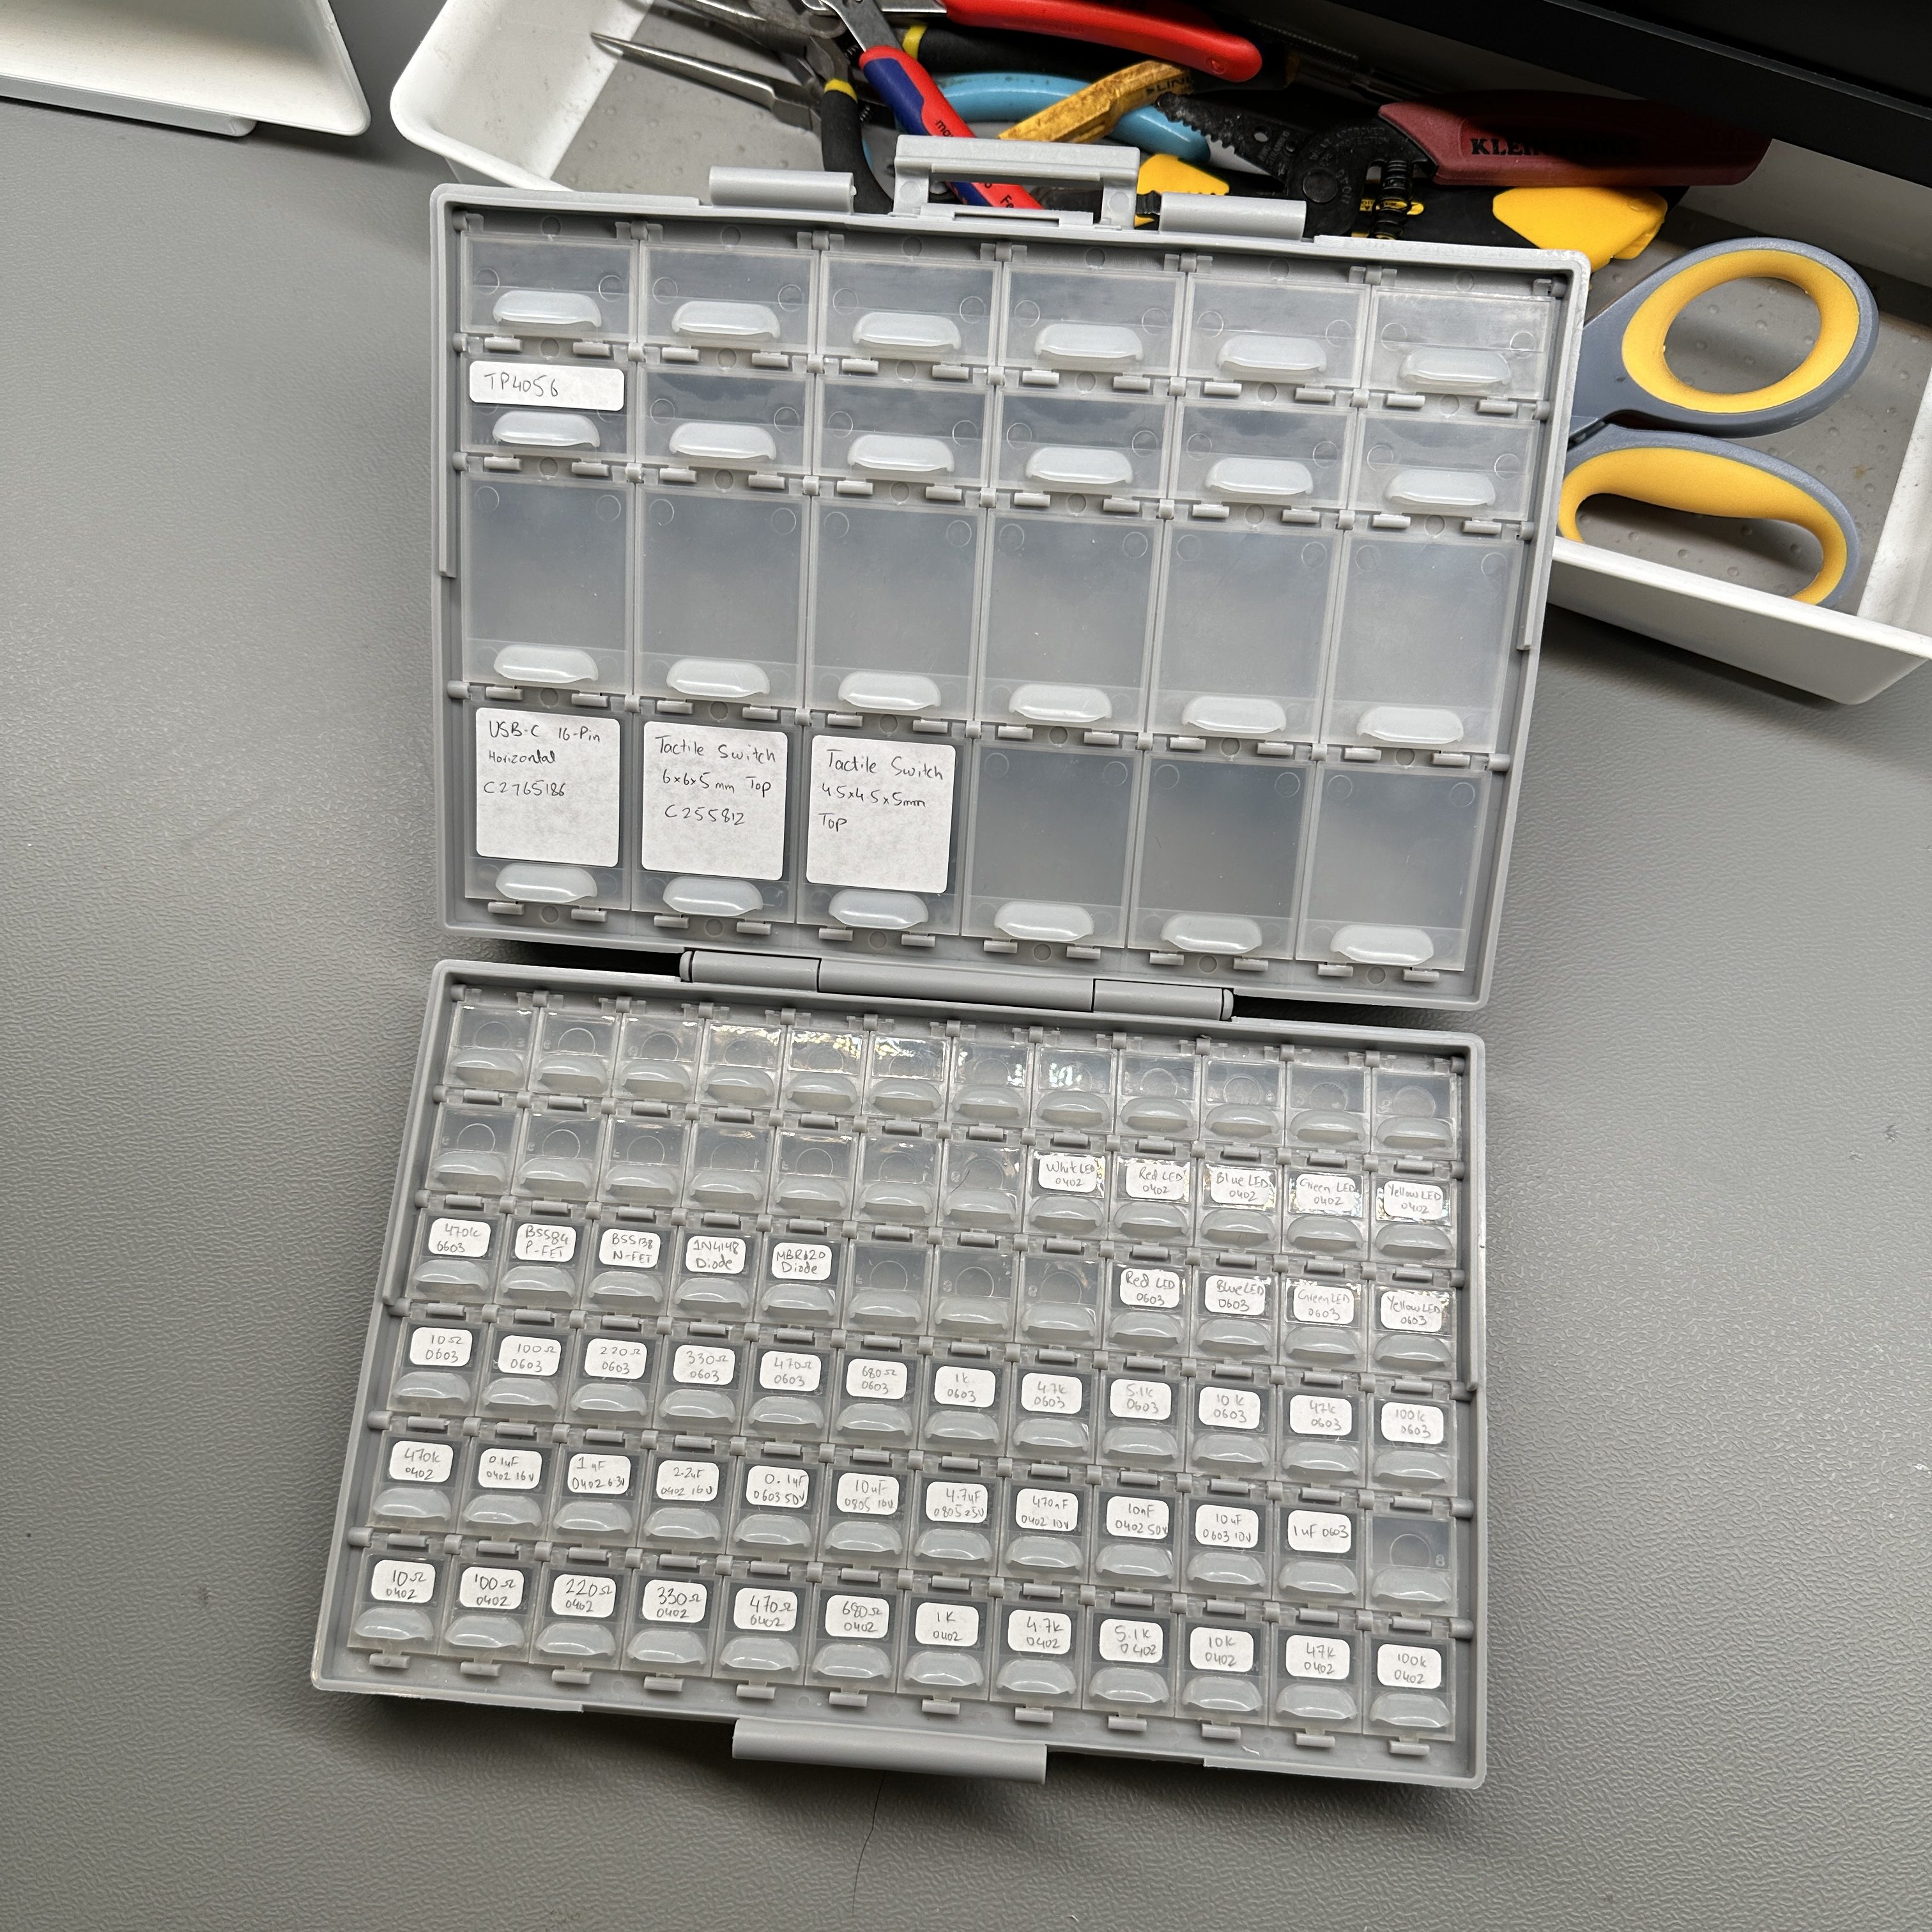
The other type of box I use is the Aidetek SMD component storage box. I absolutely love these things and they amazing to store a large number of components in a small volume. I have all my frequently used components in these boxes and I keep them on the first shelf for quick access.
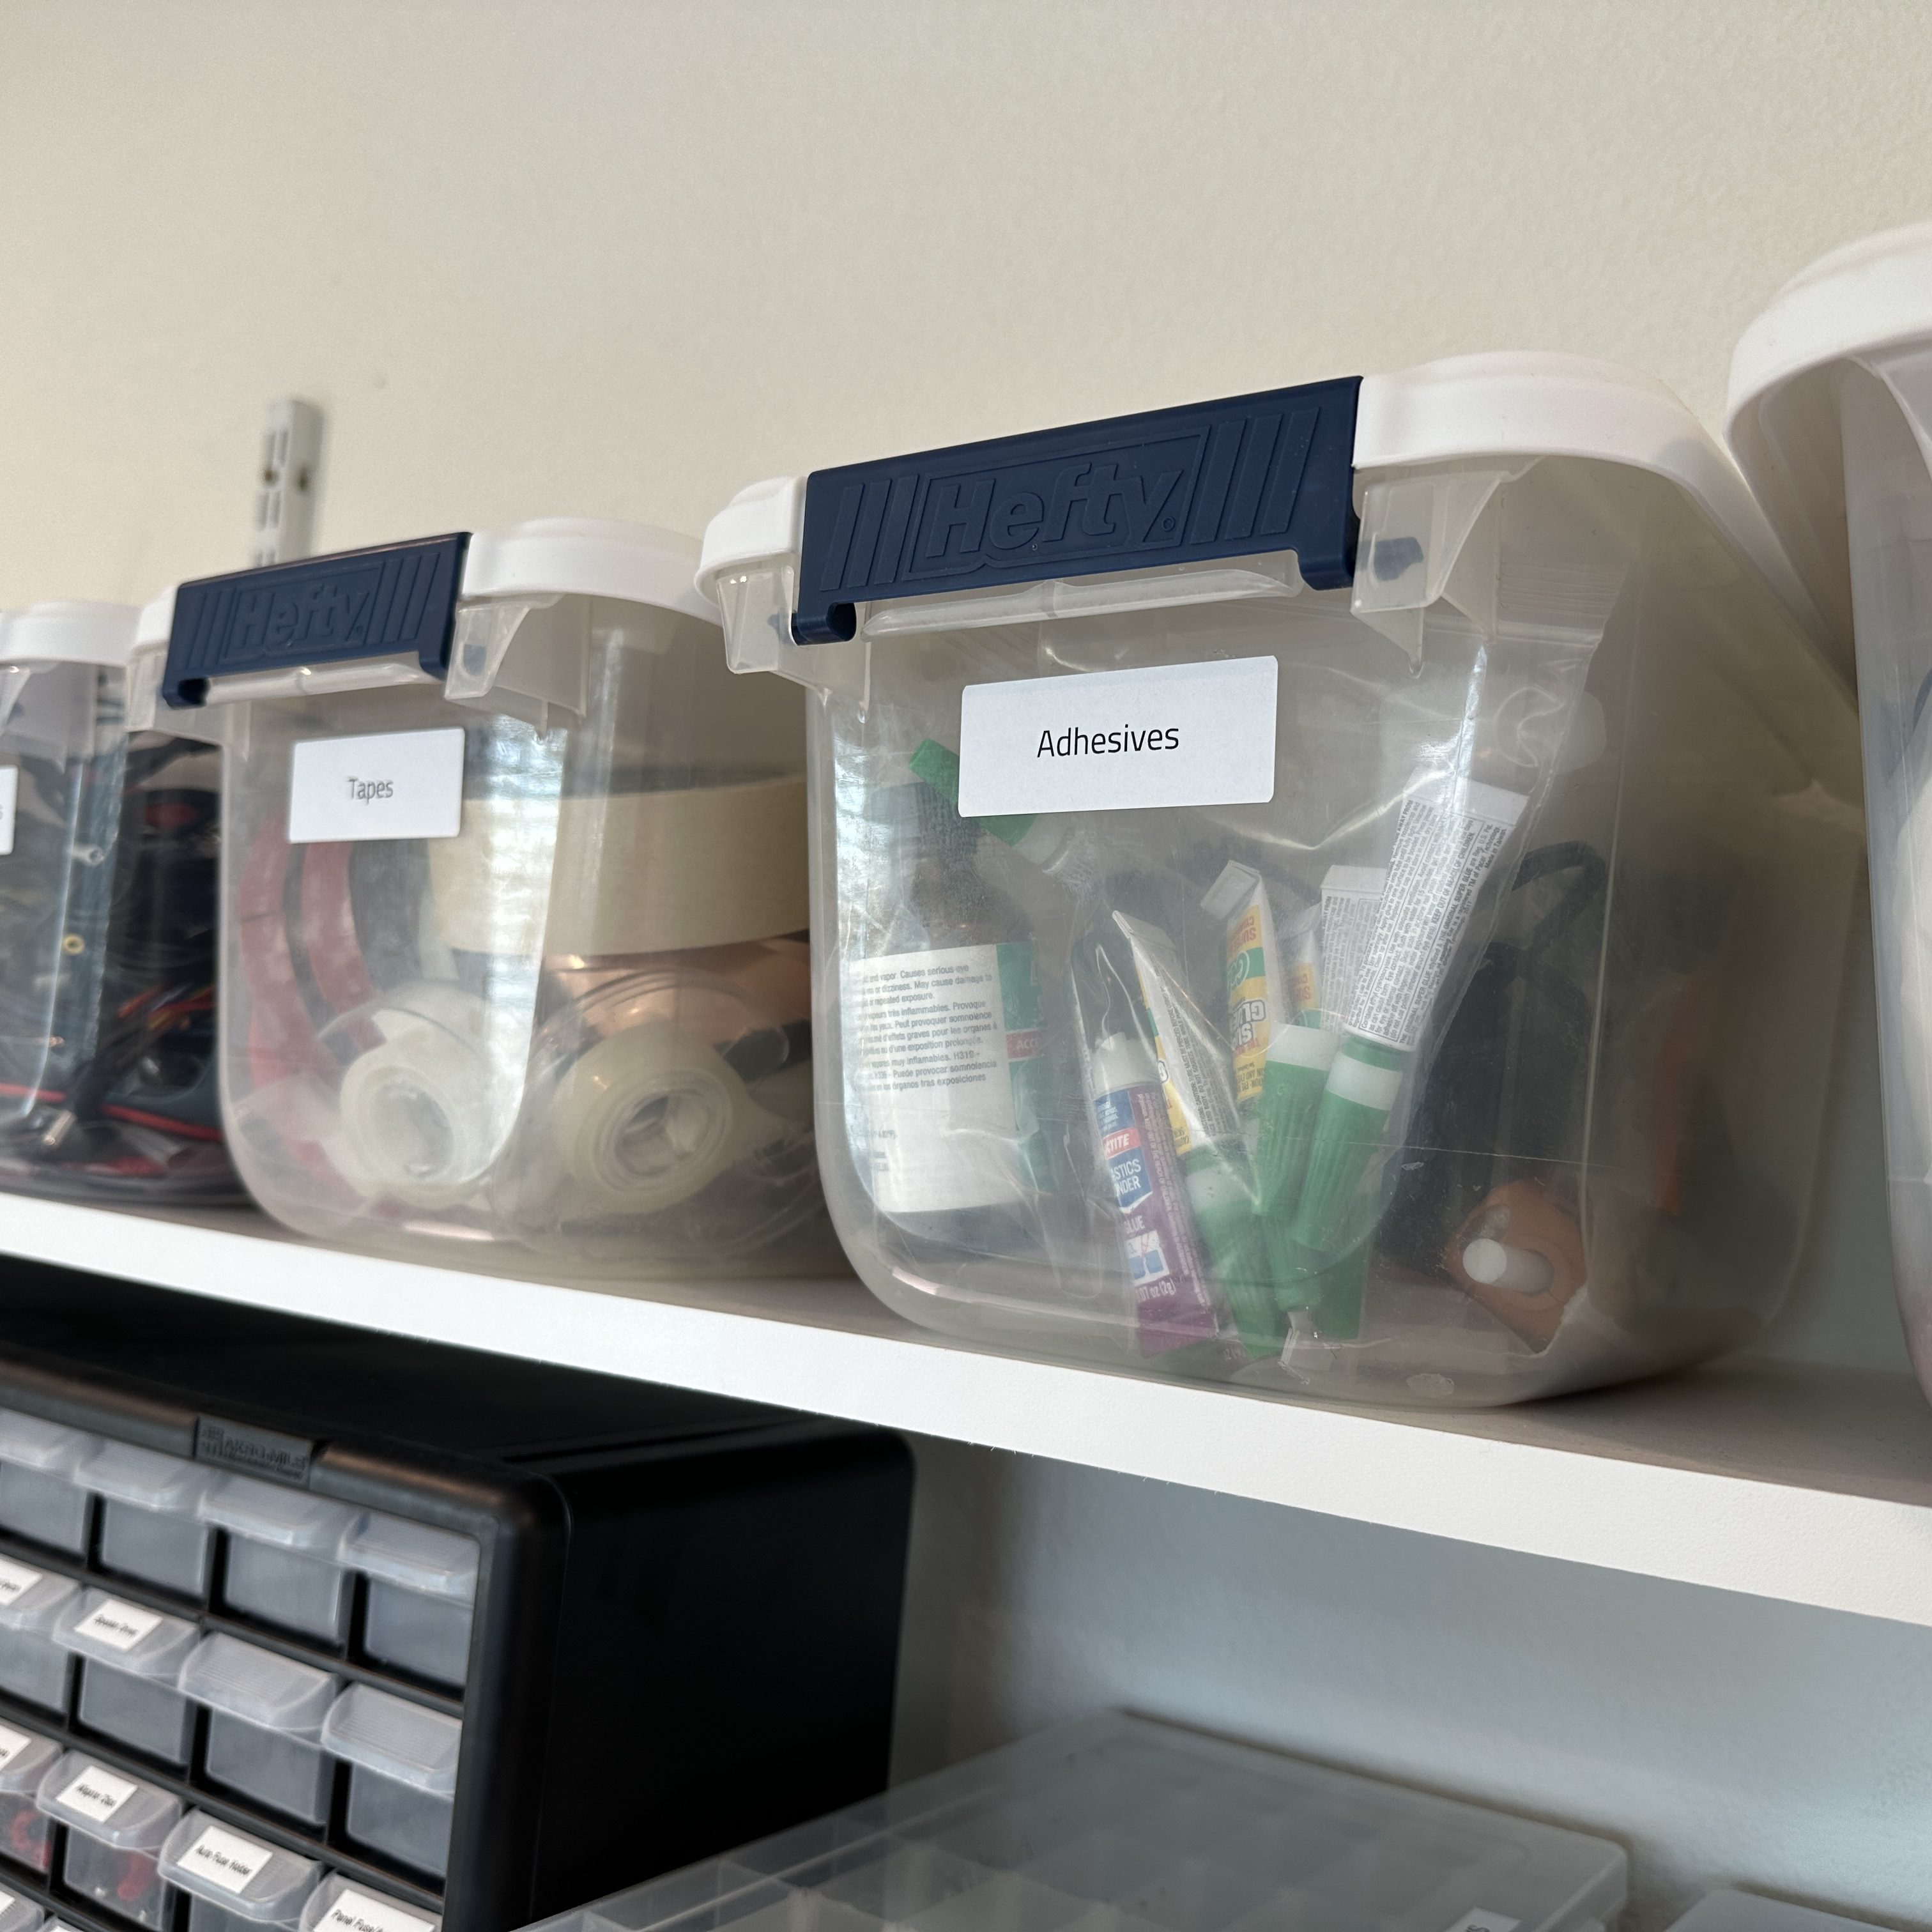
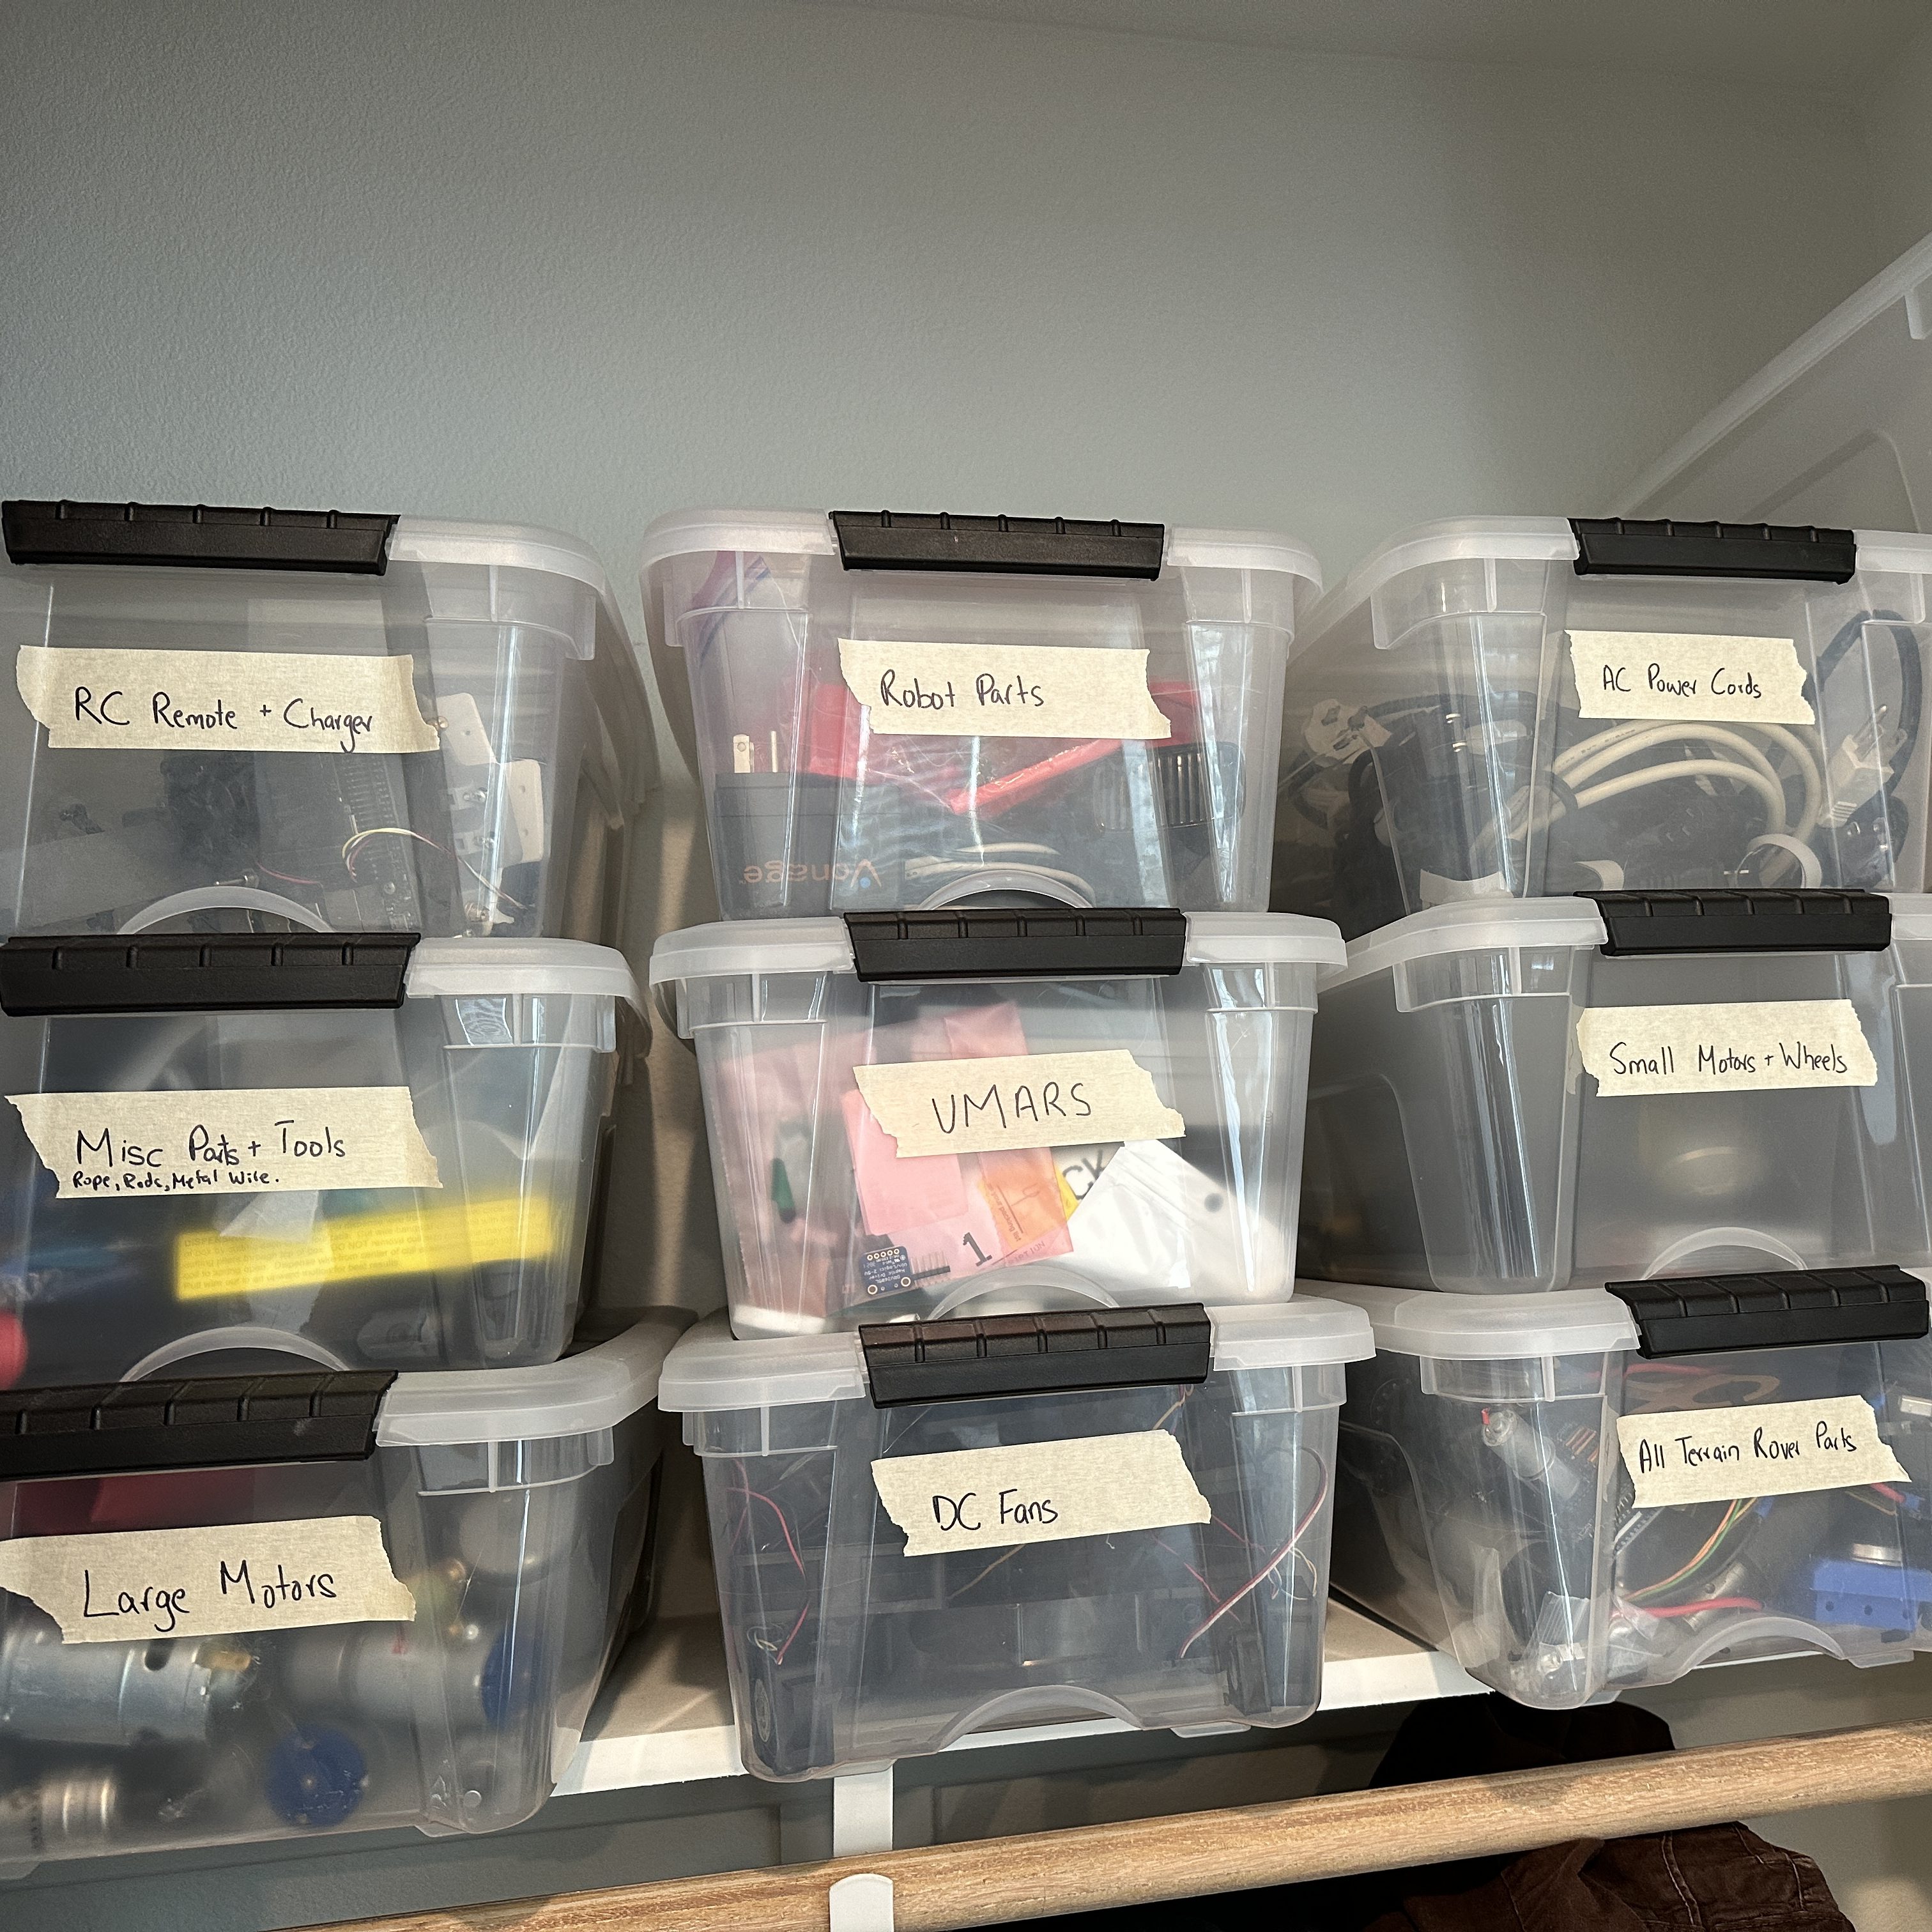
There is a lot of things that cant fit in either of the above two options so I use bins for those. Again, I have tried to use only two sizes so that its easy to store them and they look visually more aesthetic. The top shelf is taken by bins for larger things like tapes, adhesives etc. I have larger bins with parts in the closet that hold things I very rarely need to access.
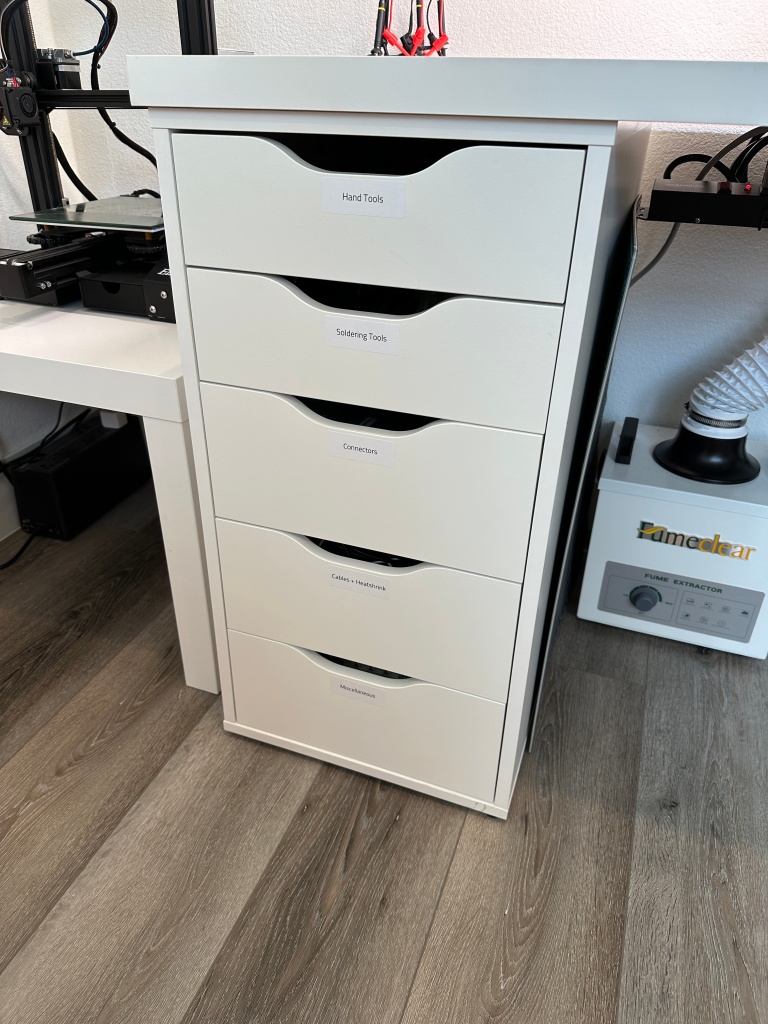
Drawers
The drawers on both ends of my desk are used to store a variety of tools, parts and consumable supplies. But more importantly, I use small organizing containers to keep things inside the drawers fairly well organized. I use these ones for the shallow drawers and these for the deep ones.
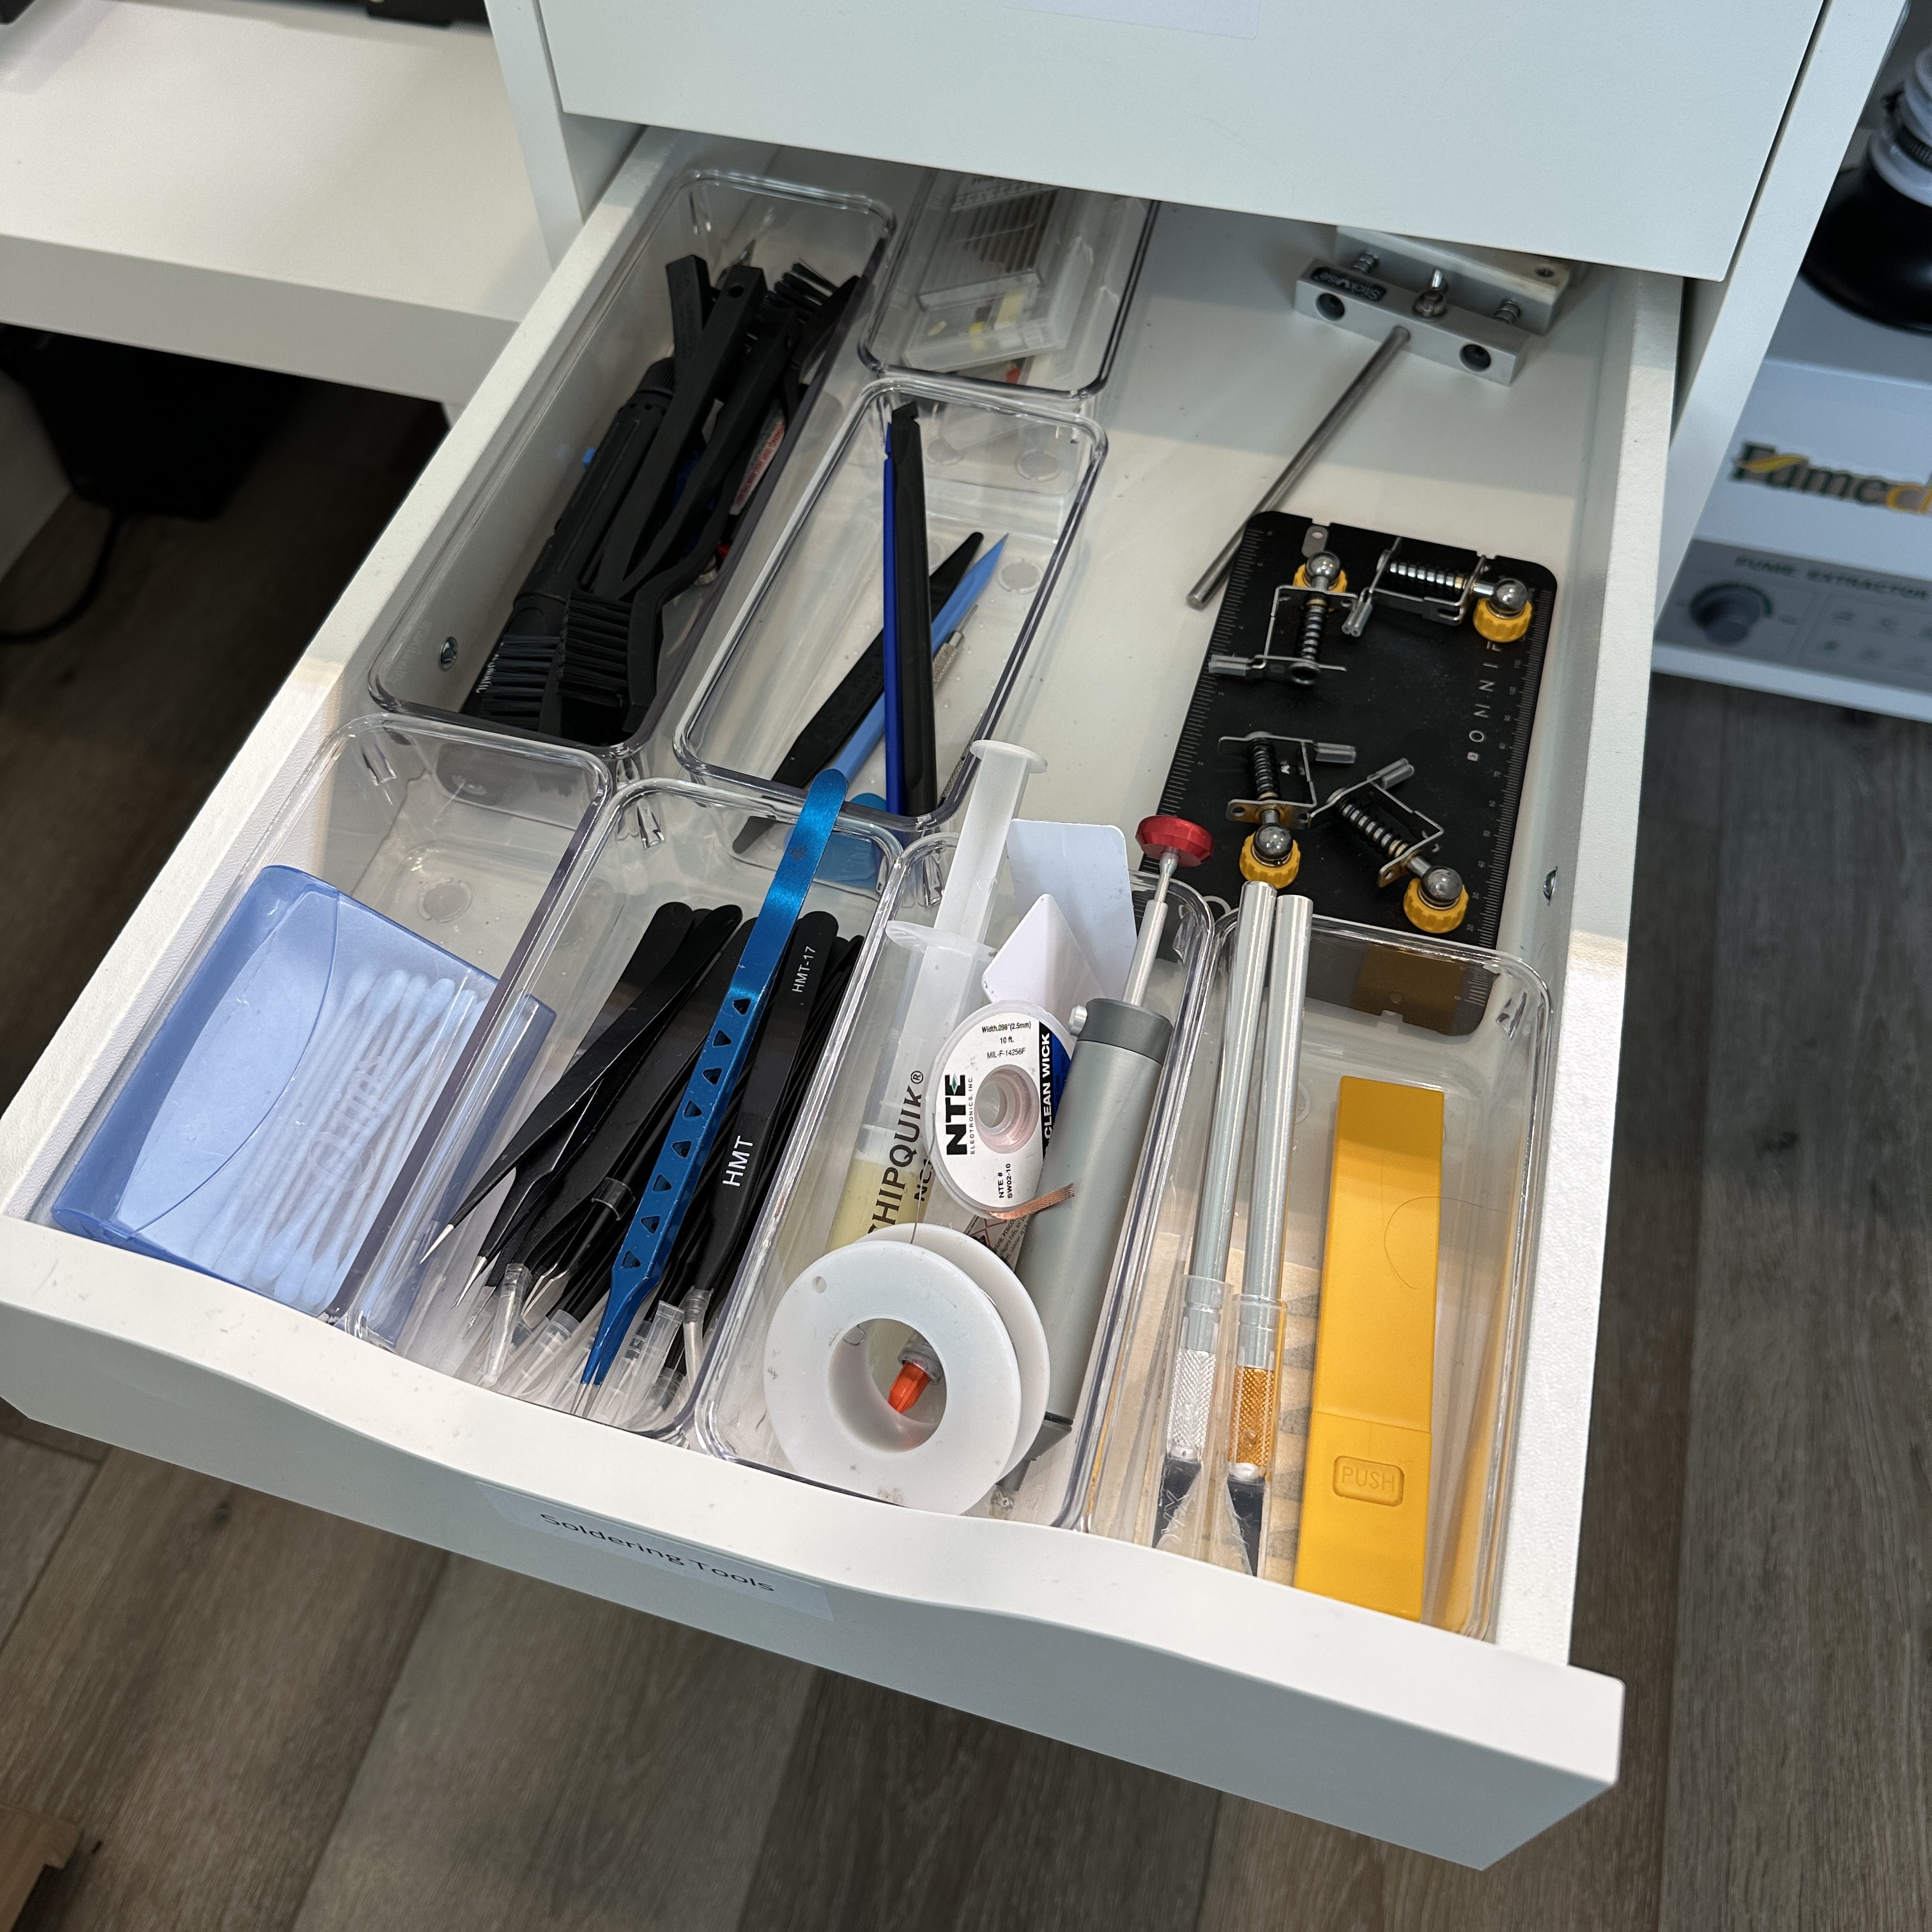
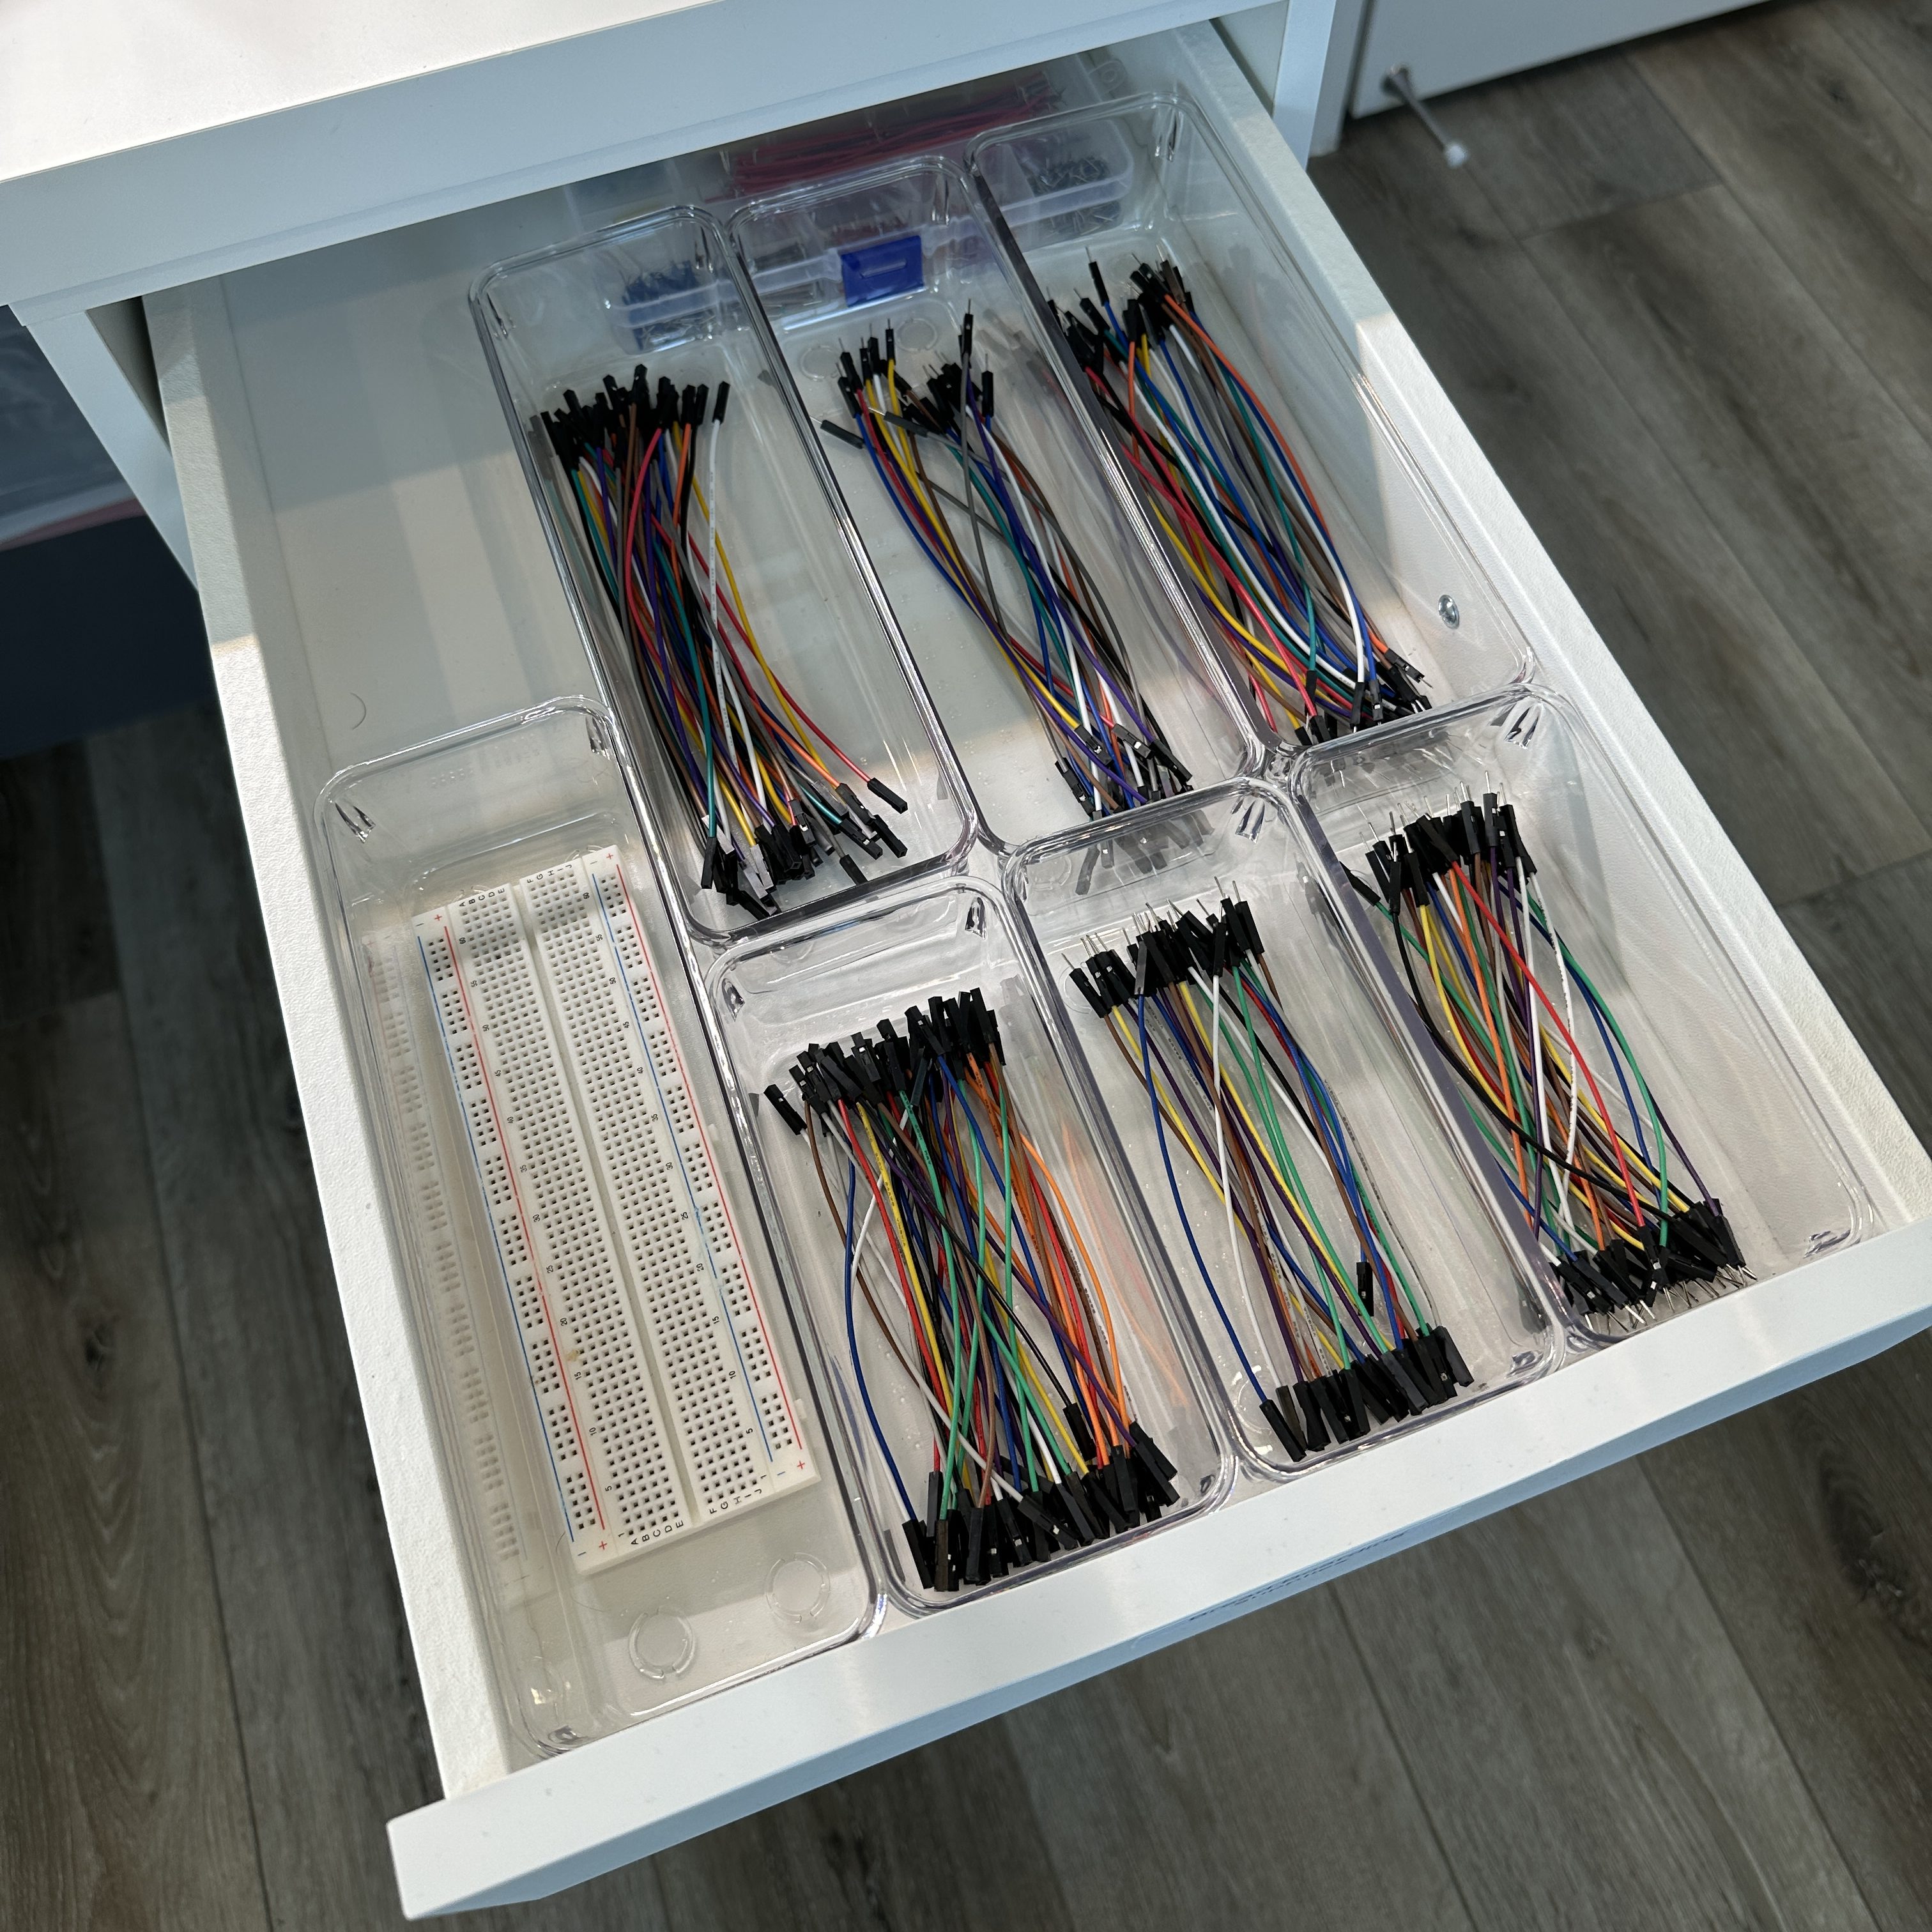
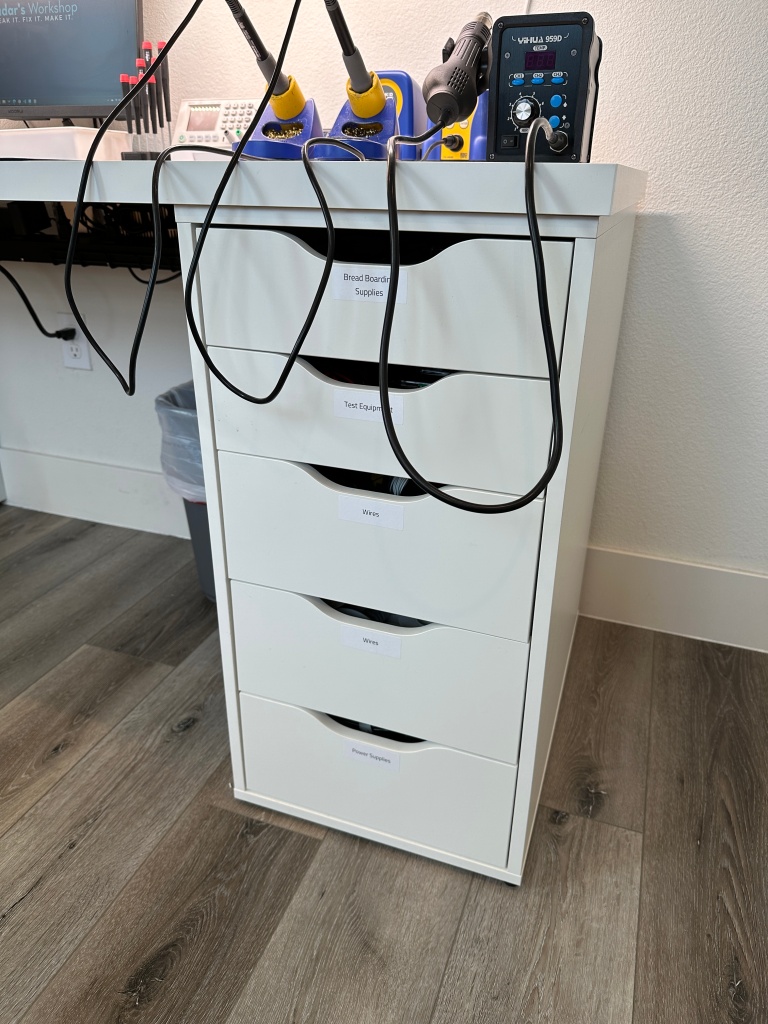
The drawers I can access most easily are the top left two drawers and they hold more tools and soldering supplies. The top drawers on the right are unfortunately blocked by the soldering station wires so I keep things I use less frequently in those.
In the lower drawers, I keep more supplies and parts like wires, heat shrink, connectors etc.
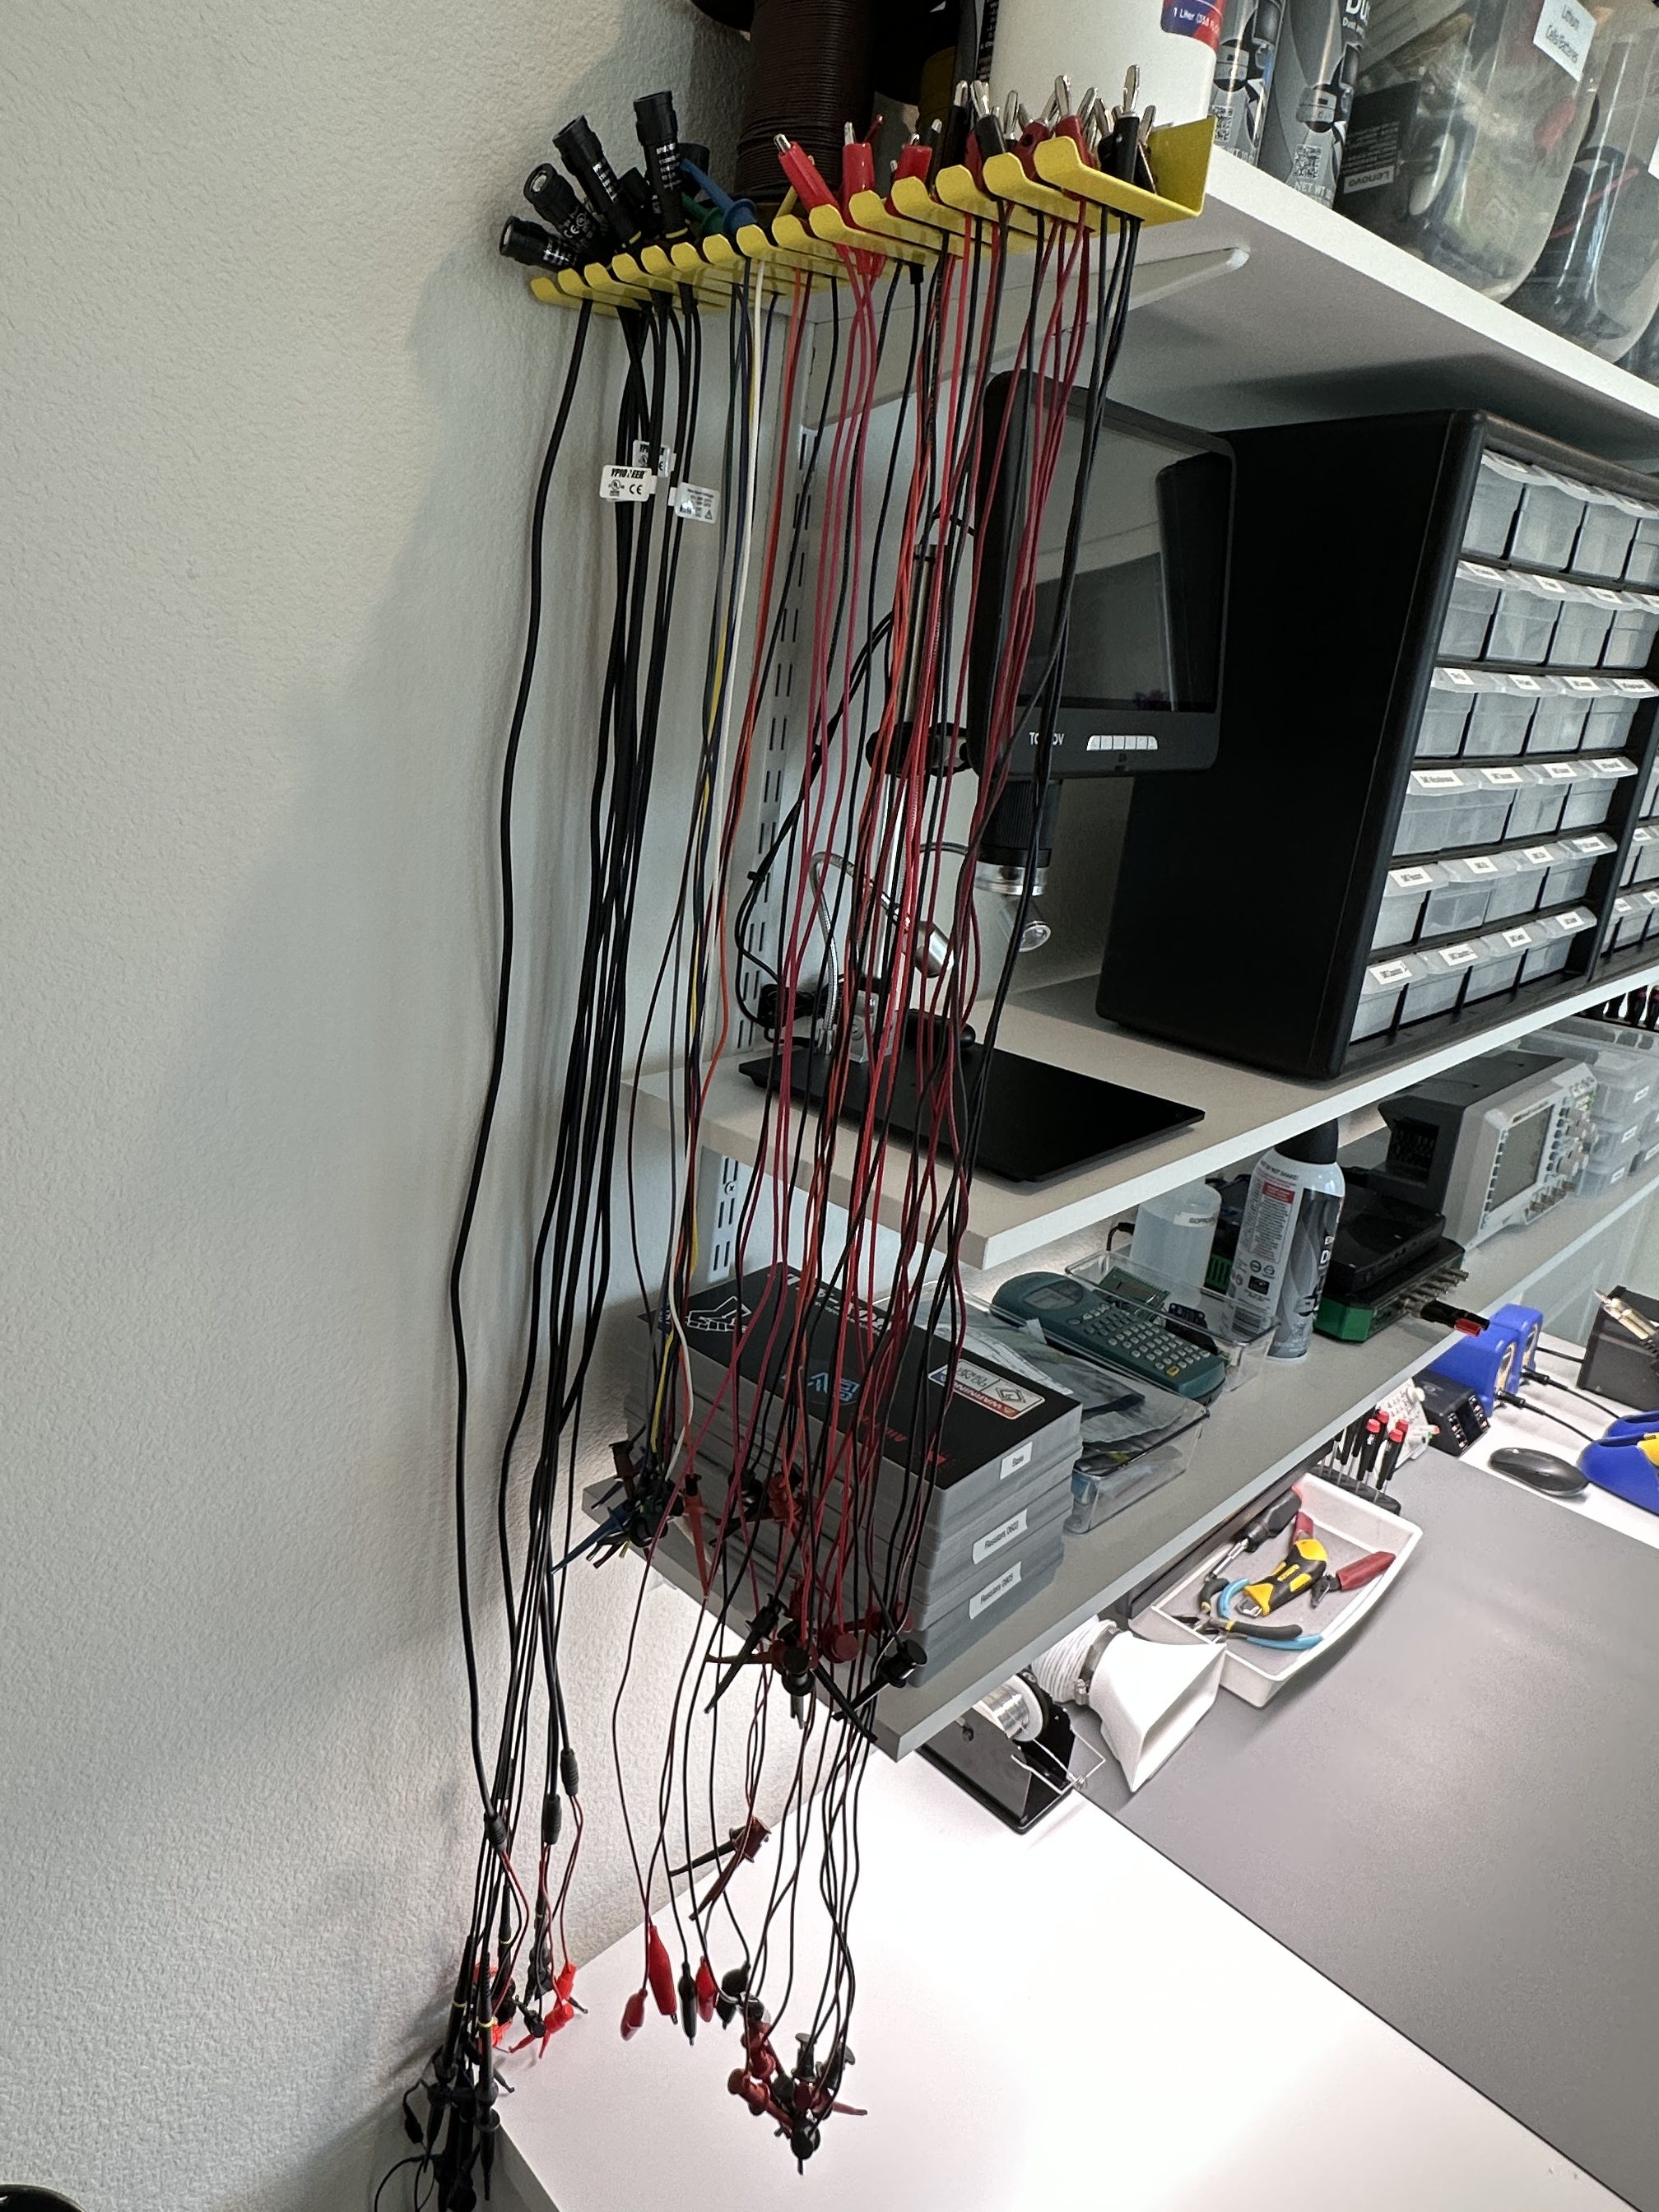
Test Lead Holder
On the left edge of the shelves, I have a test lead holder that I use to hang all my test leads including oscilloscope leads, Minigrabber leads, alligator jumper cables etc. Not only does this keep them straight, it also keeps them untangled and ready to use.
Component Inventory System
I have more than a thousand different electric components for PCBs and trying to find which one I have became very time consuming. So I spent even more time coming up with an inventory system for the components. The system is based on Airtable and it stores entries for each component. It automatically generates a nice label that I can use to re-bag the components since they consume so much less space in my bags compared to what LCSC, Digikey etc. send them in. I also have automation scripts to add components into the database from CSV files.

I will go into much more depth on the inventory system in a separate post that I will link here when its up. There are a lot of details about the system I want to document and share.
I have used a lot of different tools, parts and supplies over the years. Slowly, I have moved towards the best balance of quality and value in each of these categories. In the following sections, I will go over my current choices in each category. As you work on projects, you will add more stuff based on project specific needs. Links are provided to where you can buy everything. I have also added what I like about each item based on my personal experience using them.
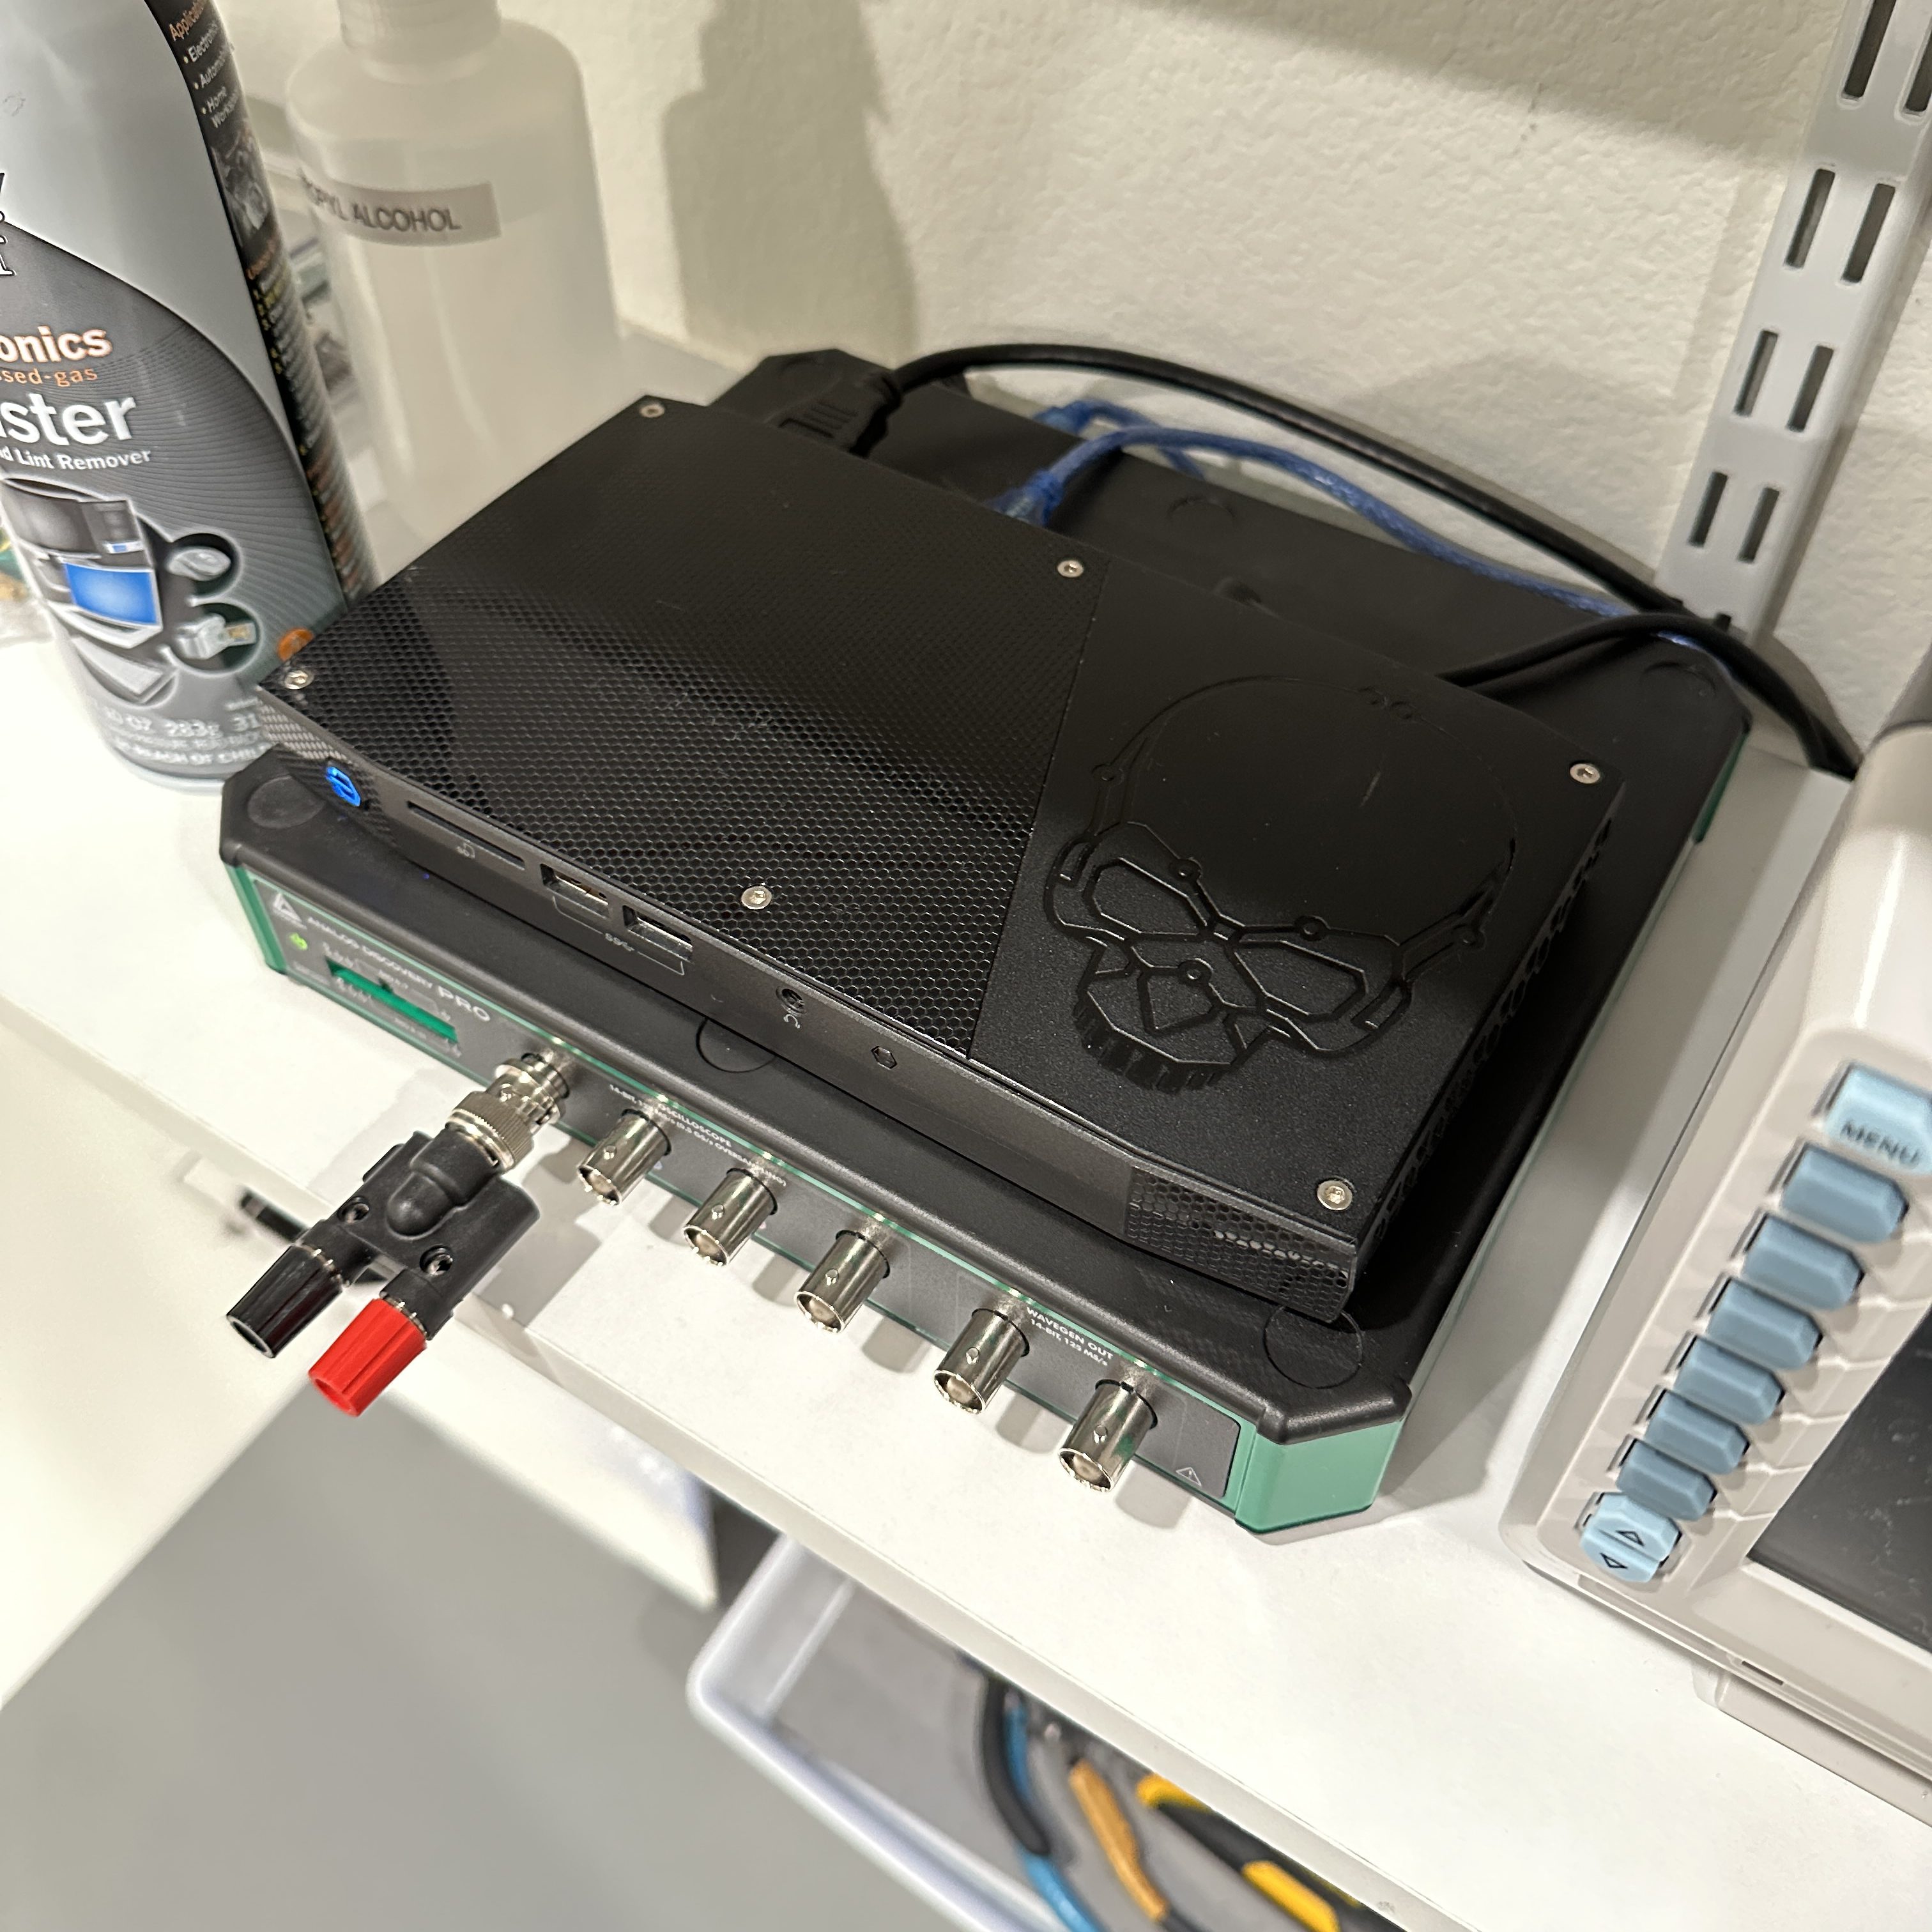
Test Equipment
Here is my current selection of test equipment. I don’t work on projects that have high precision or high speed measurement requirements. Hence I can get away with using cheaper options. Eventually, I would like to switch over to more professional equipment but this is what I currently have settled on and it works fairly well for my use case.
Prototyping Supplies
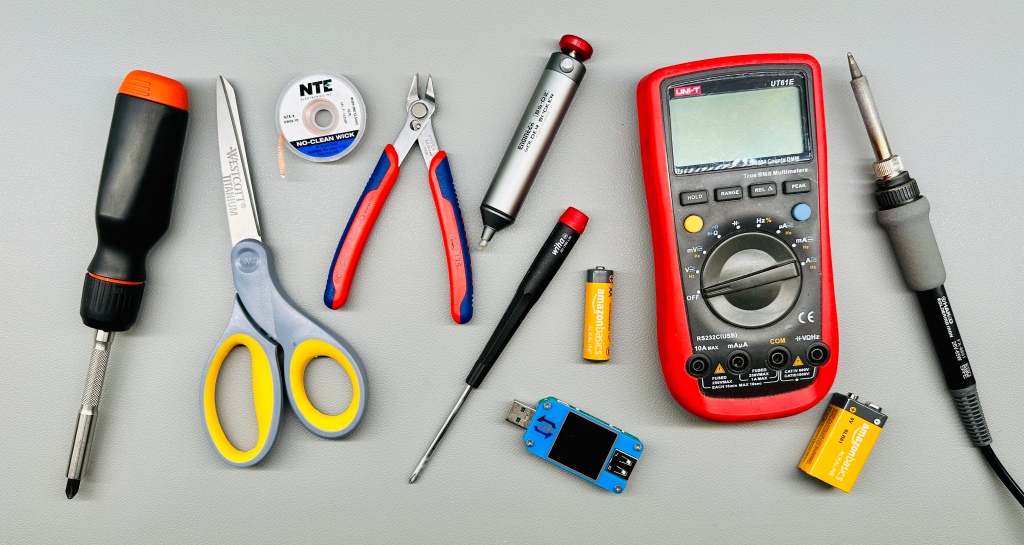
Soldering Tools
Hand Tools
Consumable Supplies
The heat shrink kits will get you through most applications but you can certainly buy them in different colors, higher quality and material based on your use case. I have accumulated a variety of tubing but use the ones mentioned 99% of the time.
My experience with silicone jacket wires from Amazon has be great. They are not the hishest quality you can get but they are good enough for most prototyping applications. You can get them in any gauge and color combo your application demands. But don’t get PVC coated wires since they generally melt very easily and are poorly made. For those, you should turn to Digikey and be ready to pay a premium.
Parts
Components
My electronic component inventory is massive with more than 1000 unique components. This inventory has built up over the course of many projects. I will write a separate blog post in which I will cover my curated list of components to get started with.
Fasteners
Having a variety of fastening hardware on hand helps to quickly prototype designs. The screws I use the most are course threaded screws that can thread into 3D printed plastic. I also have used threaded inserts and fine thread screws. While you can get screw kits from Amazon, the quality wont be particularly good. Hence I recommend getting them from McMaster-Carr.
Development Hardware
I have stocked up on a variety of development boards, modules and tools to quickly prototype ideas. The specific hardware that would be most useful for you would depend on the type of projects you want to tackle. Here are some things to keep in mind in your quest.
- Adafruit has a large selection of high quality dev hardware. You cant go wrong with those.
- Amazon has cheaper options but be careful about the quality as some might use fake components.
- Don’t buy original Arduino boards. The clones are a much better value.
I have included some basic staples of my lab and some interesting tools I have found over the years. I will do a more detailed post with all my recommended development hardware later.
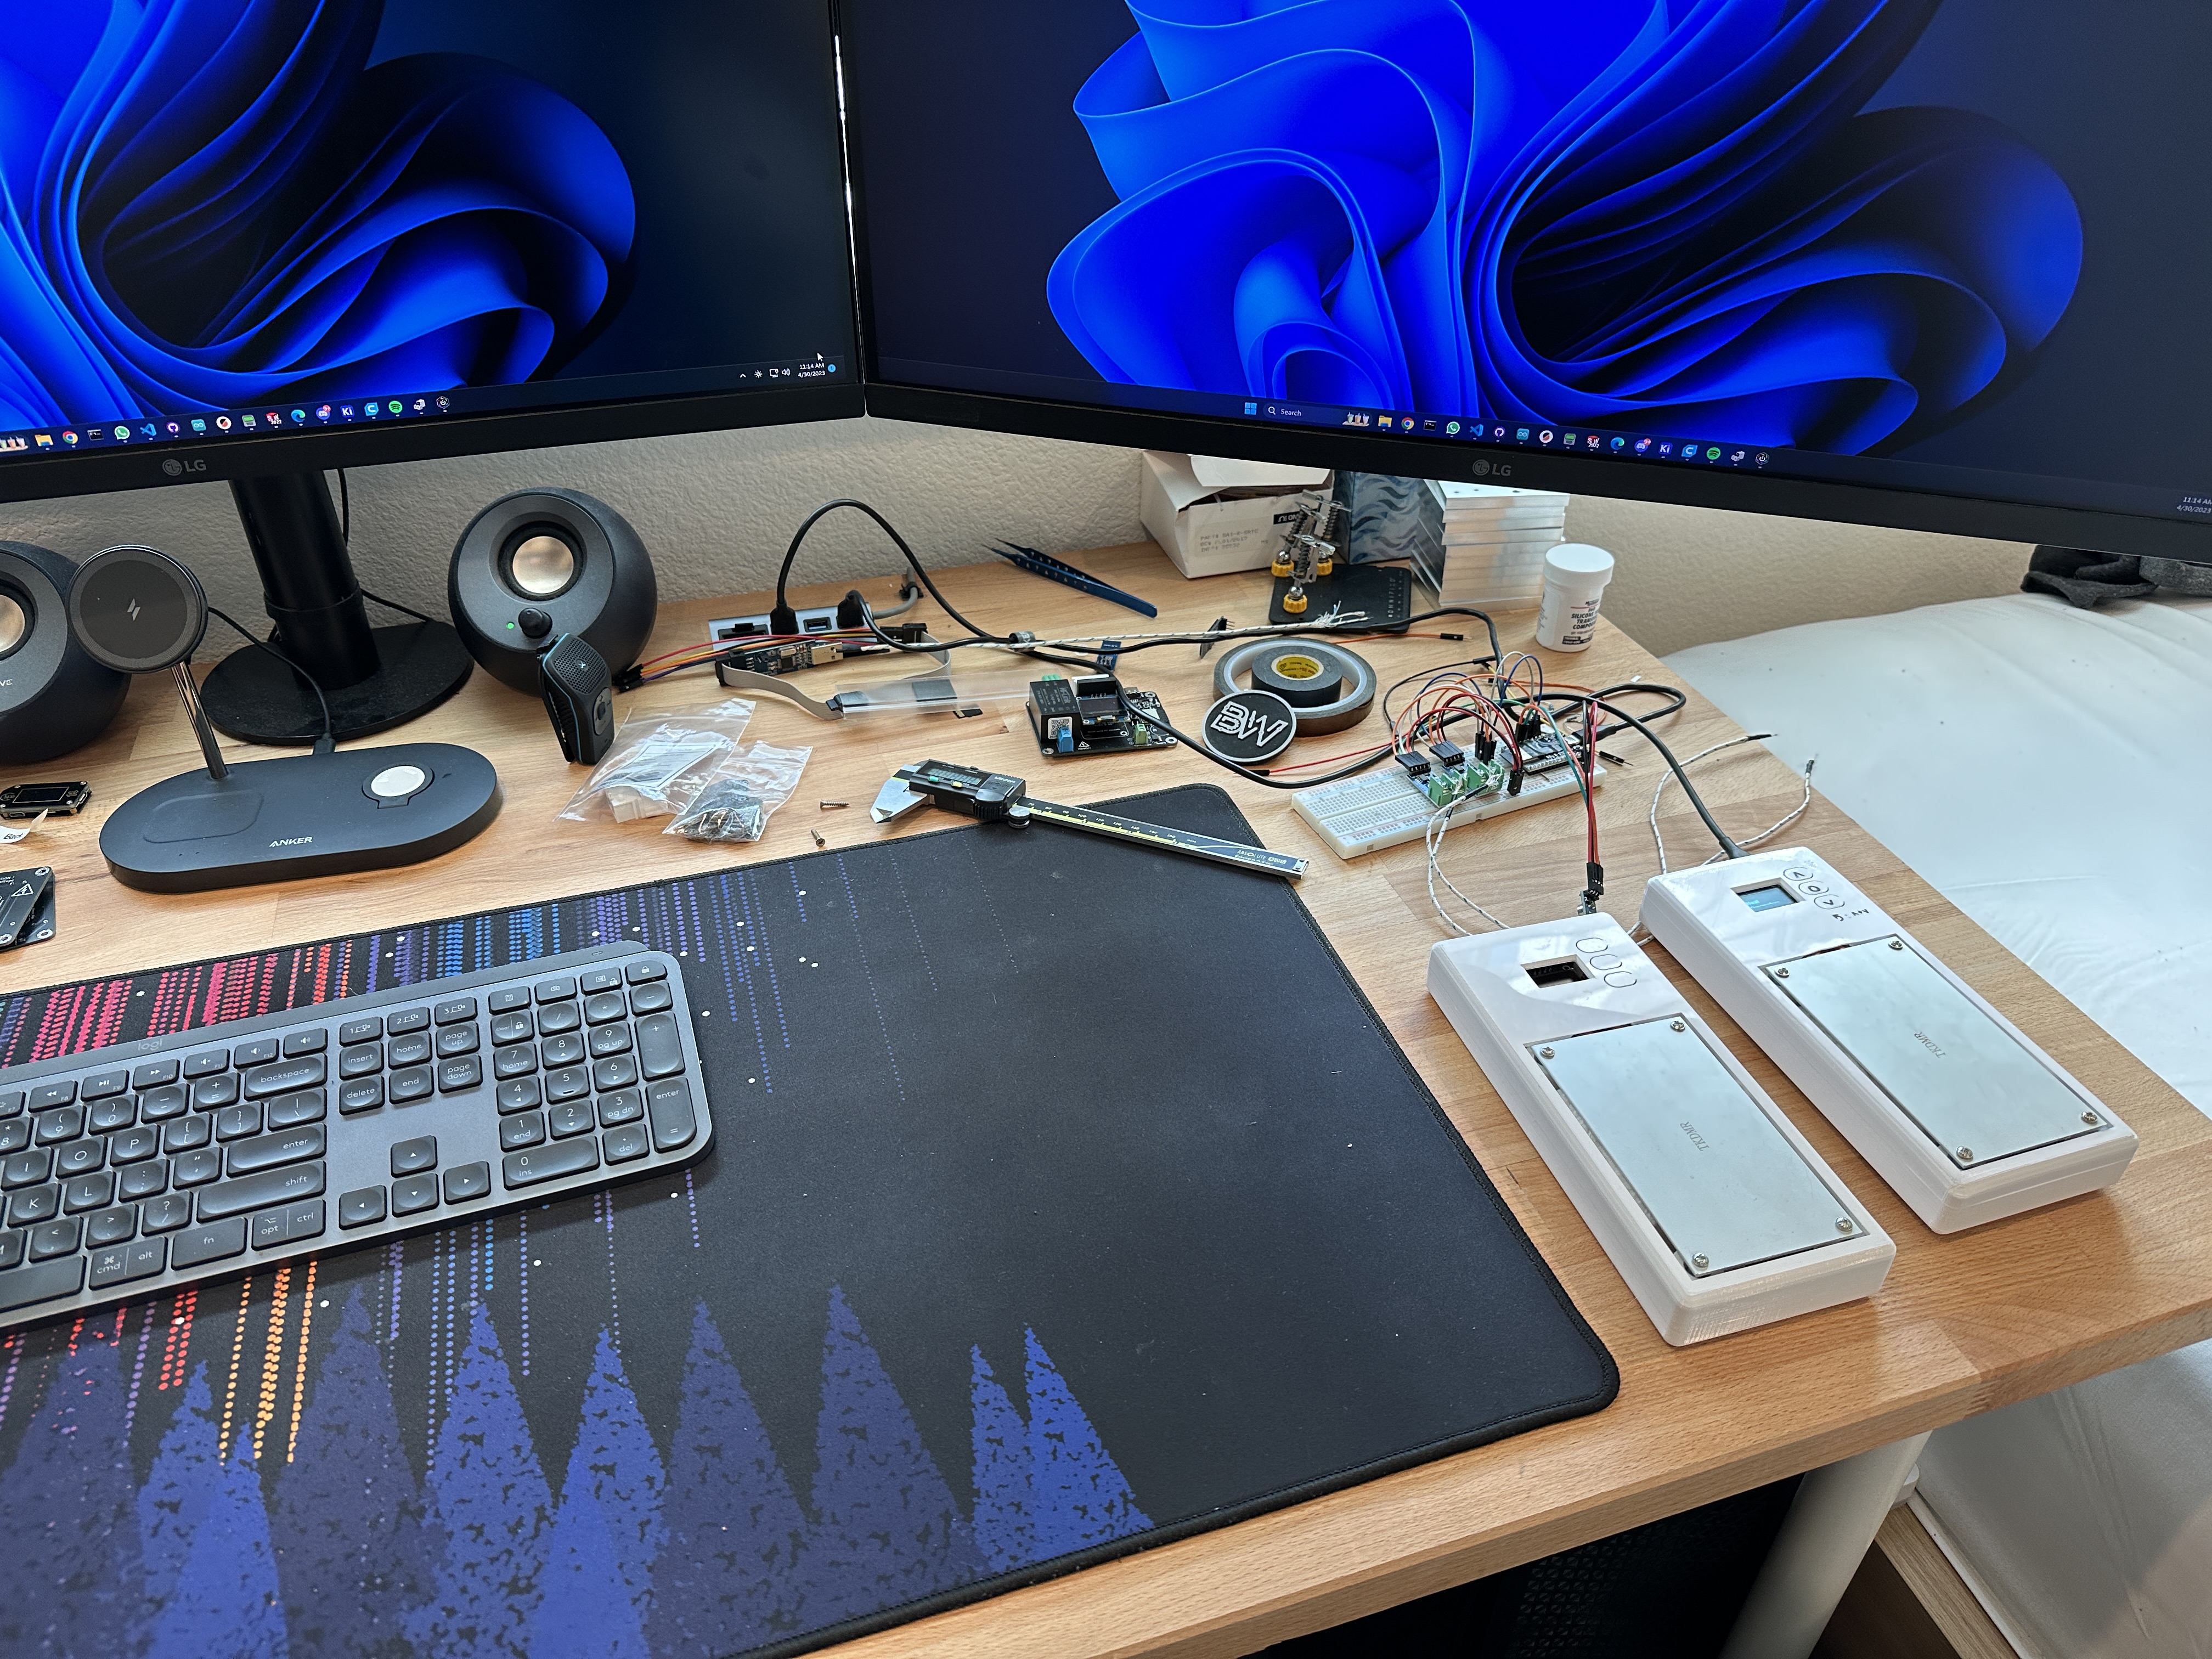
Computer Workstation
While most of the hardware work is done on the lab bench, all of my programming work is done on the computer workstation. It is the perfect complement to the lab bench and allows me all the room, screen real estate and power to test and program anything I want.
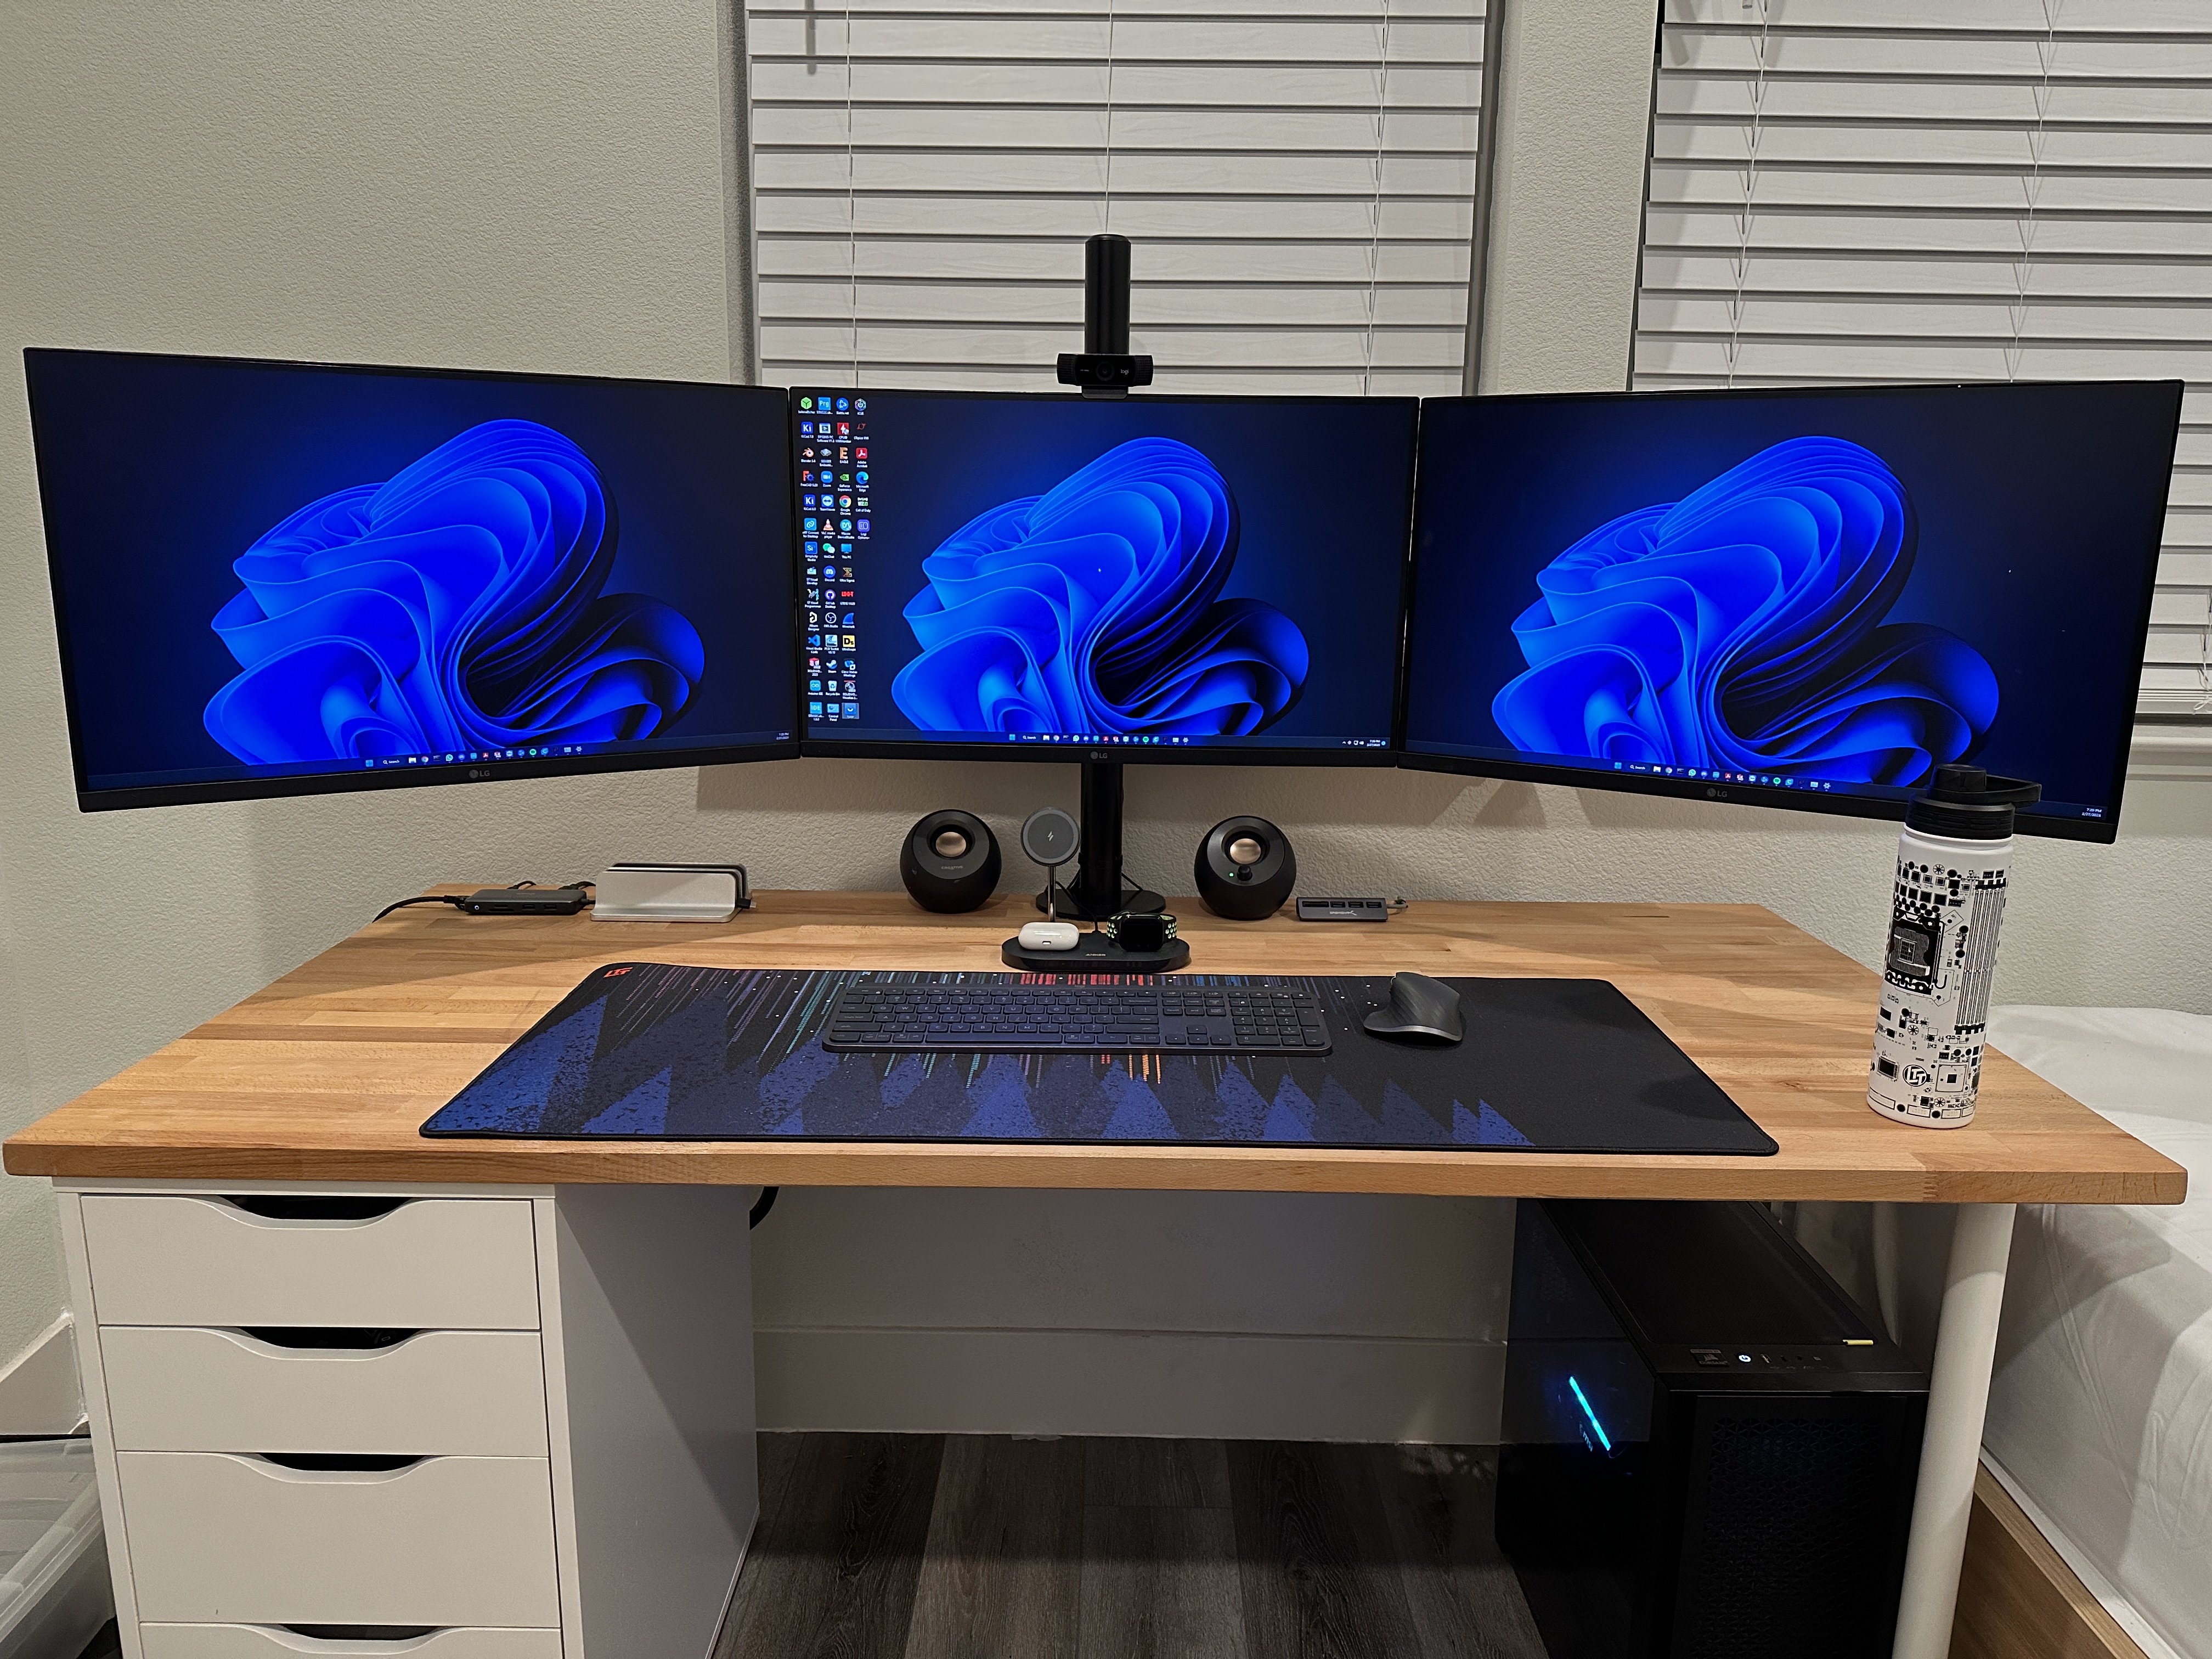
The desktop PC is a custom built unit with decent specifications. It easily handles anything I can throw at it. The triple monitor setup just cant be beat for both productivity and entertainment. Coupled with high quality peripherals, makes the setup very comfortable and effective. Following are things that make up this setup.
Most of the time, the desk looks like this and is filled with prototypes and parts of the current project I am working on.
3D Printer
A 3D printer is a very useful and powerful tool to have. Not only can you use it to optimize your lab but you can also prototype enclosures and mechanisms for your designs. There are too many options out there and the best option for you will be based on what is it that you are looking for. You can get cheaper units that can do basic printing well and might require a bit more attention and care. Or you could go for higher end units that just work and require minimal tinkering.
I have found the Ender 3 Pro with some basic upgrades to be a great value for money and the best place to get started with. Once you feel like you need a more capable printer because you need to print an engineering material or print larger quantity, you can invest in a higher end model.

Conclusion
I hope this guide will provide some inspiration for you to spice up your setup. Let me know if you have any questions. Please comment any recommendations for products you have found useful around the lab.
The grand total cost for everything I have recommended in this article is ~$10,200.
15 responses to “Electronics Lab Bench Setup Guide”
-
Thanks for the article, Badar! I appreciate your thorough documentation. I look forward to hearing about your inventory system.
-
This is great. At the end wonder what ultimate initial cost will be to setup.
-
Wonderful job, much appreciated. I’ve been looking to upgrade my workbench and the oscilloscope recommendation in particular was very helpful.
-
Do you have a link for the fume extractor that you have under your desk?
-
I am still experimenting with that fume extractor so it doesn’t have my full recommendation just yet. Here is the link though. https://amzn.to/3VThjo7
-
-
This is a wonderful write up, thank you. I’m planning to set up an electronics workbench soon and this will be a helpful guide. I already have the same Akro-Mills parts cabinets! BTW, the wire kit you recommend has silicone insulation, not silicon.
-
Awesome. Glad it would be helpful. Thanks, made the correction.
-
-
Clear and concise writeup! Some comments on HN, https://news.ycombinator.com/item?id=35903294
(p.s. remember to add disclosure statements, https://termly.io/resources/articles/amazon-affiliate-disclosure/)
-
Aha! I see you are an LTT fan. This is an excellent article. I was sent this by a friend who is probably tired of hearing how I want to set up an electronics work bench. What oscilloscope did you upgrade to?
-
Great article! I have a very similar setup to yours – it must mean we are doing something right 🙂
-
Fantastic!
If you plan to use a diffuser for the LED strips, I would recommend a switch like this (which allows dimming): https://www.aliexpress.com/item/4000105234853.html
-
I must say. Excellent article. I would love it if you could share more details about the sorting software that you made since it is rather intriguing. Also according to me atleast, it is not safe having a 3d printer in the same room as th eone in which you work in because of safety issues when it comes to smoke. That is the only point I wanted to make. Once again, wonderful lab and article!
-
Excellent presentation and description! Best wishes for your future endeavors. Could you and others on this forum provide more information about such fume extractors?
-
Great! Thanks for the ideas
-
Thanks for putting all this together. One question, how did you attach the desks to the alex drawers?

Leave a comment