Wiha Precision Screwdriver Stand
2024
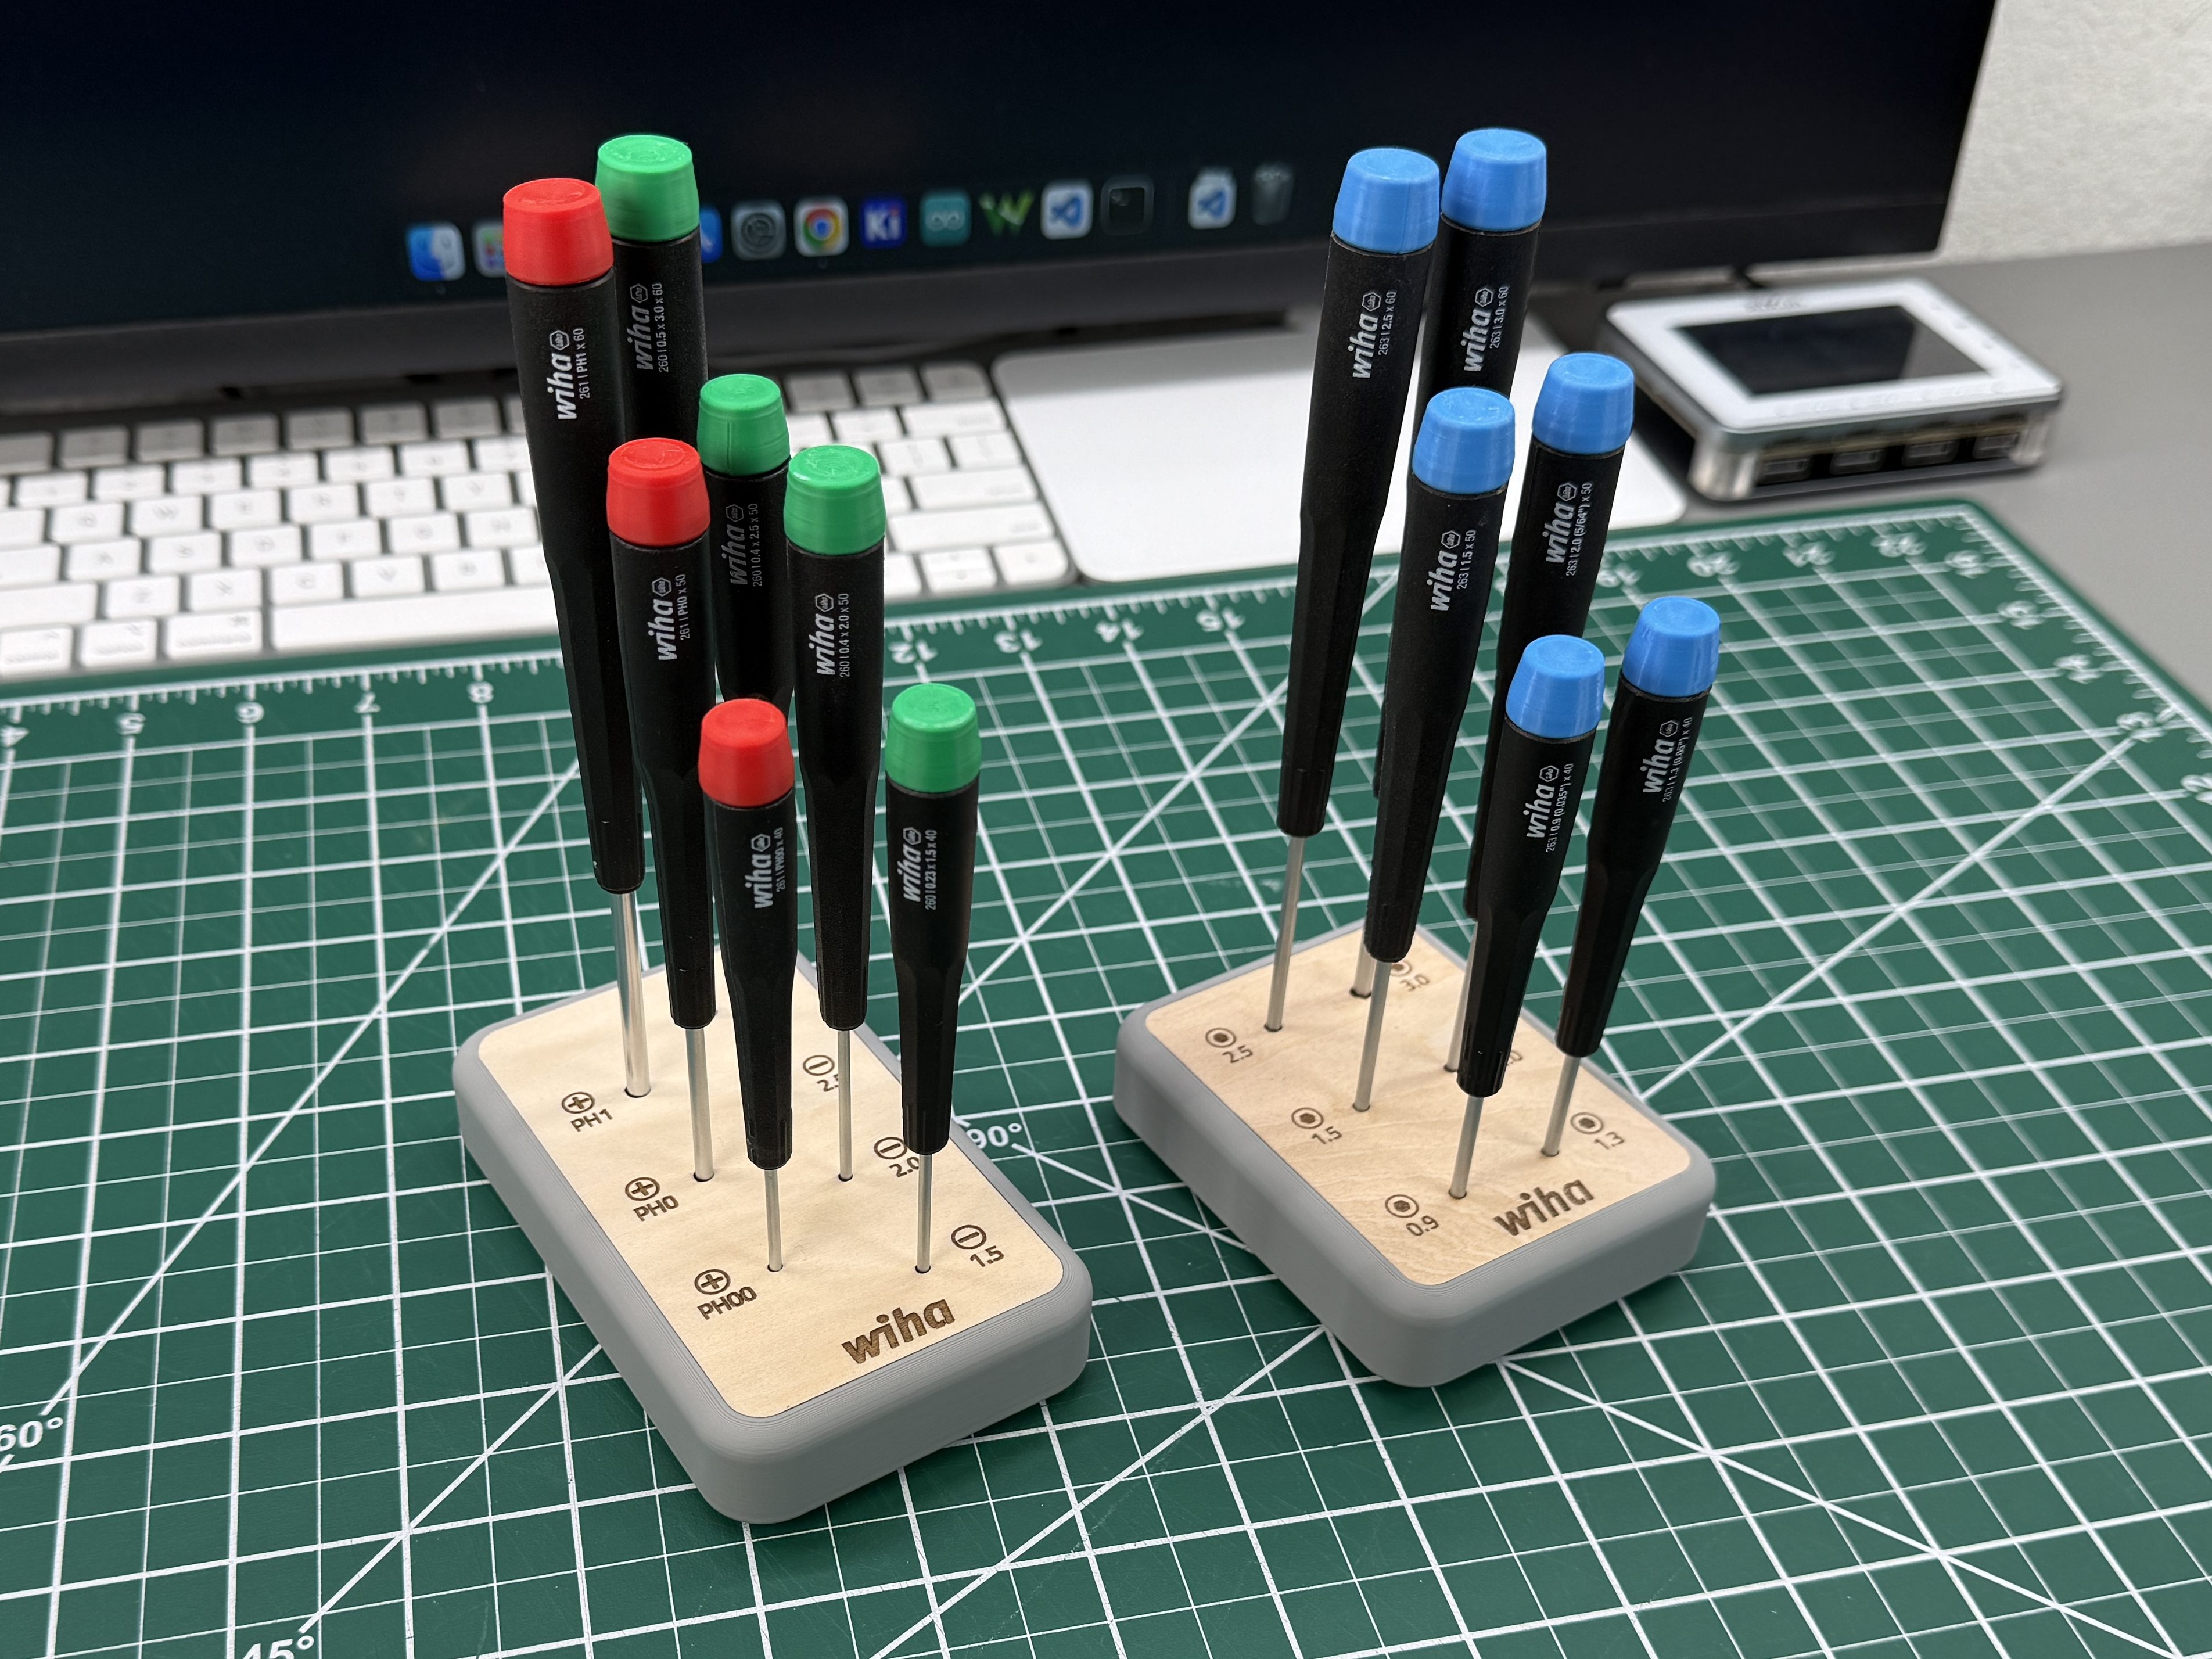
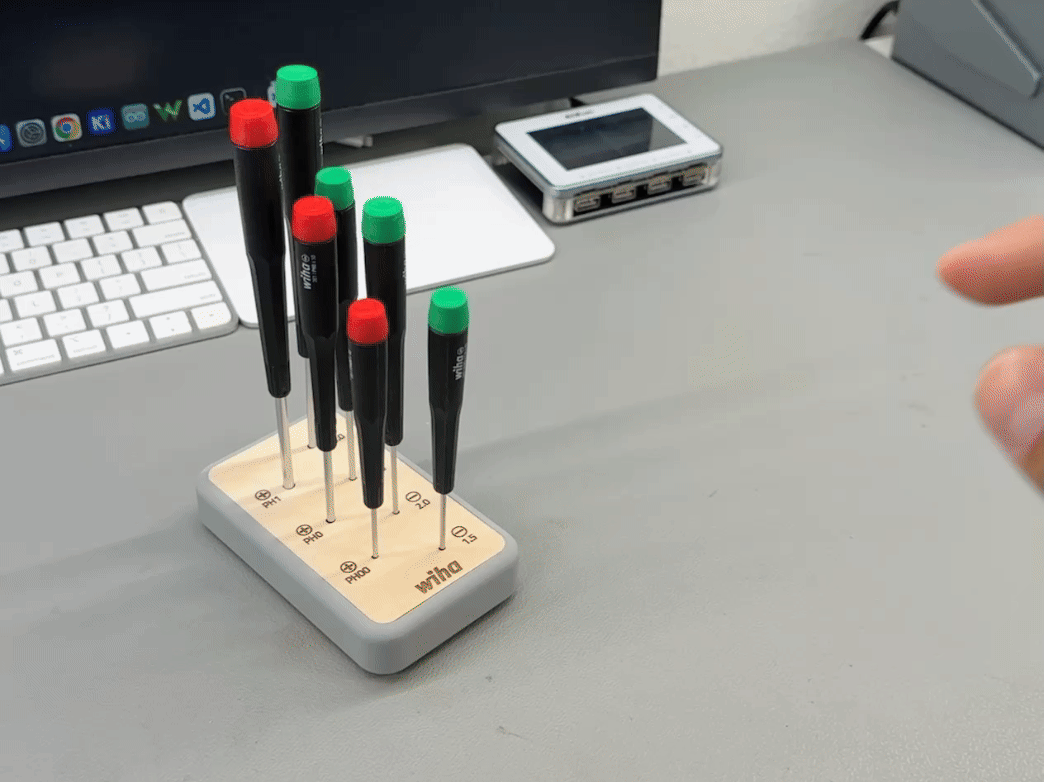
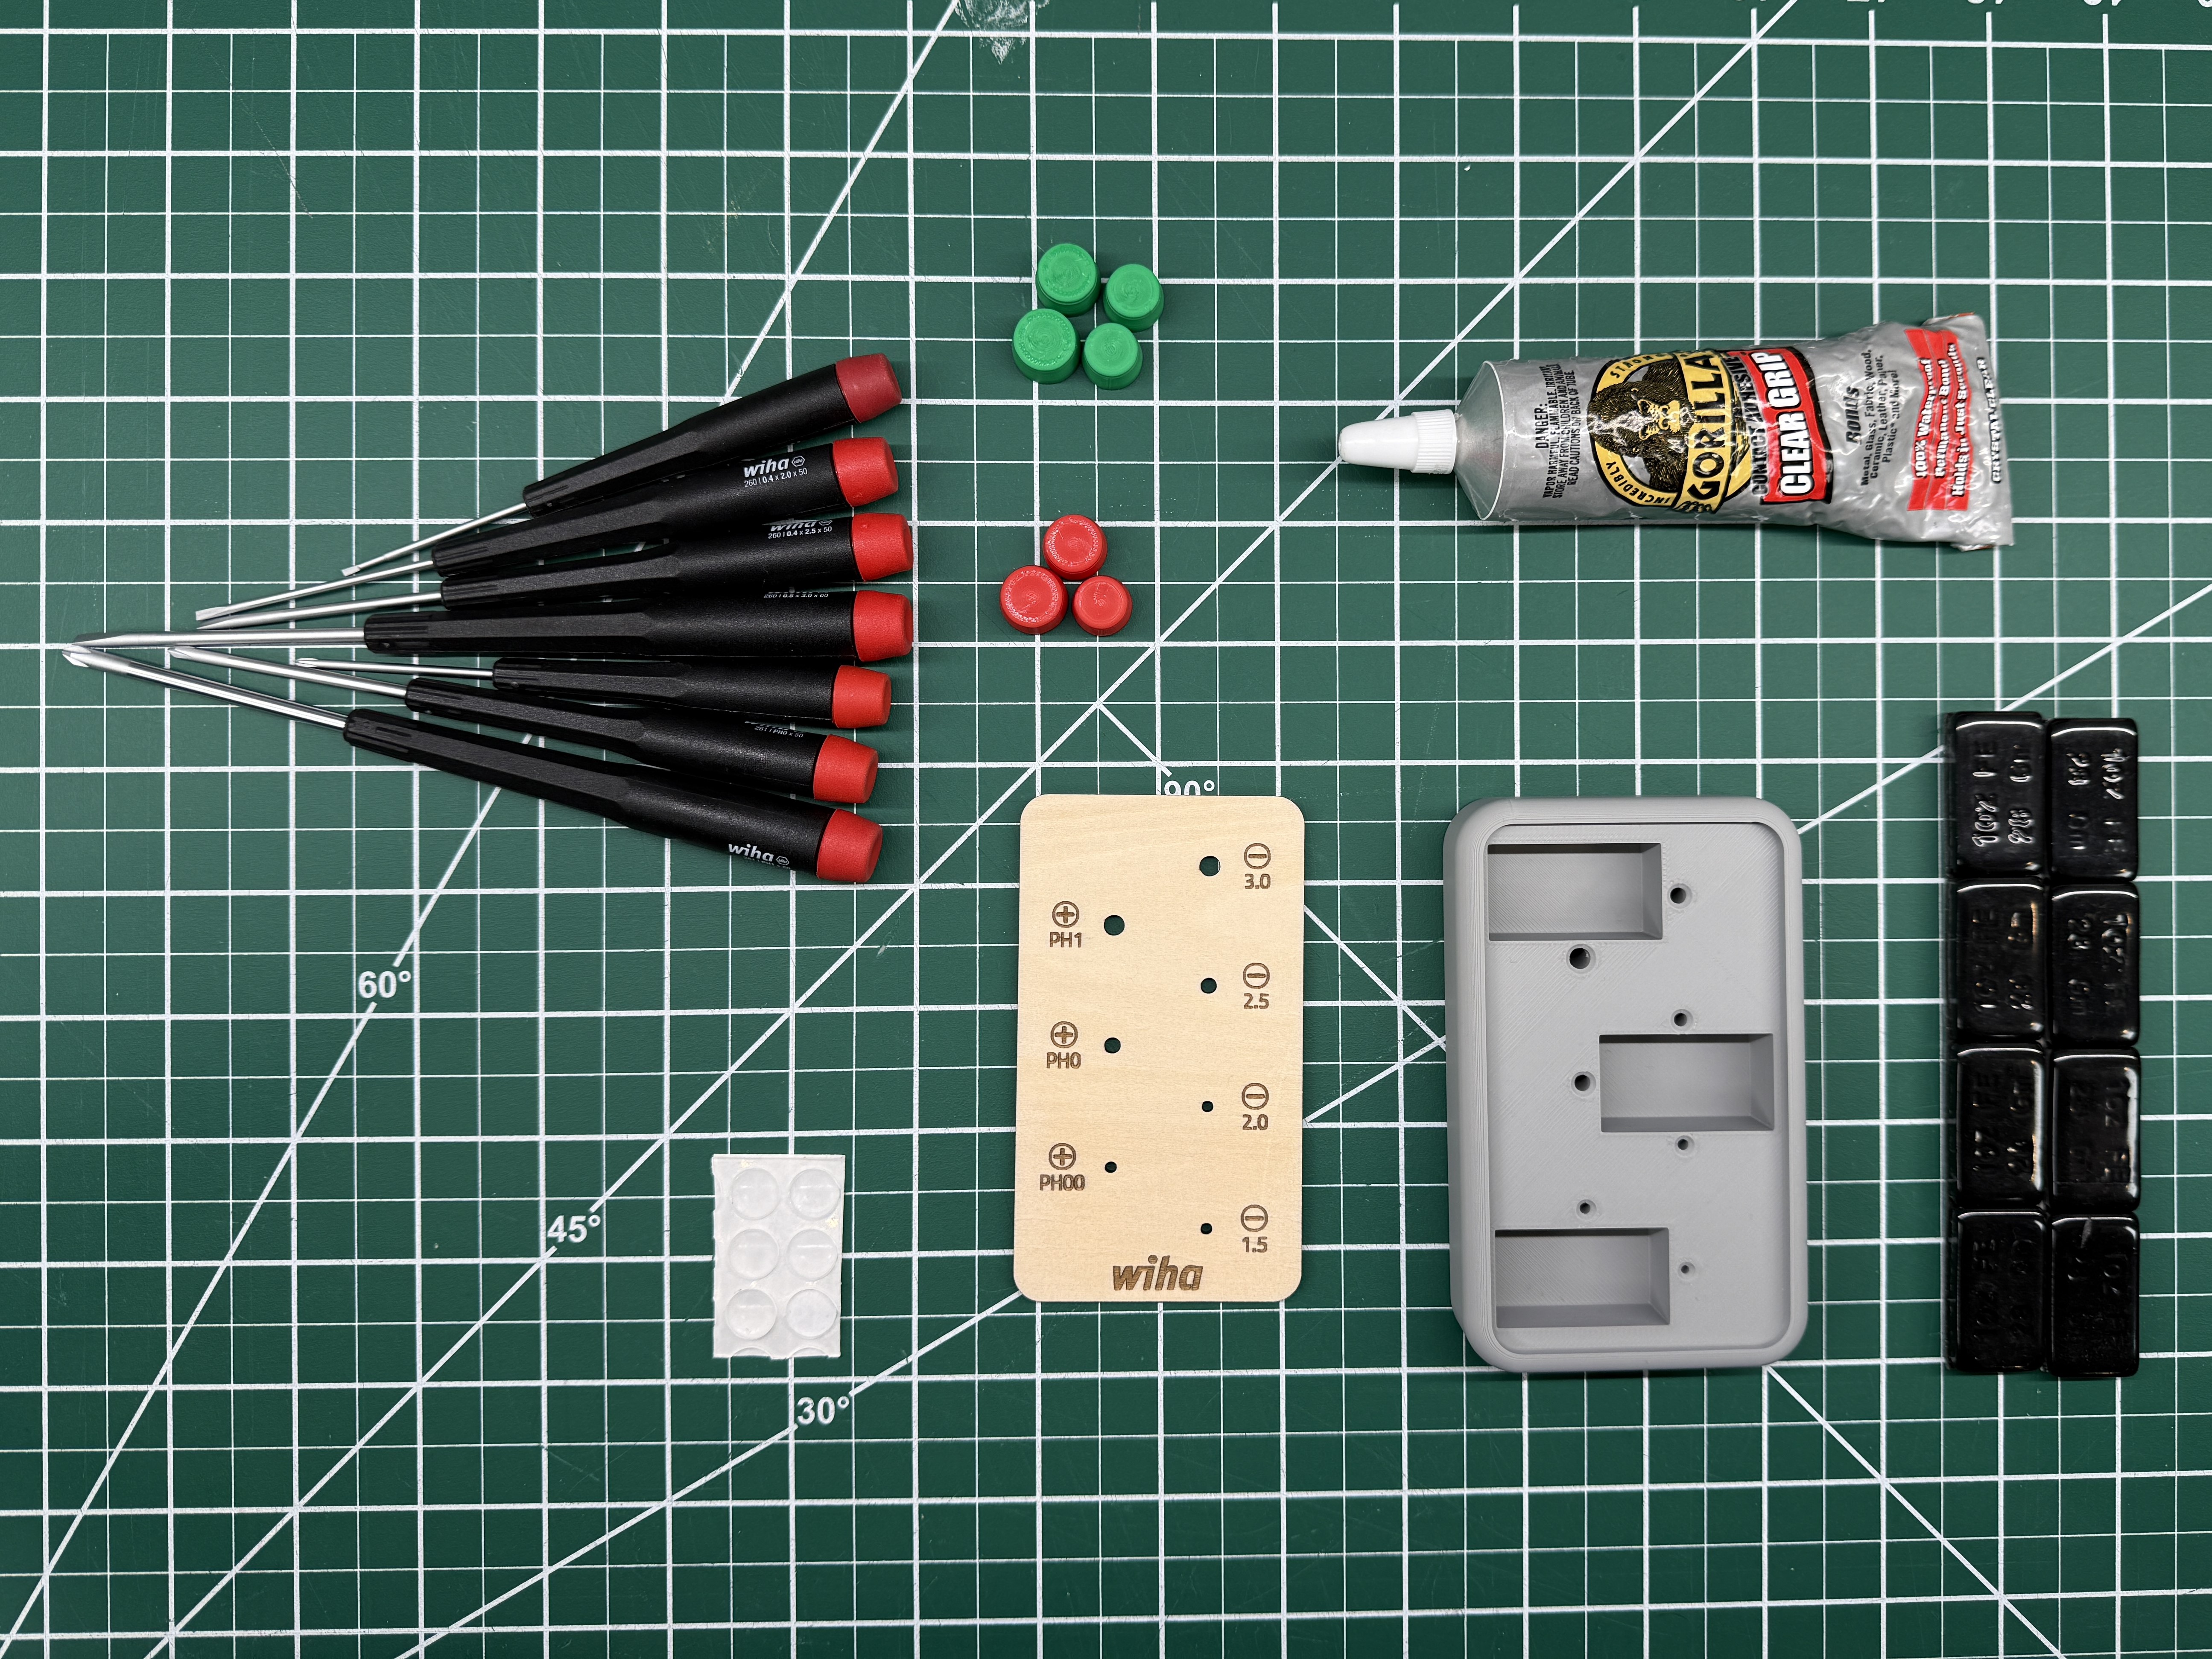
A stand to hold Wiha precision screwdrivers where they can be neatly organized, easily identified and conveniently accessed. The base is weighted and has anti slip feet. The drivers have custom, color coded end caps.
This is a fairly simple project but it has taken years of evolution to get to this point. I had a need that no product on the market met. So, I built my own solution and refined it over the year to get to this point.
Project Links
GitHub: Link
OnShape: Link
Etsy: Link
Background
Having tools conveniently available on the lab bench while working is very important. I keep looking for ways to improve my bench setup for optimal efficiency when working on projects. Over the years, I have made many small improvements and additions to achieve that goal. This project is one of those additions.
When I work on hardware projects on the bench, I keep needing to use screwdrivers. In the past, I would store these in my drawer and pull them out when needed but they would just get mixed up in the project materials (parts, wires, other tools, test leads etc.) on the bench and be very hard to find. So I needed a place for them to go. This way, I don’t have to search for the right driver when I need it.
I made the first version of this in 2018. Since then, I have been using some variant of it and improving the design. The latest version presented here is tuned to be easy to assemble, convenient to use and last for a long time.
Features
Small Footprint

The stand is designed to have as small of a footprint on the bench as possible while still being easy to use. Hence the design is basically just a base to hold the drivers vertically and is broken out into different drive types. So far I have only built a Slotted + Phillips version and a Hex version but more could be added over time. You only need to have the one you use most often in the prime bench area.
Easy Identification
Color Coded End Caps
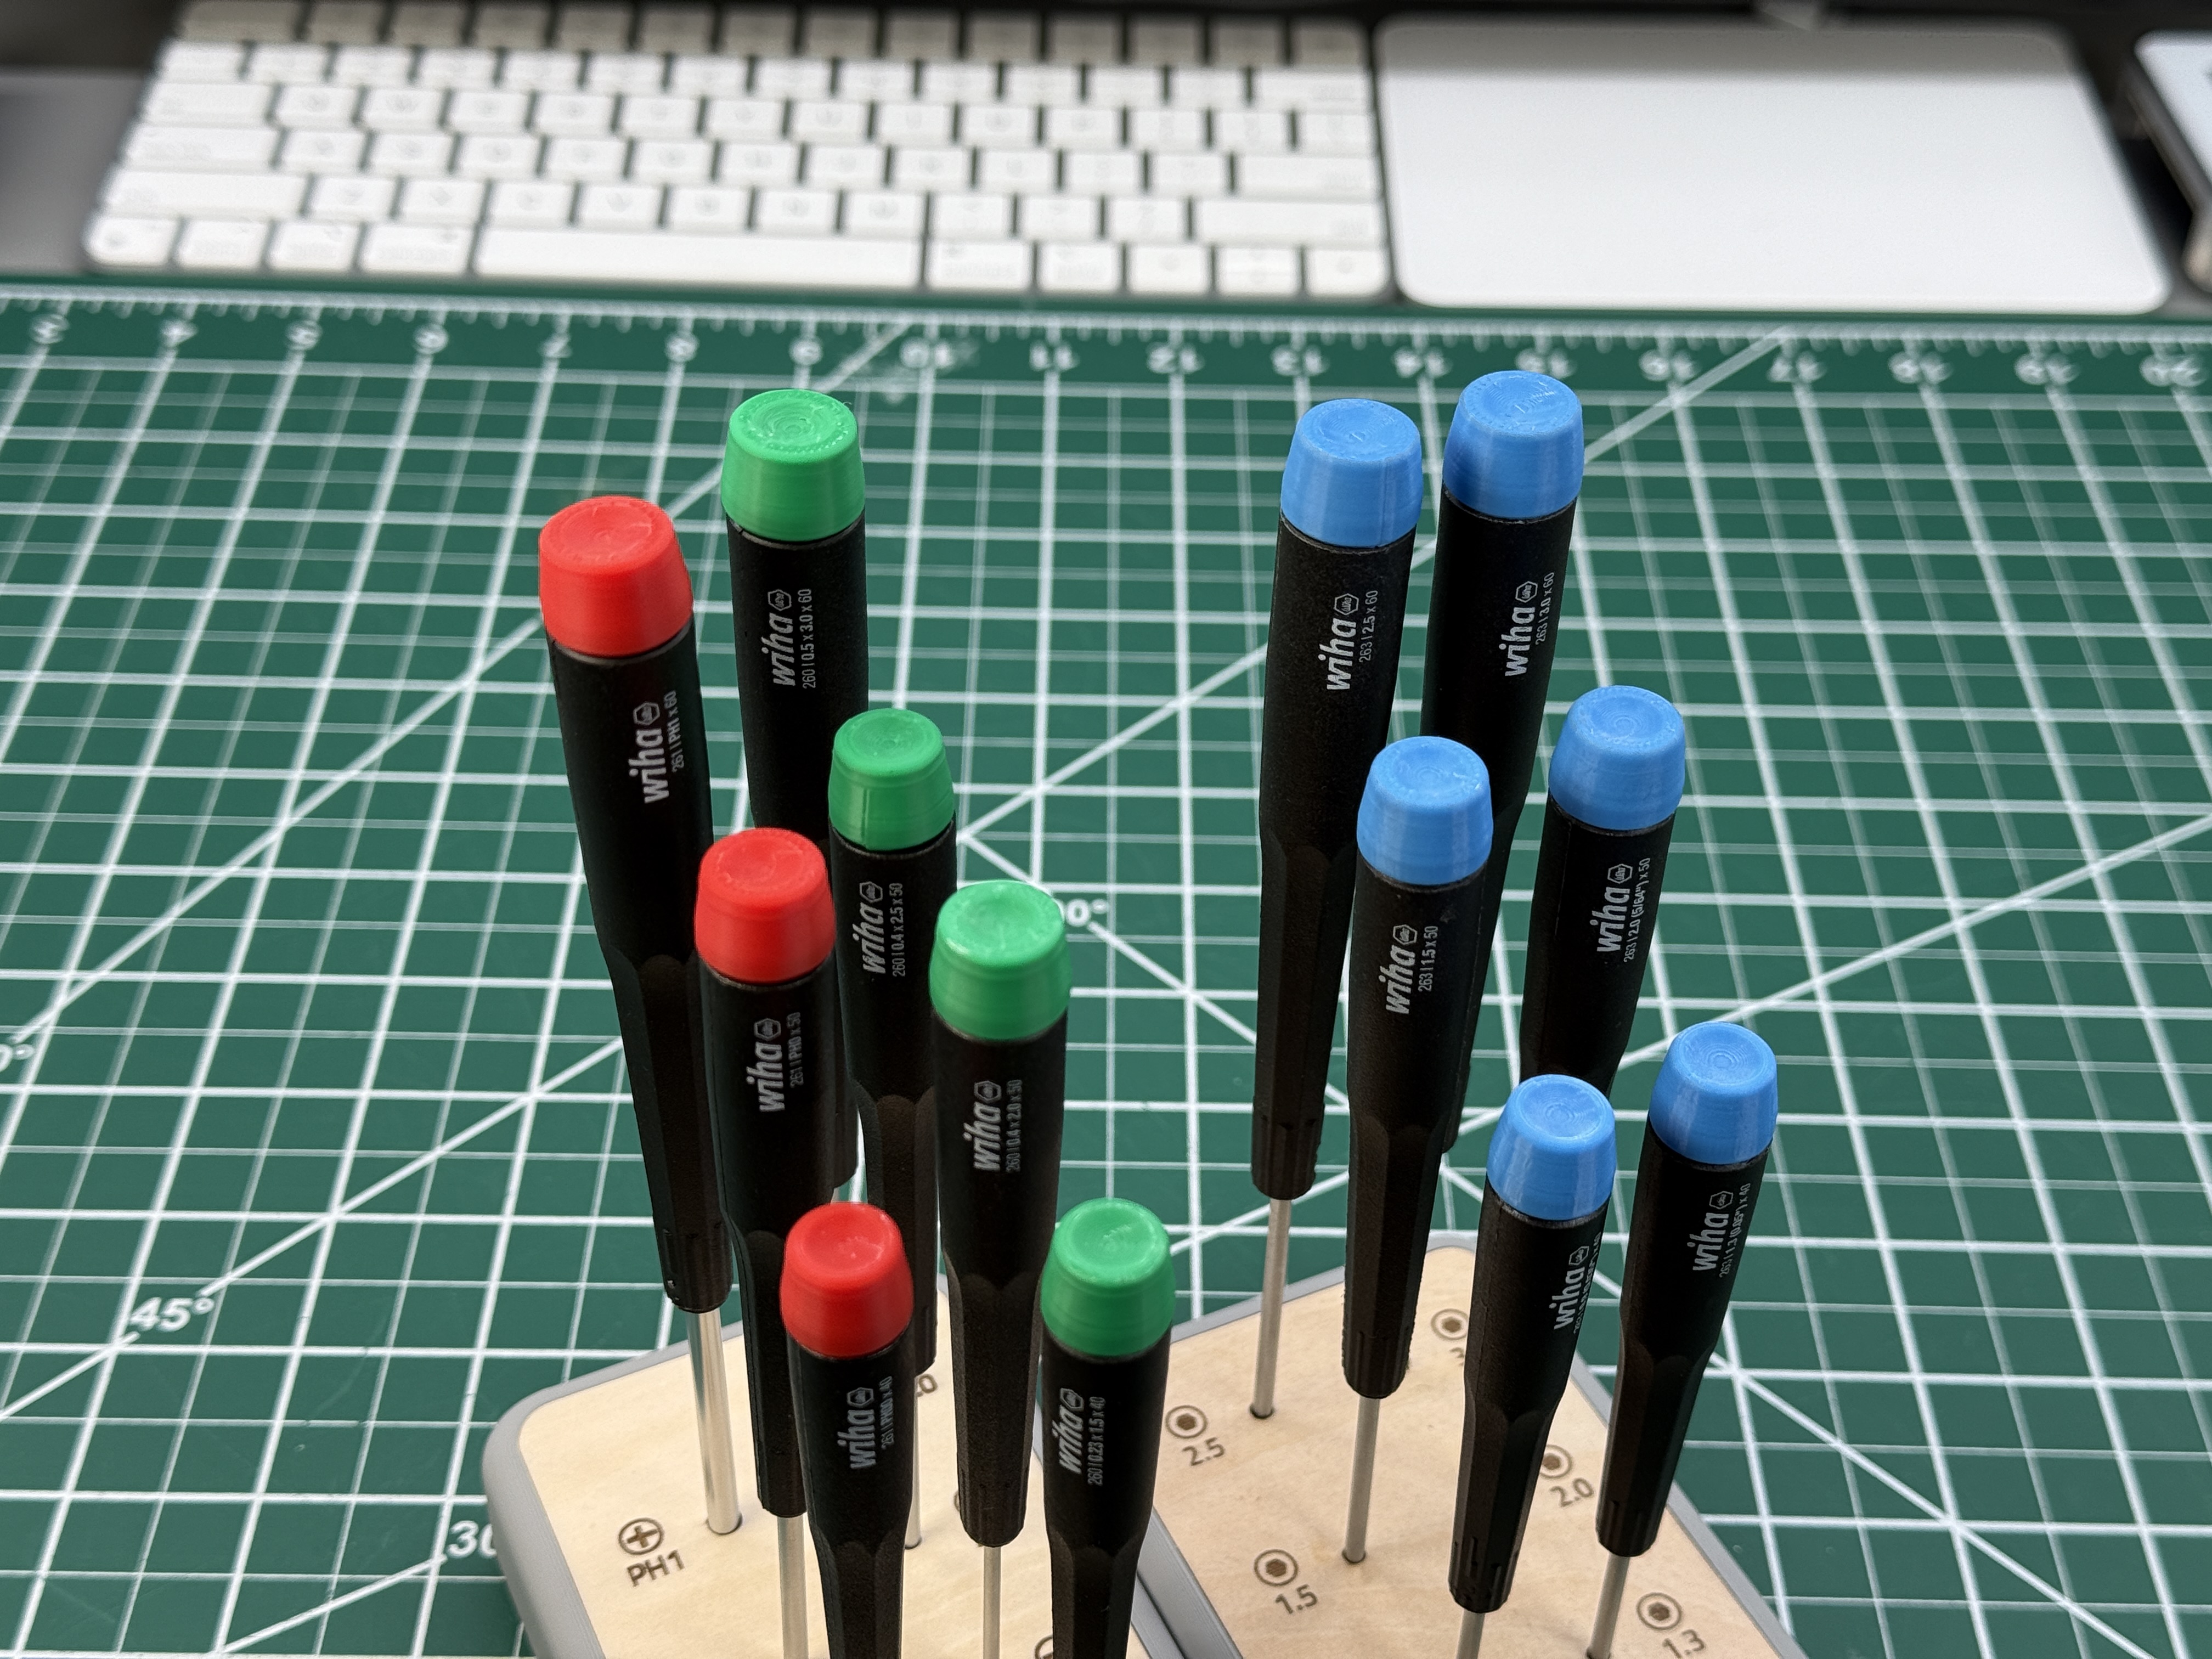
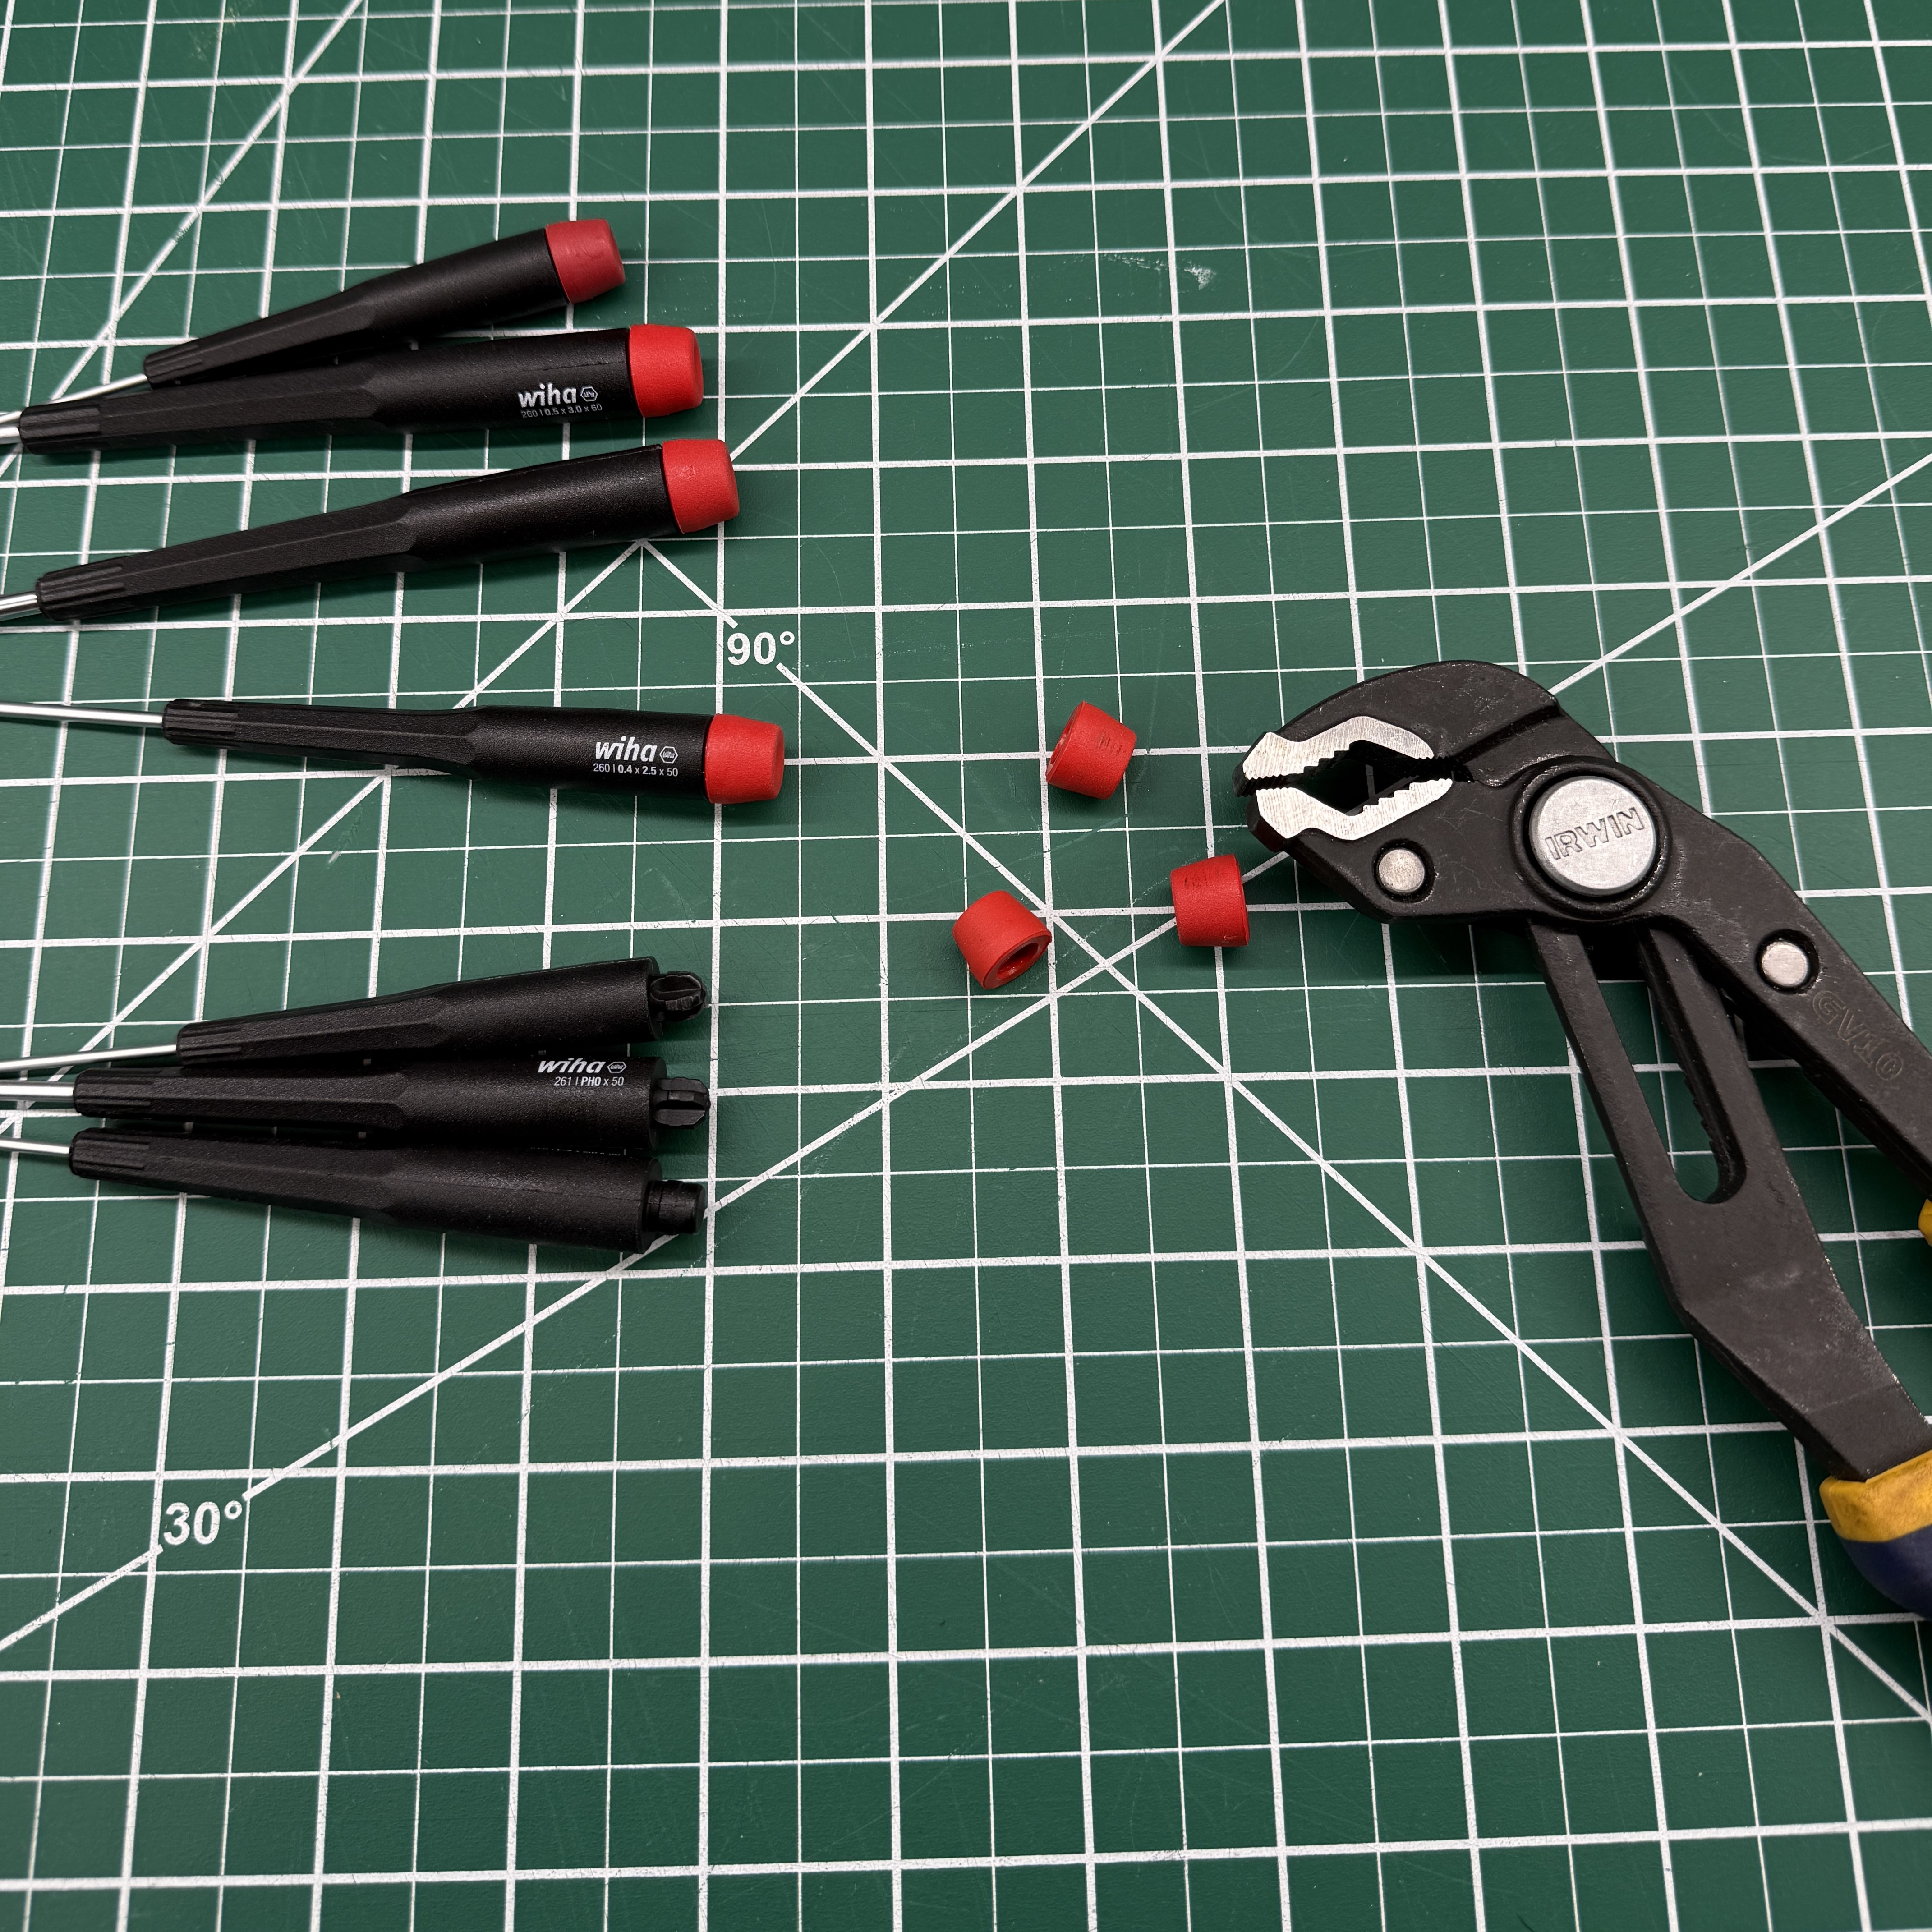
I like how some brands have unique colors for easy identification of their drivers like Wera Kraftform drivers. But I have found the Wera to not be ergonomic to use despite them looking to be built for that. I tried them in parallel with Wiha but ended up liking the Wiha grip a lot more. So I wanted to add that feature to the Wiha drivers. I 3D designed and printed end caps for the Wiha drivers. I use a different color for different drive types. So far I have been using the following color coding.
| Drive Type | Color |
| Slotted | Green |
| Phillips | Red |
| Metric Hex | Blue |
Laser Engraved Labels

I also have a laser cut base plate that has the drive type icon and size clearly laser engraved. The hole sizing is also perfectly tuned for each drivers diameter.
Planted Base
Weights

I hate to interact with tools on my bench that don’t have a solid footing and like to slide around. It drives me crazy and it just makes me want to use it a lot less. An example would be a light weight and slippery soldering iron stand. If that stand moved when I put my iron back, I want to chuck it in the trash. So my screwdriver stand needed to have a solid base so it doesn’t slide around easily or get knocked over if I bump it a bit.
I have experimented with a very different techniques to add weight (sand, lead balls etc.) but settled on 1oz steel wheel balancing weights. They are fairly cheap and easy to work with. The result is that the base has as much weight as I can hide inside of it making it very type resistant to tipping and gives it a nice solid feel.
Rubber Feet
I also have rubber feet on the base to prevent it for slipping around. I have tried a variety of feet and some are stickier than others but the hemispherical ones works well and together with the weights, they prevent slippage.
Overall, these two features make the base very planted and give it a nice and solid feeling.
Build Guide
Follow this guide if you want to build your own. Its fairly straightforward but let me know if you have any questions in the comments.
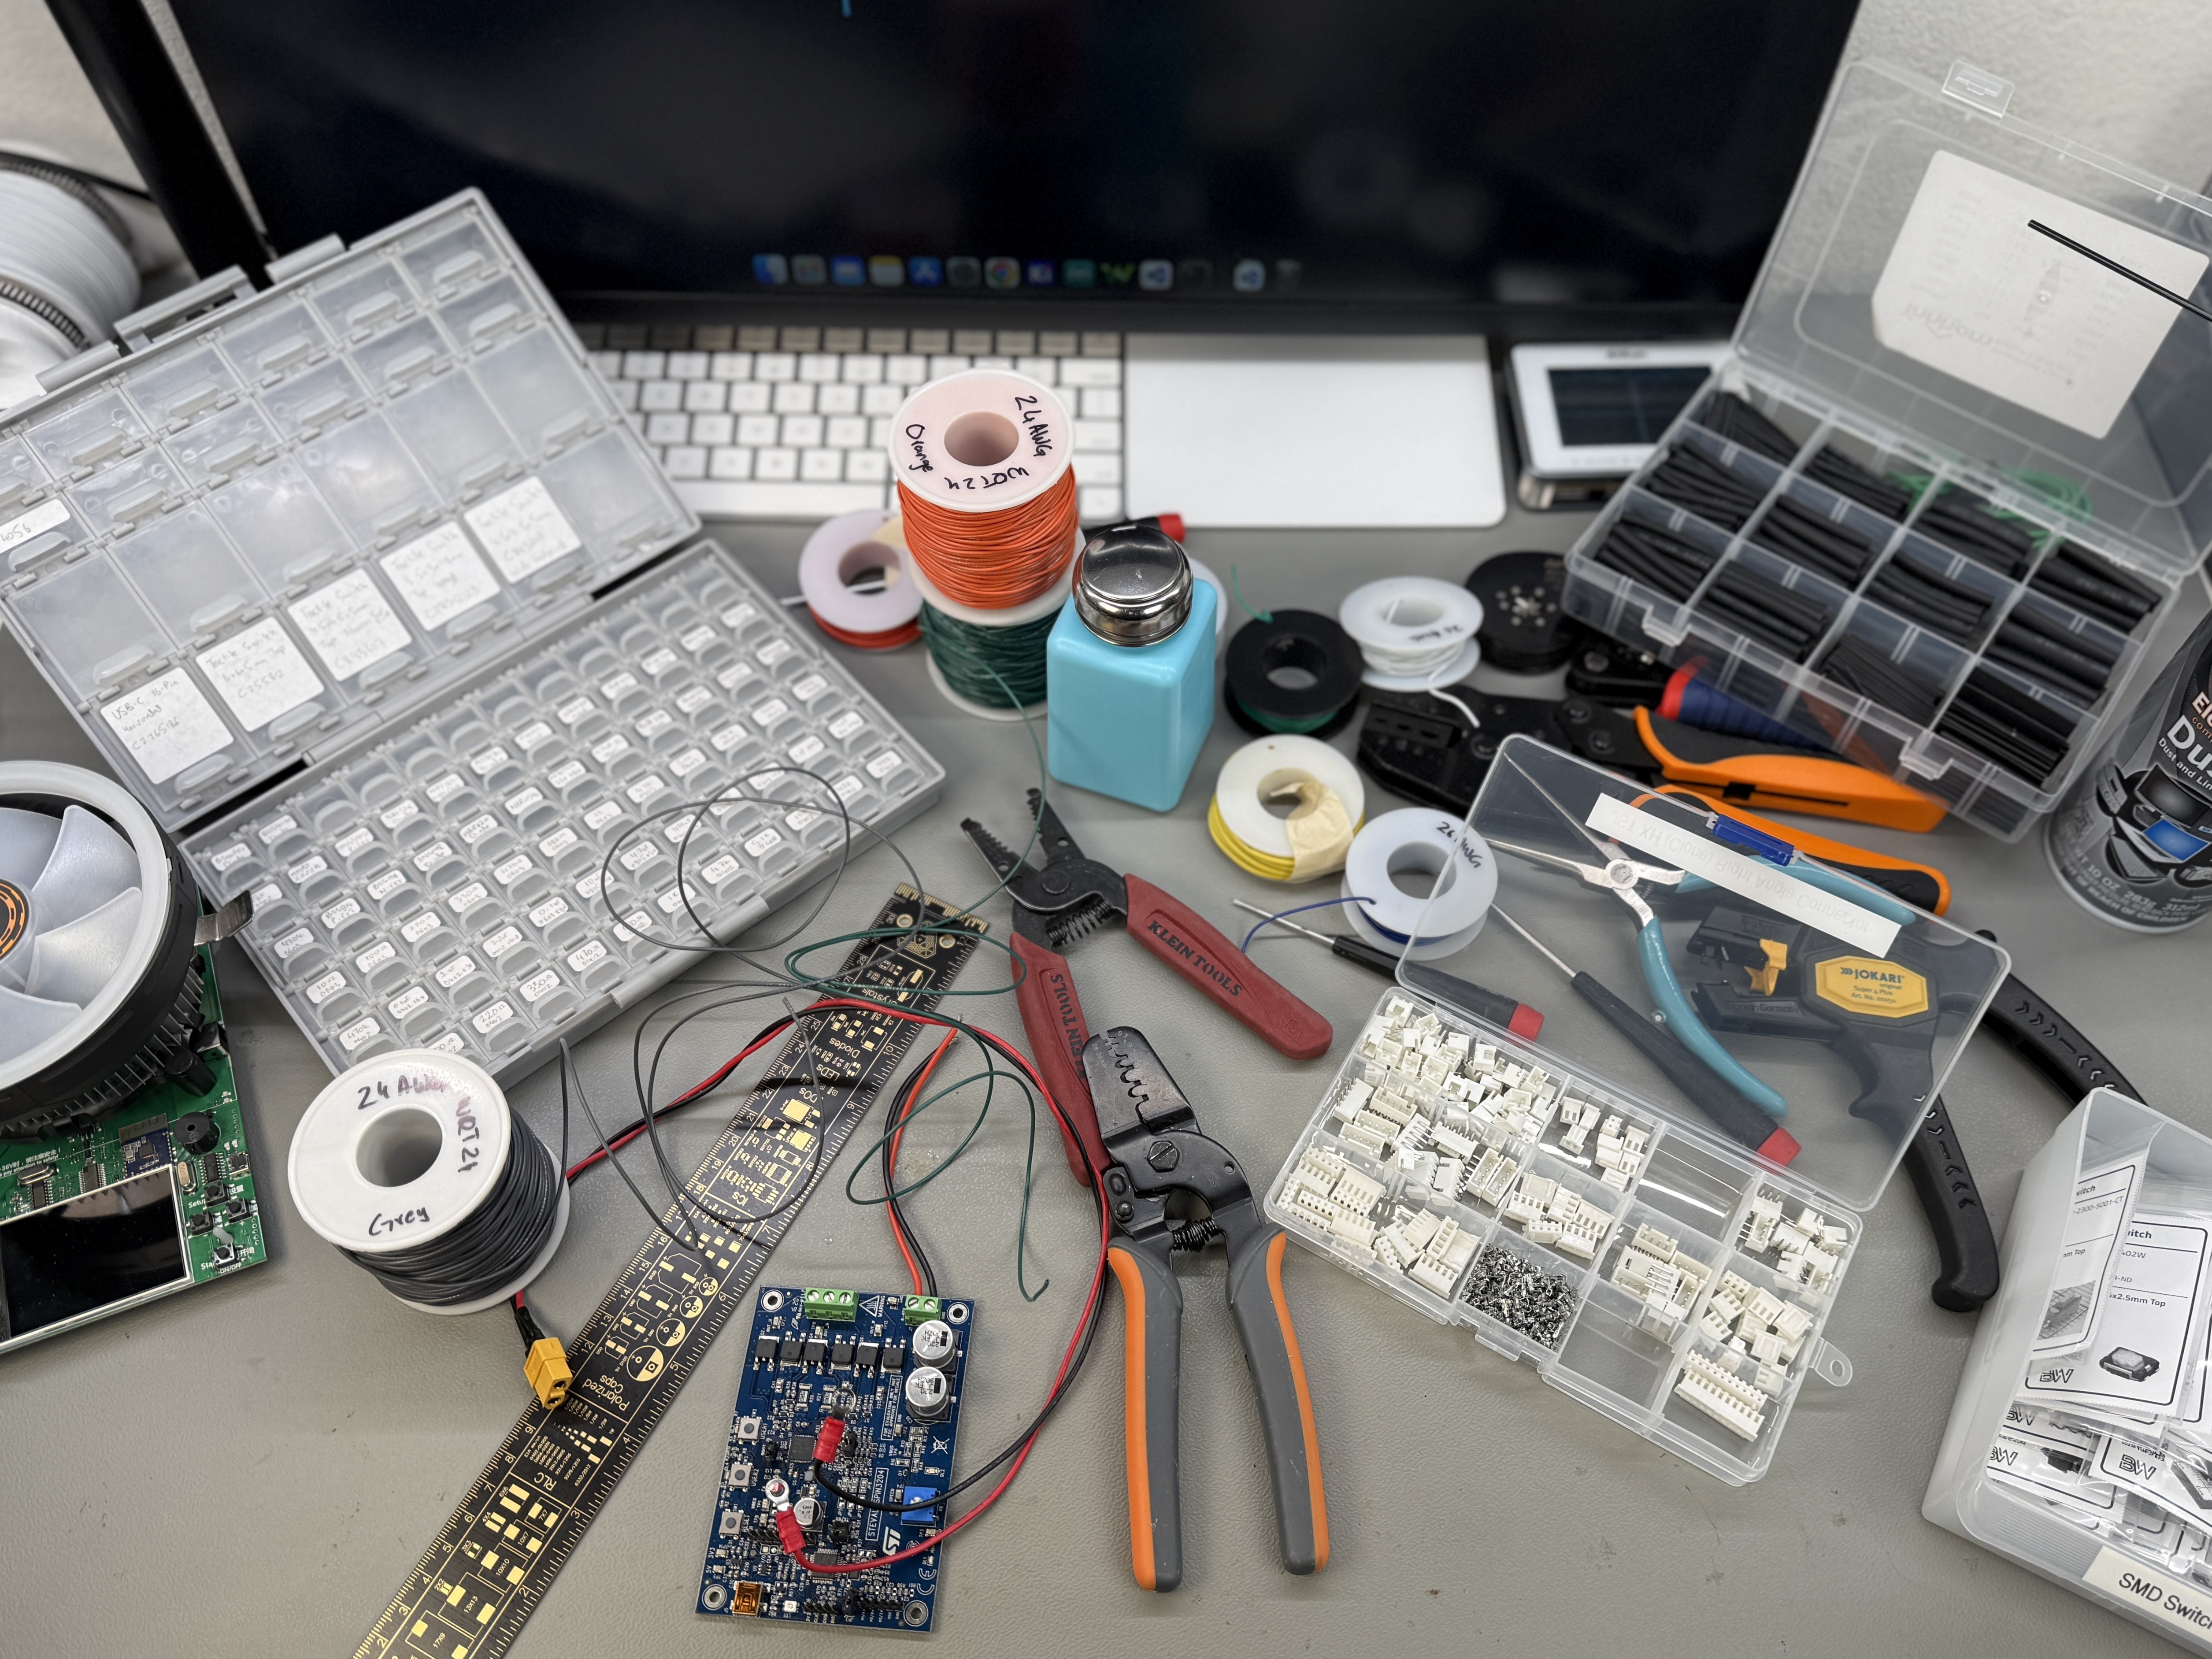
Bill of Materials
- Wiha Precision Screwdrivers
- 8Pc Phillips + Slotted ($40)
- 7Pc Phillips + Slotted ($27)
- 7Pc Metric Hex ($27)
- 1oz Wheel Weights
- Clear Rubber Feet
- 1/8″ Basswood Plywood (I didn’t use this specific brand)
- Bambu Lab Filament
- Gorilla Clear Construction Adhesive
Please note that I do earn a small commission on Amazon purchases made from the above links.
Assembly Guide


- Navigate to the GitHub repo or Maker World page to download the design files.
- Print the base (0.12mm, 25% infill, 4 walls) and end caps (0.08mm, 100% concentric infill). I used the Bambu Labs P1S for the printing.
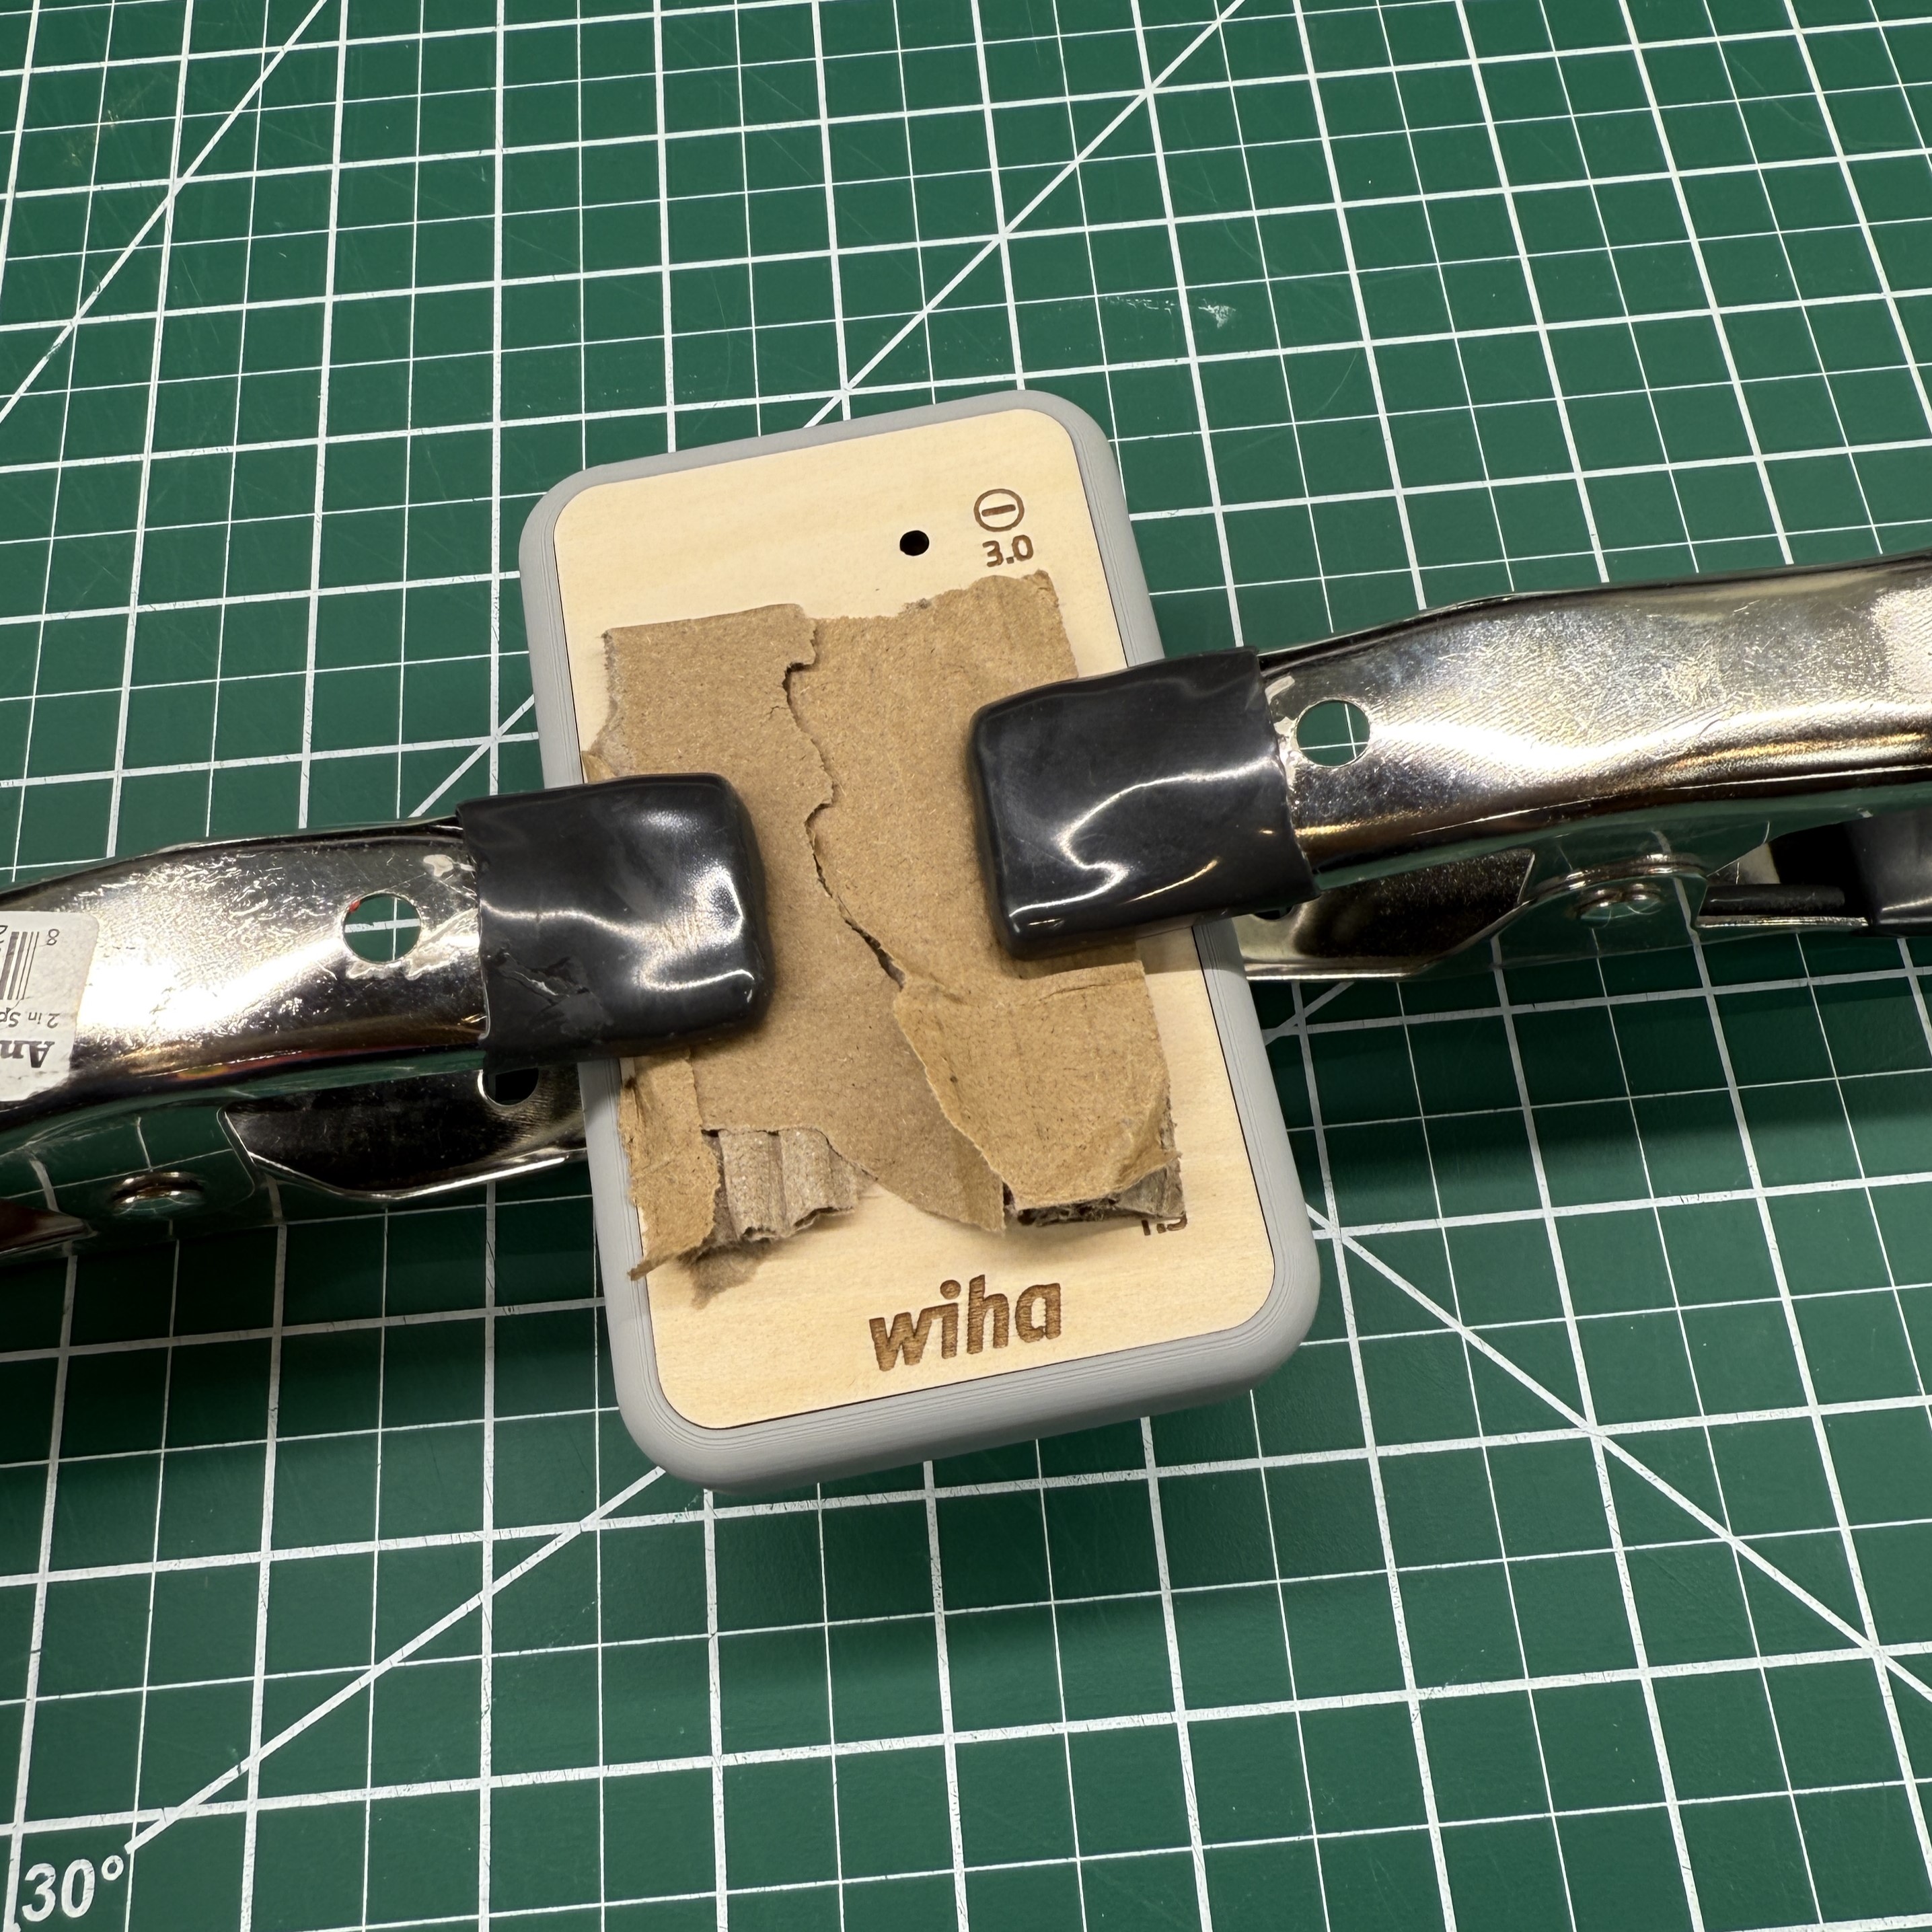
- Laser engrave the base plate using the 1/8in plywood. I used the xTool S1 40W for that and the design file including the settings are available in the project files. Sand the top with 220 grit sand paper for a smooth finish. I didn’t apply any finish but you can do that for even better results
- Stick the weights inside the base.
- Apply the glue on the edges and on the weights.
- Stick the base plate and apply clamp to secure it in place. Clean up excess glue and leave clamped overnight to dry. Make sure to use no marking clamps or soft interface layer to prevent the plywood from getting dented.
- Use pliers to remove the factory end caps from the drivers. You might have to get a bit aggressive to achieve this as removing them cleanly is a bit difficult. Press fit the 3D printed end caps. Some might be a bit difficult to push fit so a gentle amount of heat can soften the PLA a bit to make it push in more easily. Be careful not to apply too much heat and deform the PLA part.
- Stick four hemispherical rubber feet on the base and you are done. Make sure to clean any glue squeeze out from the screw holes.
- Enjoy using your screwdriver stand and always having the right driver ready to go.
Purchase
I have listed this on my Etsy store so if you want to purchase it, you can do so there. I also will take custom order requests you may have for different drive types or custom engraving on the plywood top plate.
Conclusion
This project was fun to develop over a long period of time and I genuinely use it on my bench every day. I have one for my lab bench and another one for my computer desk. It has really become an integral part of my organization and workflow.
If you have any thoughts or comments, please leave them down below. If you want them for a drive type I have not yet designed for or another driver brand, please let me know and I would do my best to help you with that. I have some ideas on potential variations I would want to experiment with but if you have any ideas on variations, do leave a comment.

Leave a comment